
SwiftUI + Core Animation: Demystify all sorts of Groups
Understand DrawingGroup, CompositingGroup and GeometryGroup in the Core Animation way

The Core Animation framework serves as the infrastructure between the top-level UI frameworks and the underlying rendering and composition techniques, whether you are using UIKit, AppKit, or SwiftUI to lay out or draw your top-level UI.
This article will inspect the CALayer level to provide more information and help demystify all sorts of Groups in SwiftUI: CompositingGroup, DrawingGroup, and GeometryGroup. Those kinds of groups can be sometimes confusing by their names, and it’s hard to understand for the first time. So I write this blog to try help you understand the underlying behaviors of those types.
Note: In SwiftUI, there is actually a Group. But it has NOTHING to do with today’s topic, as it only allows any modifier you apply to the group affects all of that group's members. For example, if you have some
Viewin the same hierarchy and want to apply the same modifier to all of those, you can leverage theGroupAPI to do so. And the layout behavior of the descendants in the Group will be determined by their common parent.
The following content will be organized in those sections:
CALayer overview
Inspecting CALayers in a SwiftUI app
Demystify all sorts of Groups in SwiftUI
Core Animation and CALayer overview
According to the Apple Documentation:
Core Animation provides high frame rates and smooth animations without burdening the CPU or slowing down your app.
If you see the name of this framework for the first time, it may confuse you by making you associate it with the animations you use, like moving a UIView from one position to another.
In fact, Core Animation does help providing smooth animations for you, but it serves as an infrastructure between the top-level UI and the bottom-level rendering technique by introducing CALayer as the back-store of your drawing content, as it can be manipulated by GPU directly with hight performance, without needing to re-draw the content.
The modern Apple Documentation lacks all kinds of information about this framework, but the archived one does provide a super-detailed information for us to learn. I would recommend reading those documentations, even they are marked as archived.
In simple words, as for Core Animation:
CALayermanages image-based drawing content that can be manipulated by GPU with high performance.
Nowadays, even you are not using
CALayerdirectly, there areCALayerunderneath the whole UIView / NSView / SwiftUI View hierarchy.
CALayerare used in the render phase of render loop. The render server will iterate through the app's layer tree and prepares a linear pipeline that the GPU can then execute.
CALayeralso can have a hierarchy, which means aCALayercan has its own descendantCALayer.
Inspecting CALayers in a SwiftUI app
Though we describe our SwiftUI view as the UI tree hierarchy, the underlying parts of it doesn’t necessarily match the whole tree. Instead, the UIView tree and CALayer tree may be flat for a SwiftUI view with deep hierarchy.
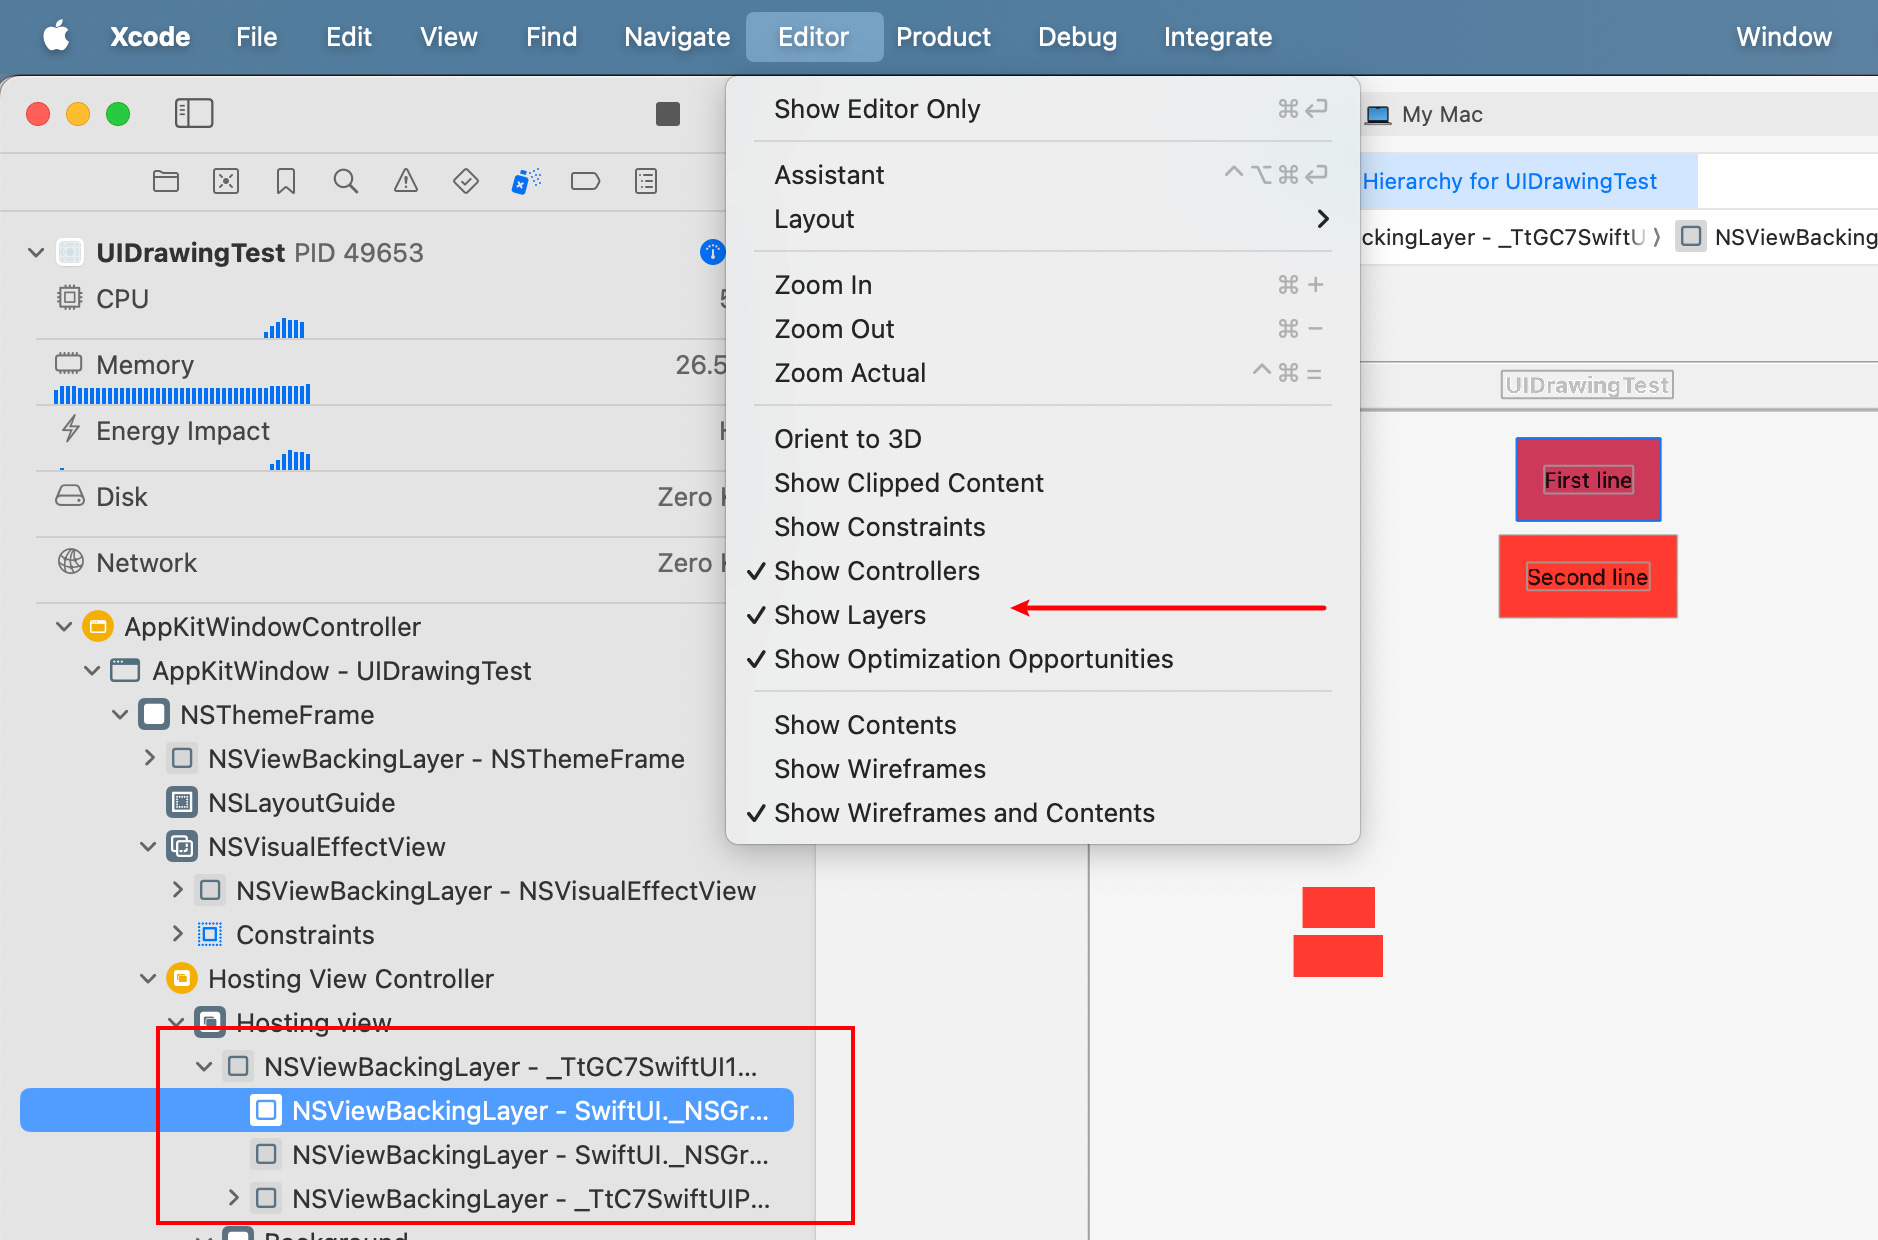
When we click the “Debug View Hierarchy” button in Xcode, it captures the current view tree and let us explore and inspect the views inside.
However, by default, it shows only the views from UIKit, AppKit, and SwiftUI. For example, given the following code:
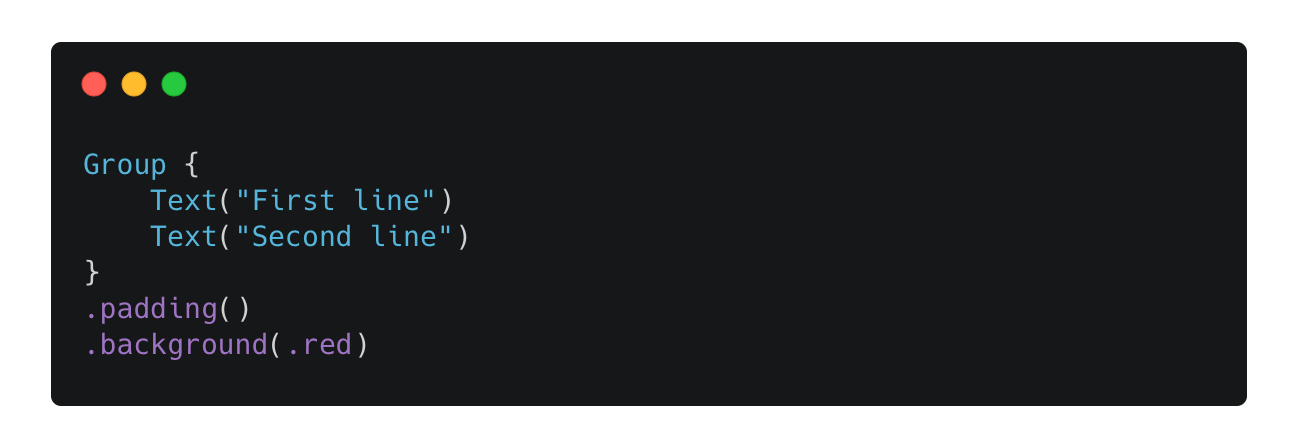
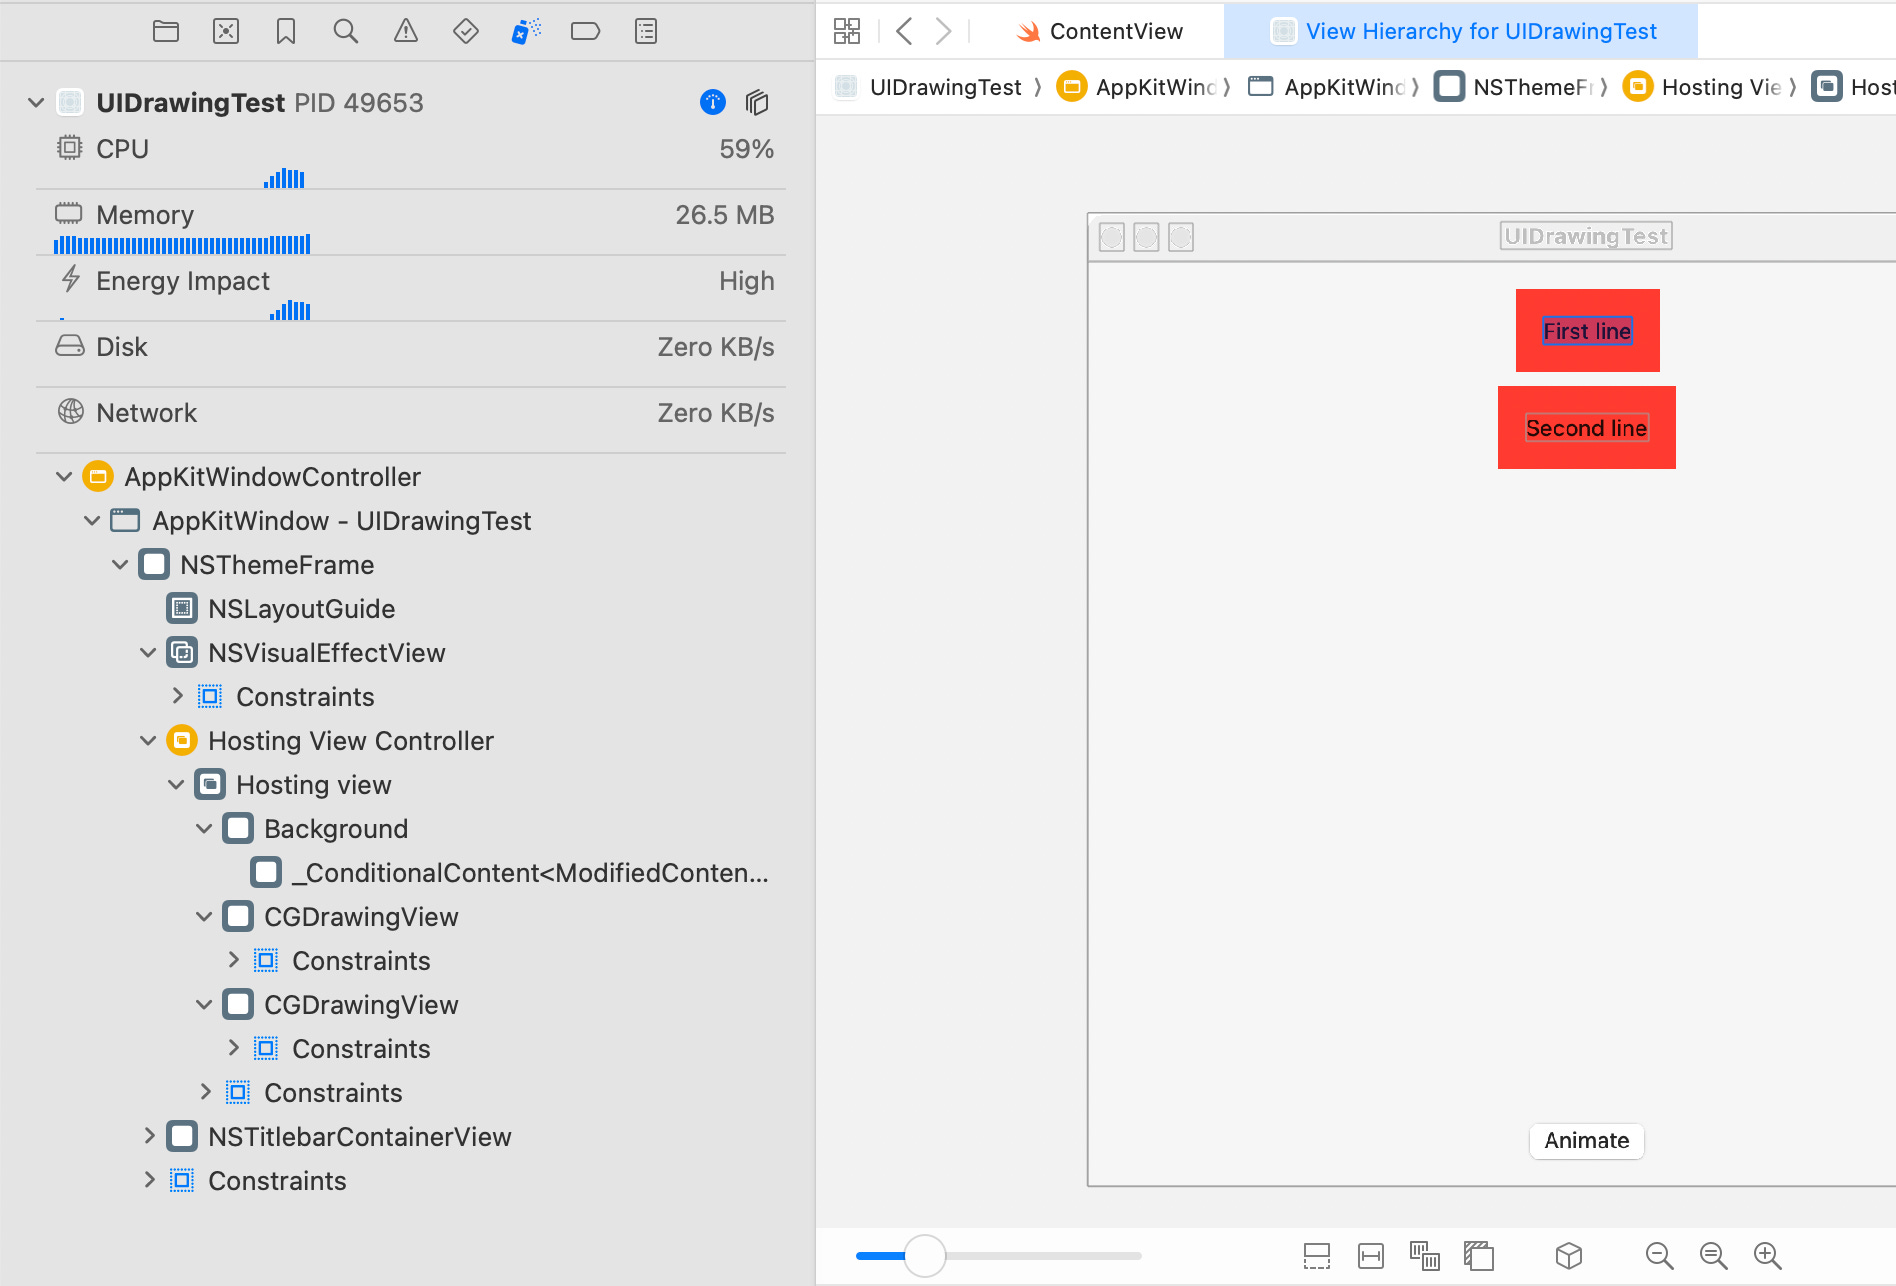
The captured view hierarchy will look like this by default:
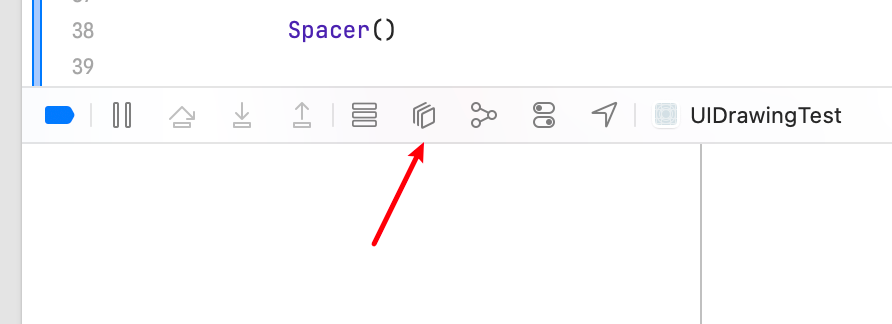
No CALayer objects can be inspected until we select “Show Layers” in the Editor menu each time we capture the view hierarchy.
Now, when we click a CALayer in the view hierarchy, the corresponding UI element in the capture preview will also be highlighted, which can be useful for checking specific UI elements.
With this tool, we can now dive into how these Groups in SwiftUI affect the underlying CALayers.
Demystify all sorts of Groups in SwiftUI
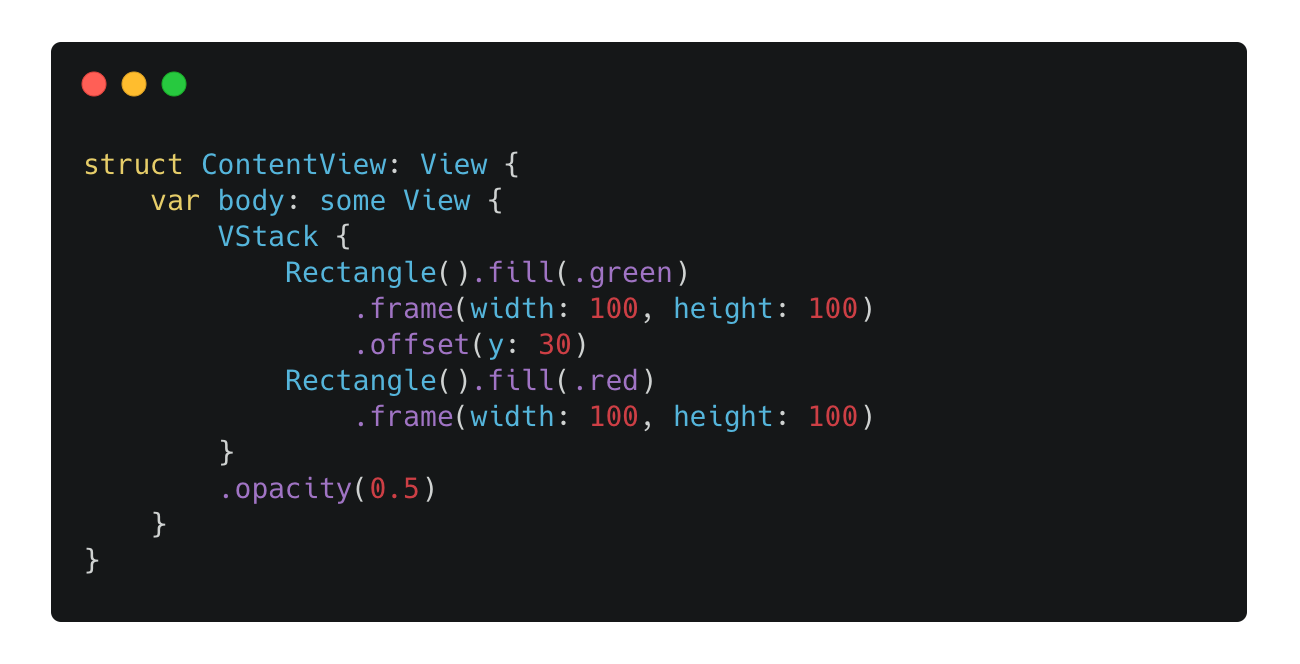
No Grouping applied
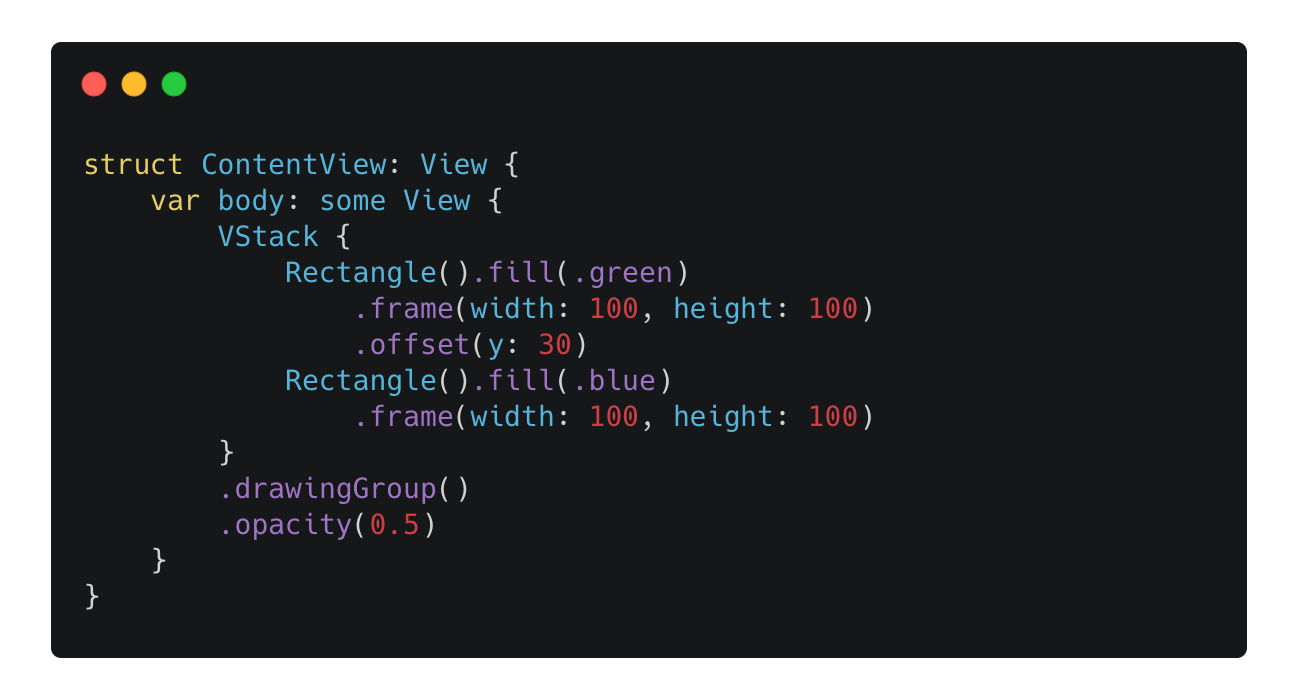
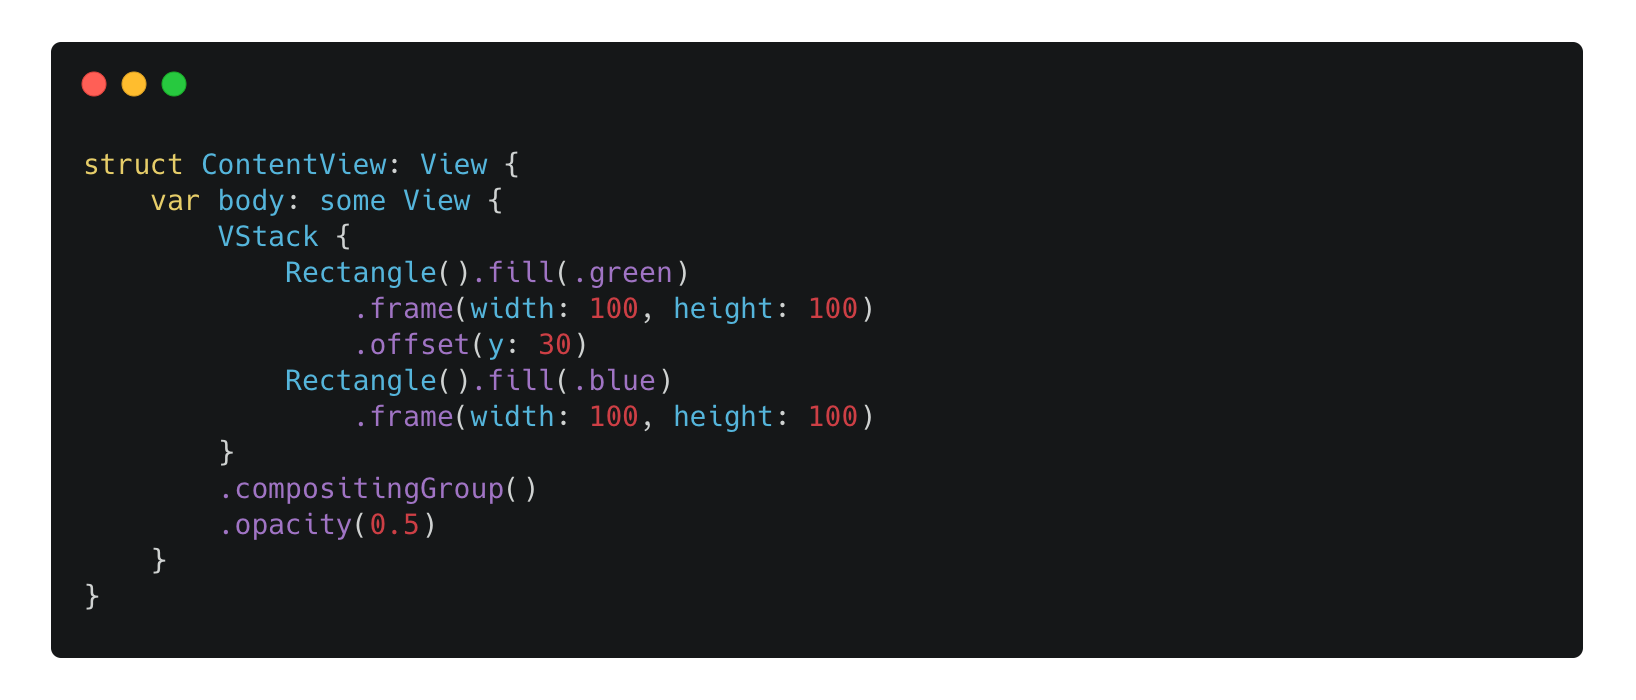
For the following code, no grouping techniques are applied.
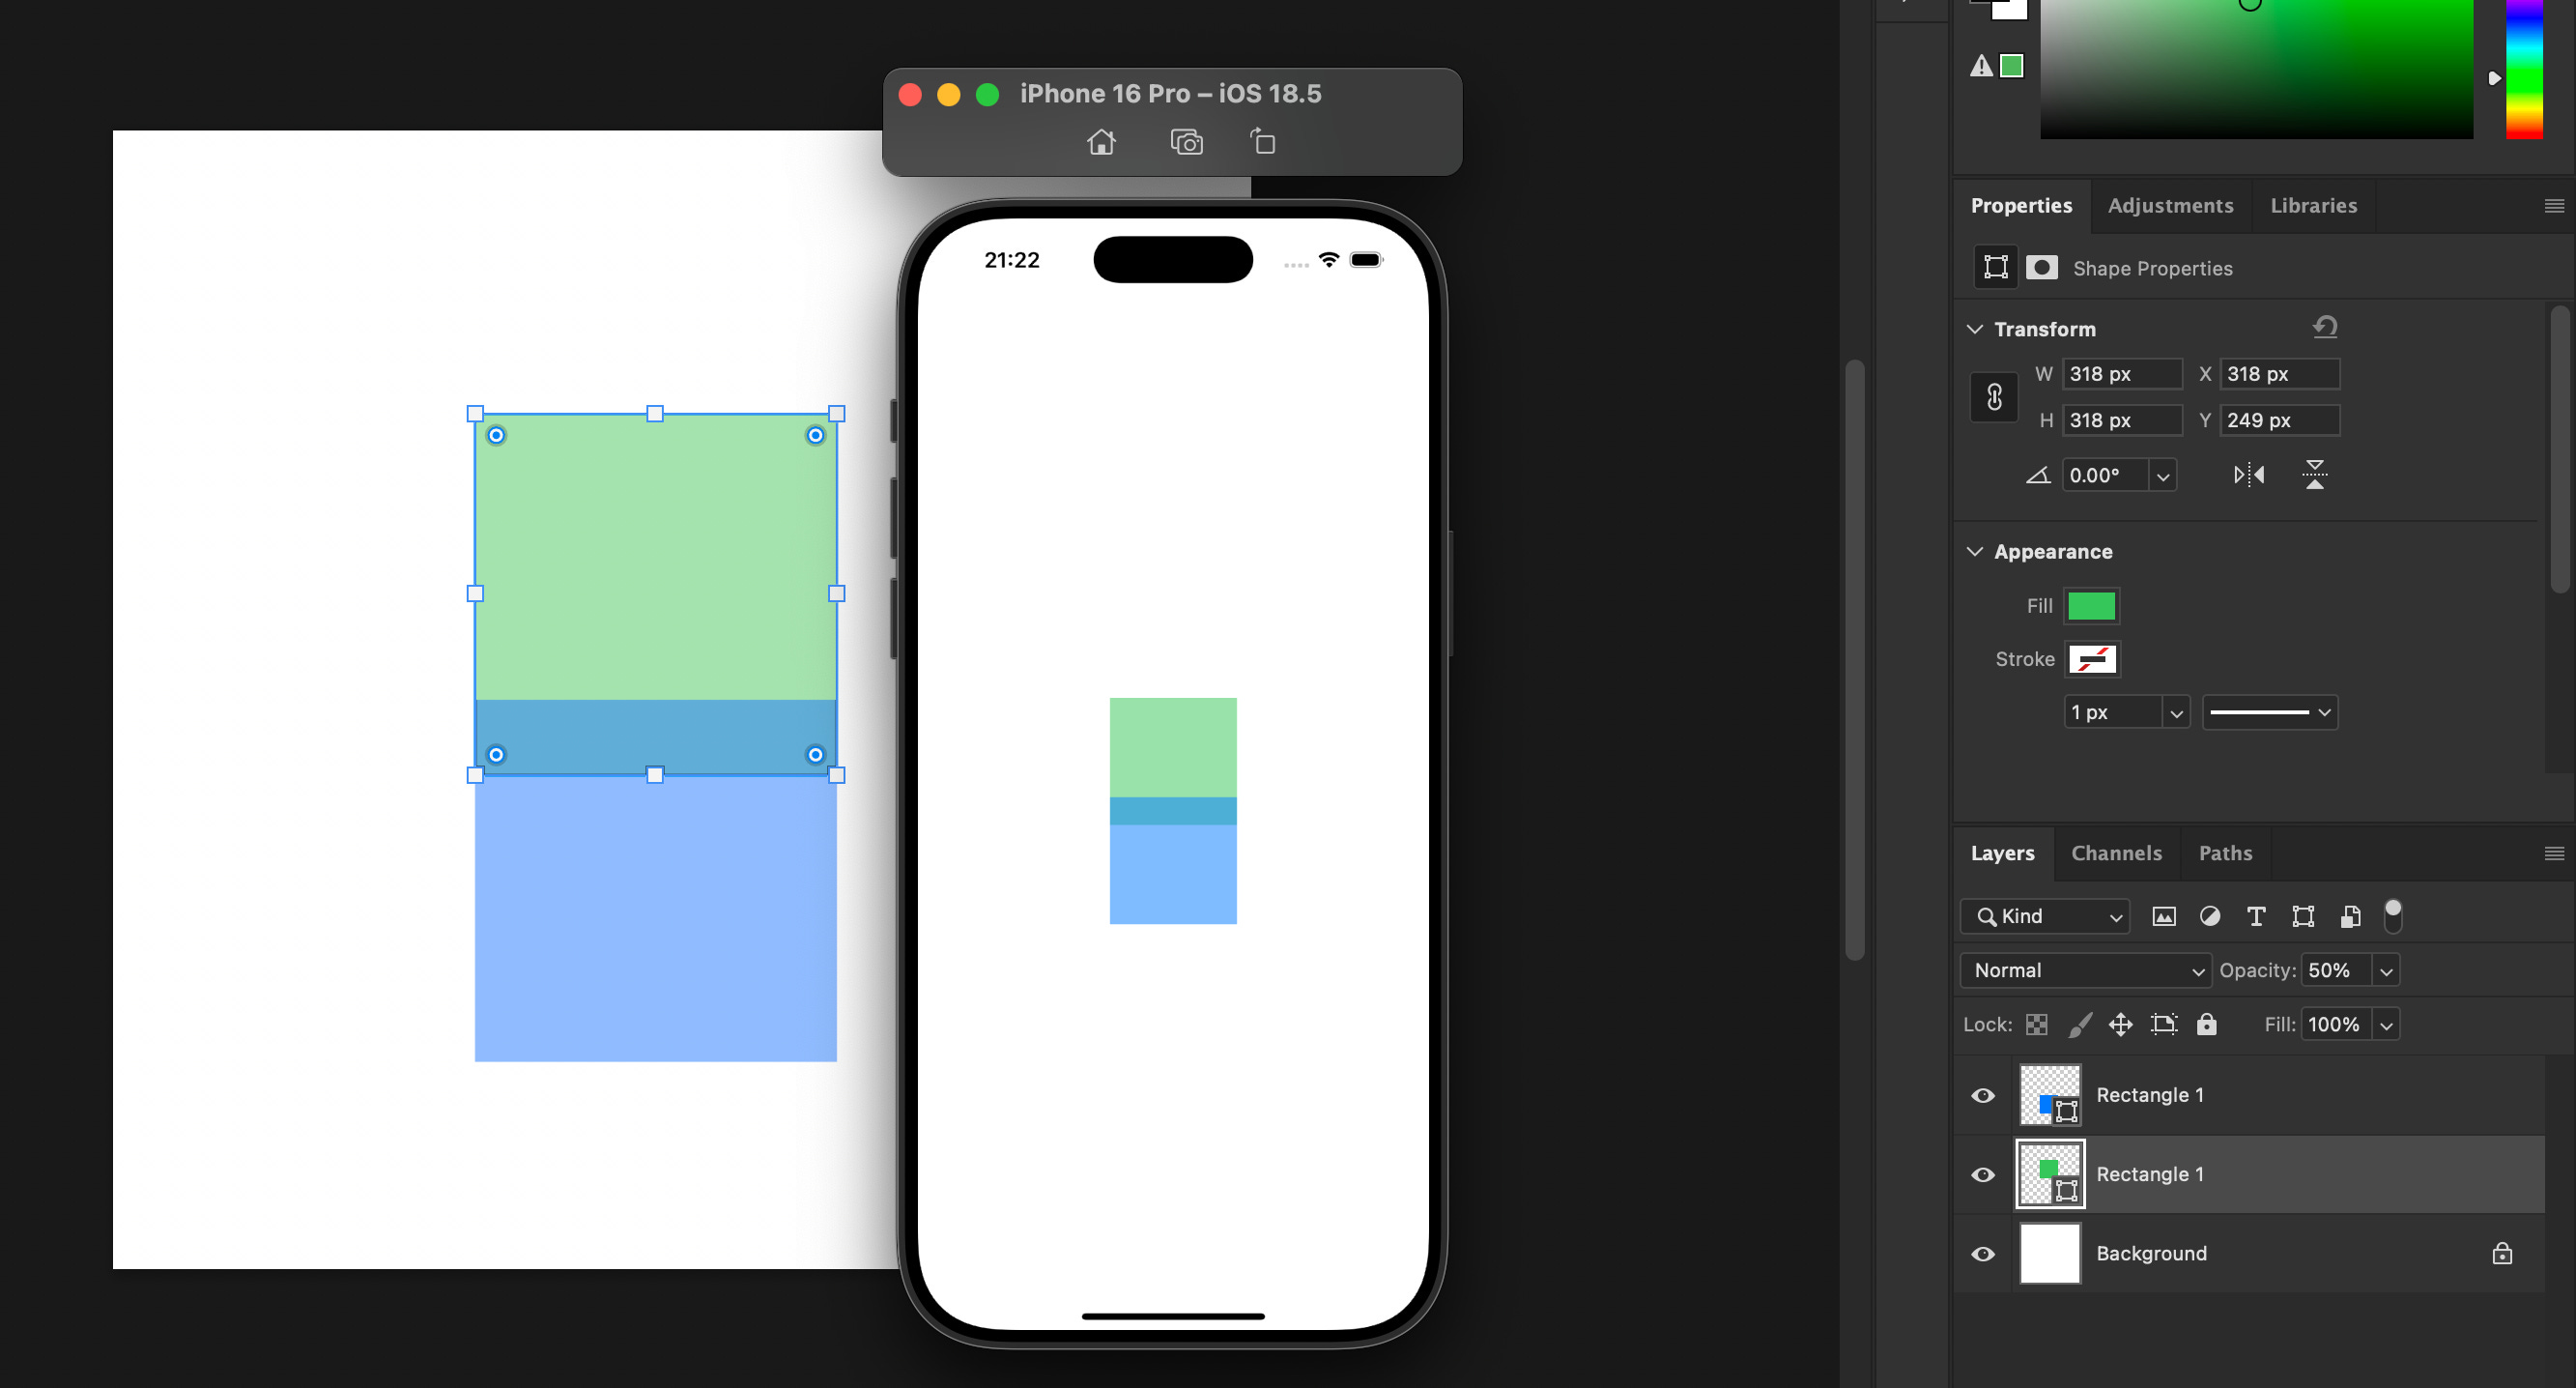
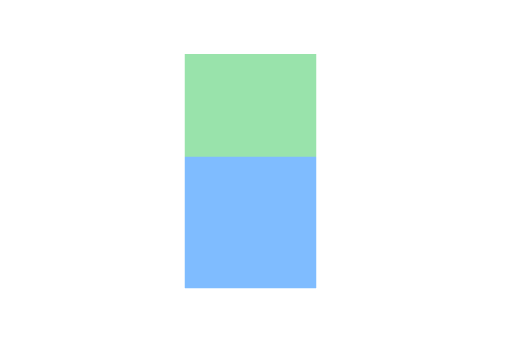
The render result will be:
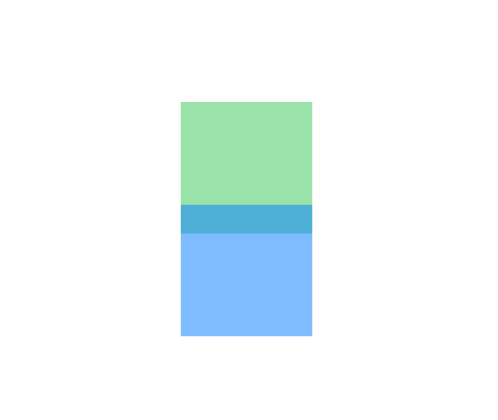
Those two rectangles are rendered in these ways:
First the green rectangle with opacity of 0.5 is drawn.
Then the blue rectangle with opacity of 0.5 is drawn on top of the green rectangle.
Because we offset the vertical position green rectangle by 30pt, and those two rectangles have translucent, the overlapped part appears to be cyan-ish.
Now read the code again, we do apply the opacity modifier to the VStack, not the individual views inside the VStack. Mostly, the intuitive result would be: we don’t see the overlapped part of the two rectangles, and as the zIndex of the blue rectangle is higher, the overlapped part should appear to be the exact same with the rest part of the blue.
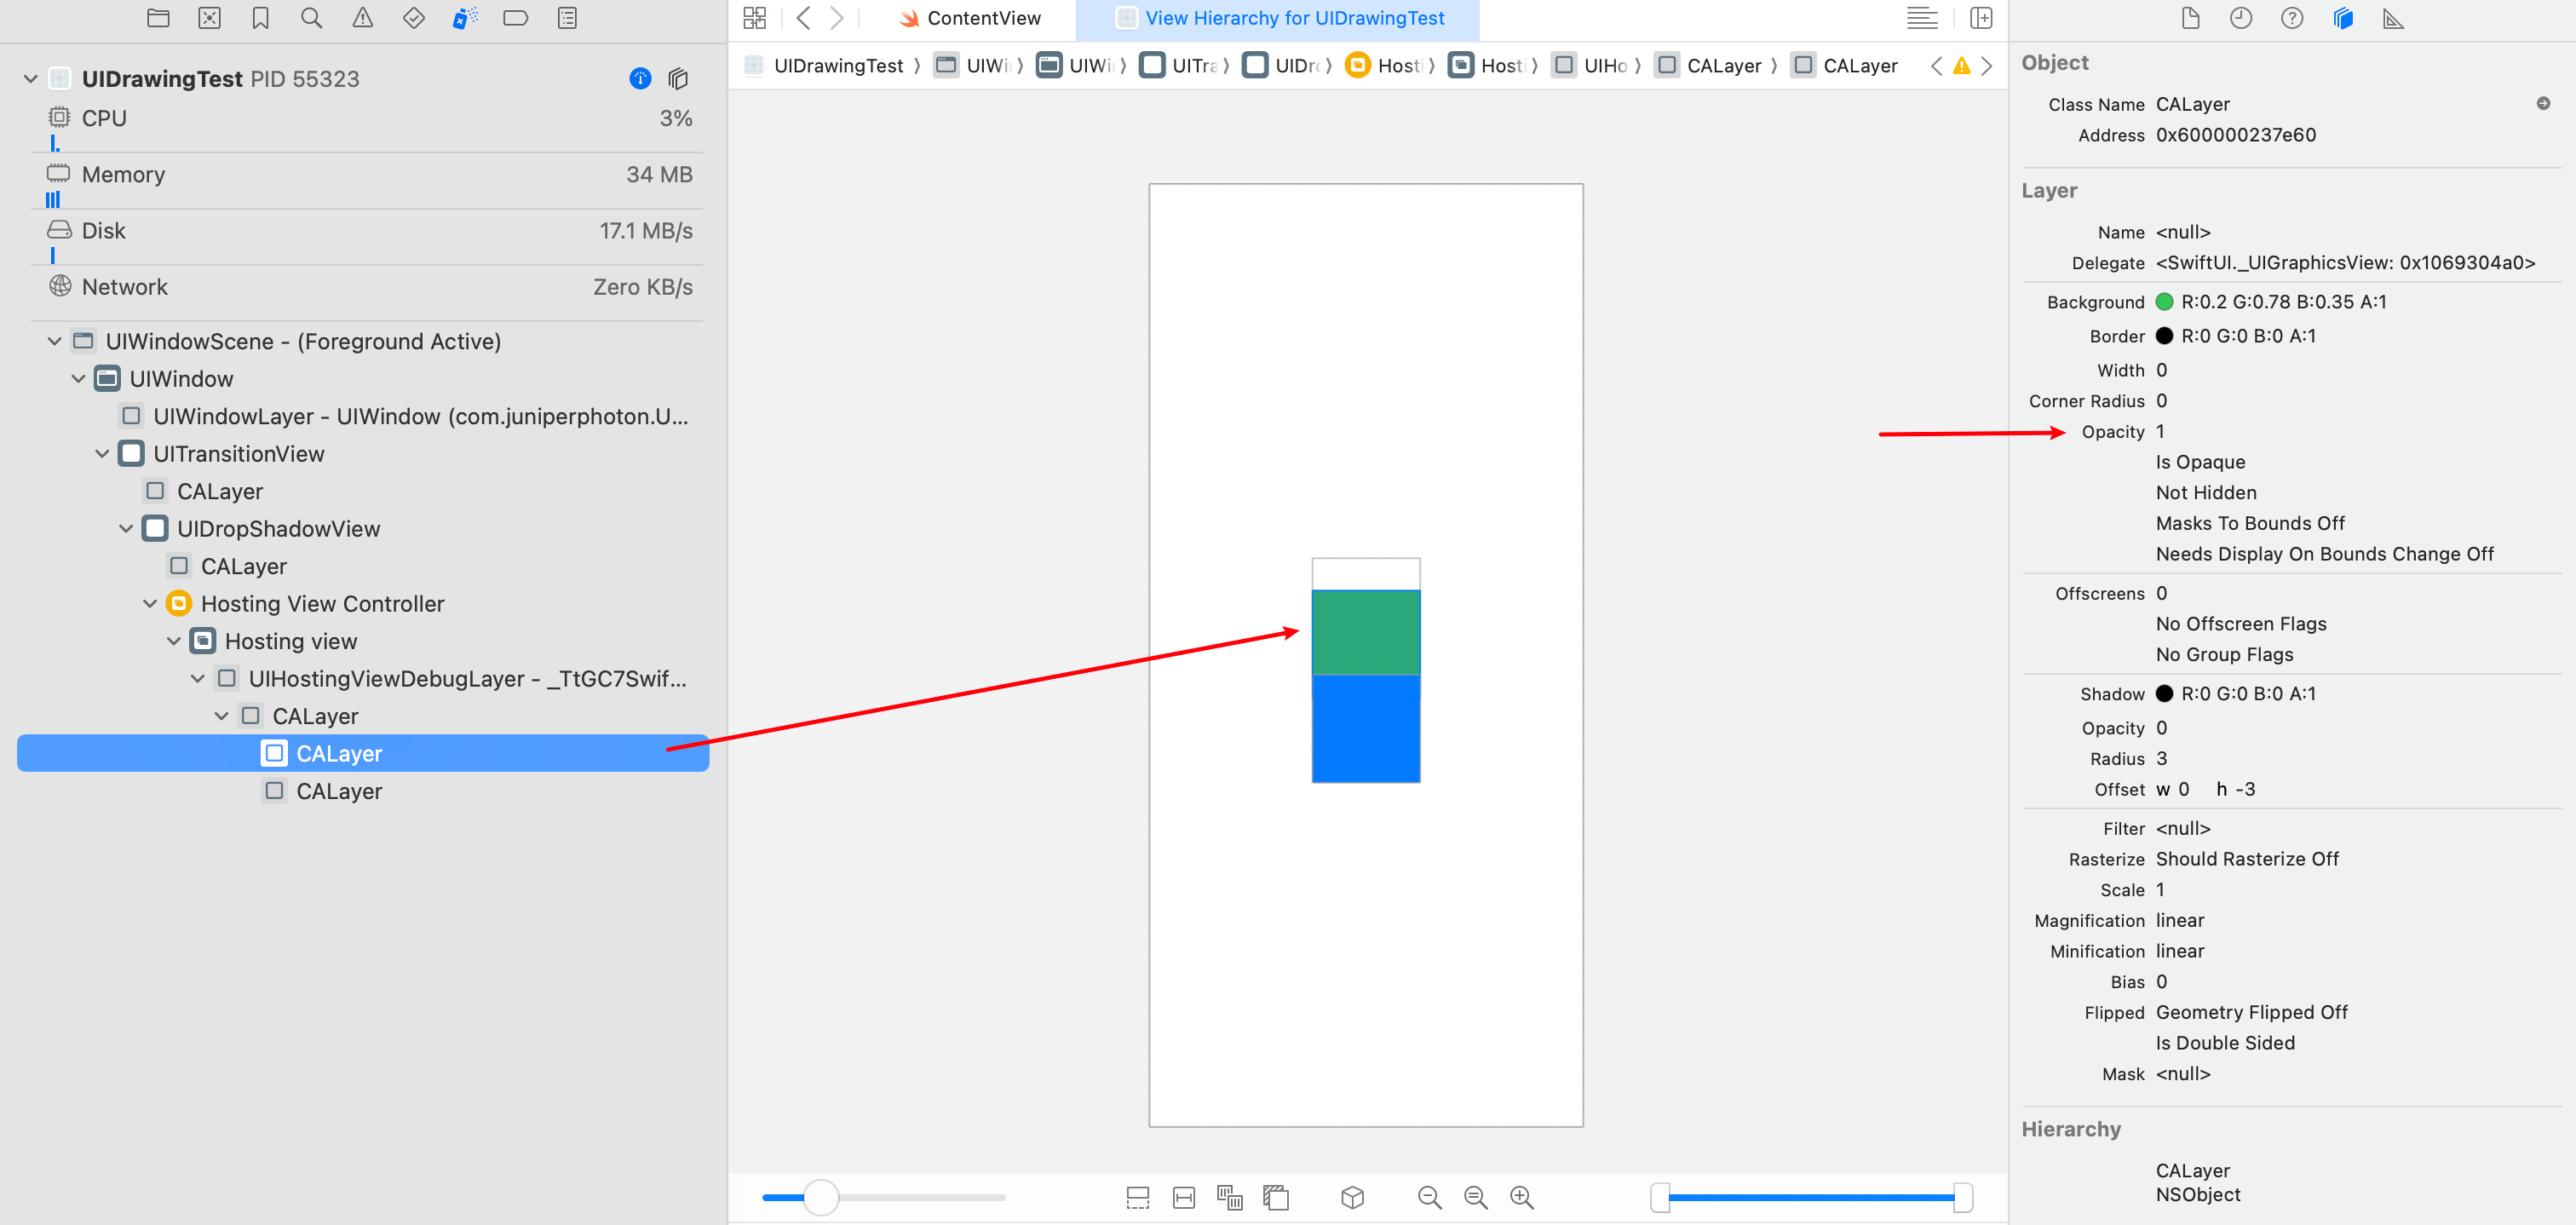
And for the layer hierarchy, it looks like this:
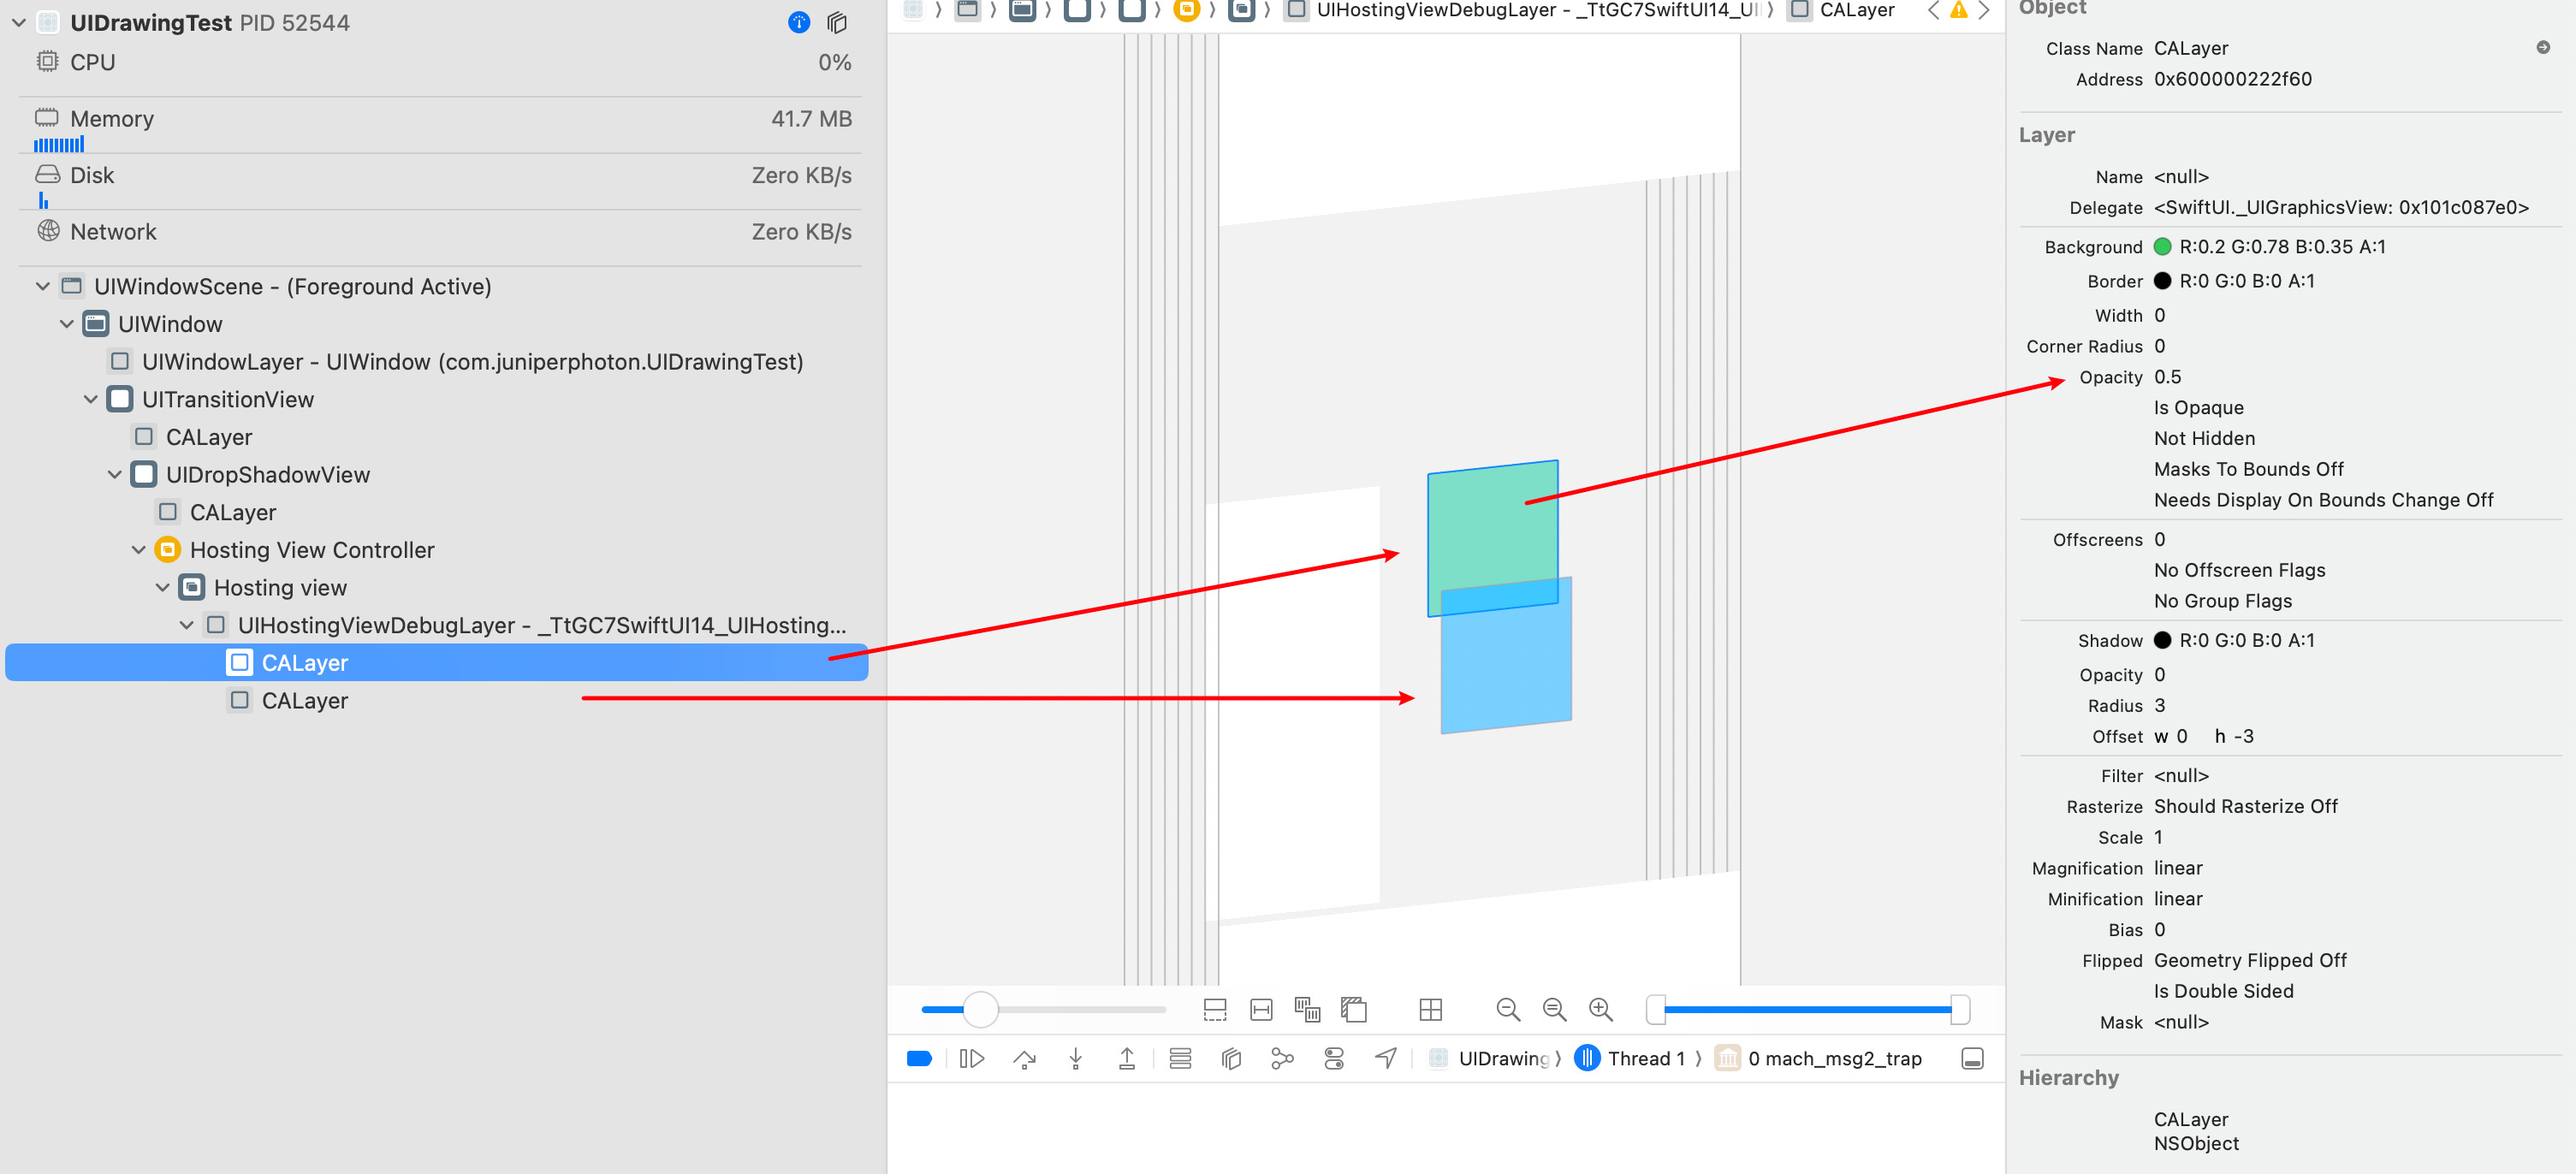
The two rectangles are represented as two CALayers sit inside the root CALayer. And by inspecting their properties:
Both of them have an opacity of 0.5.
That explains why the rendered result will look like this. You can also try blending two rectangles in the Photoshop to get the similar result.
DrawingGroup
One way to achieve the effect that the opacity is actually applied to the outer container of the view is to mark them as the DrawingGroup using the drawingGroup(opaque:colorMode:) modifier.
Composites this view’s contents into an offscreen image before final display.
Note that the order of placing drawingGroup() and opacity(0.5) matters. And the render result will be:

As for the CALayer hierarchy, as the description says, it’s rendered into an offscreen image, which is managed in a CALayer:
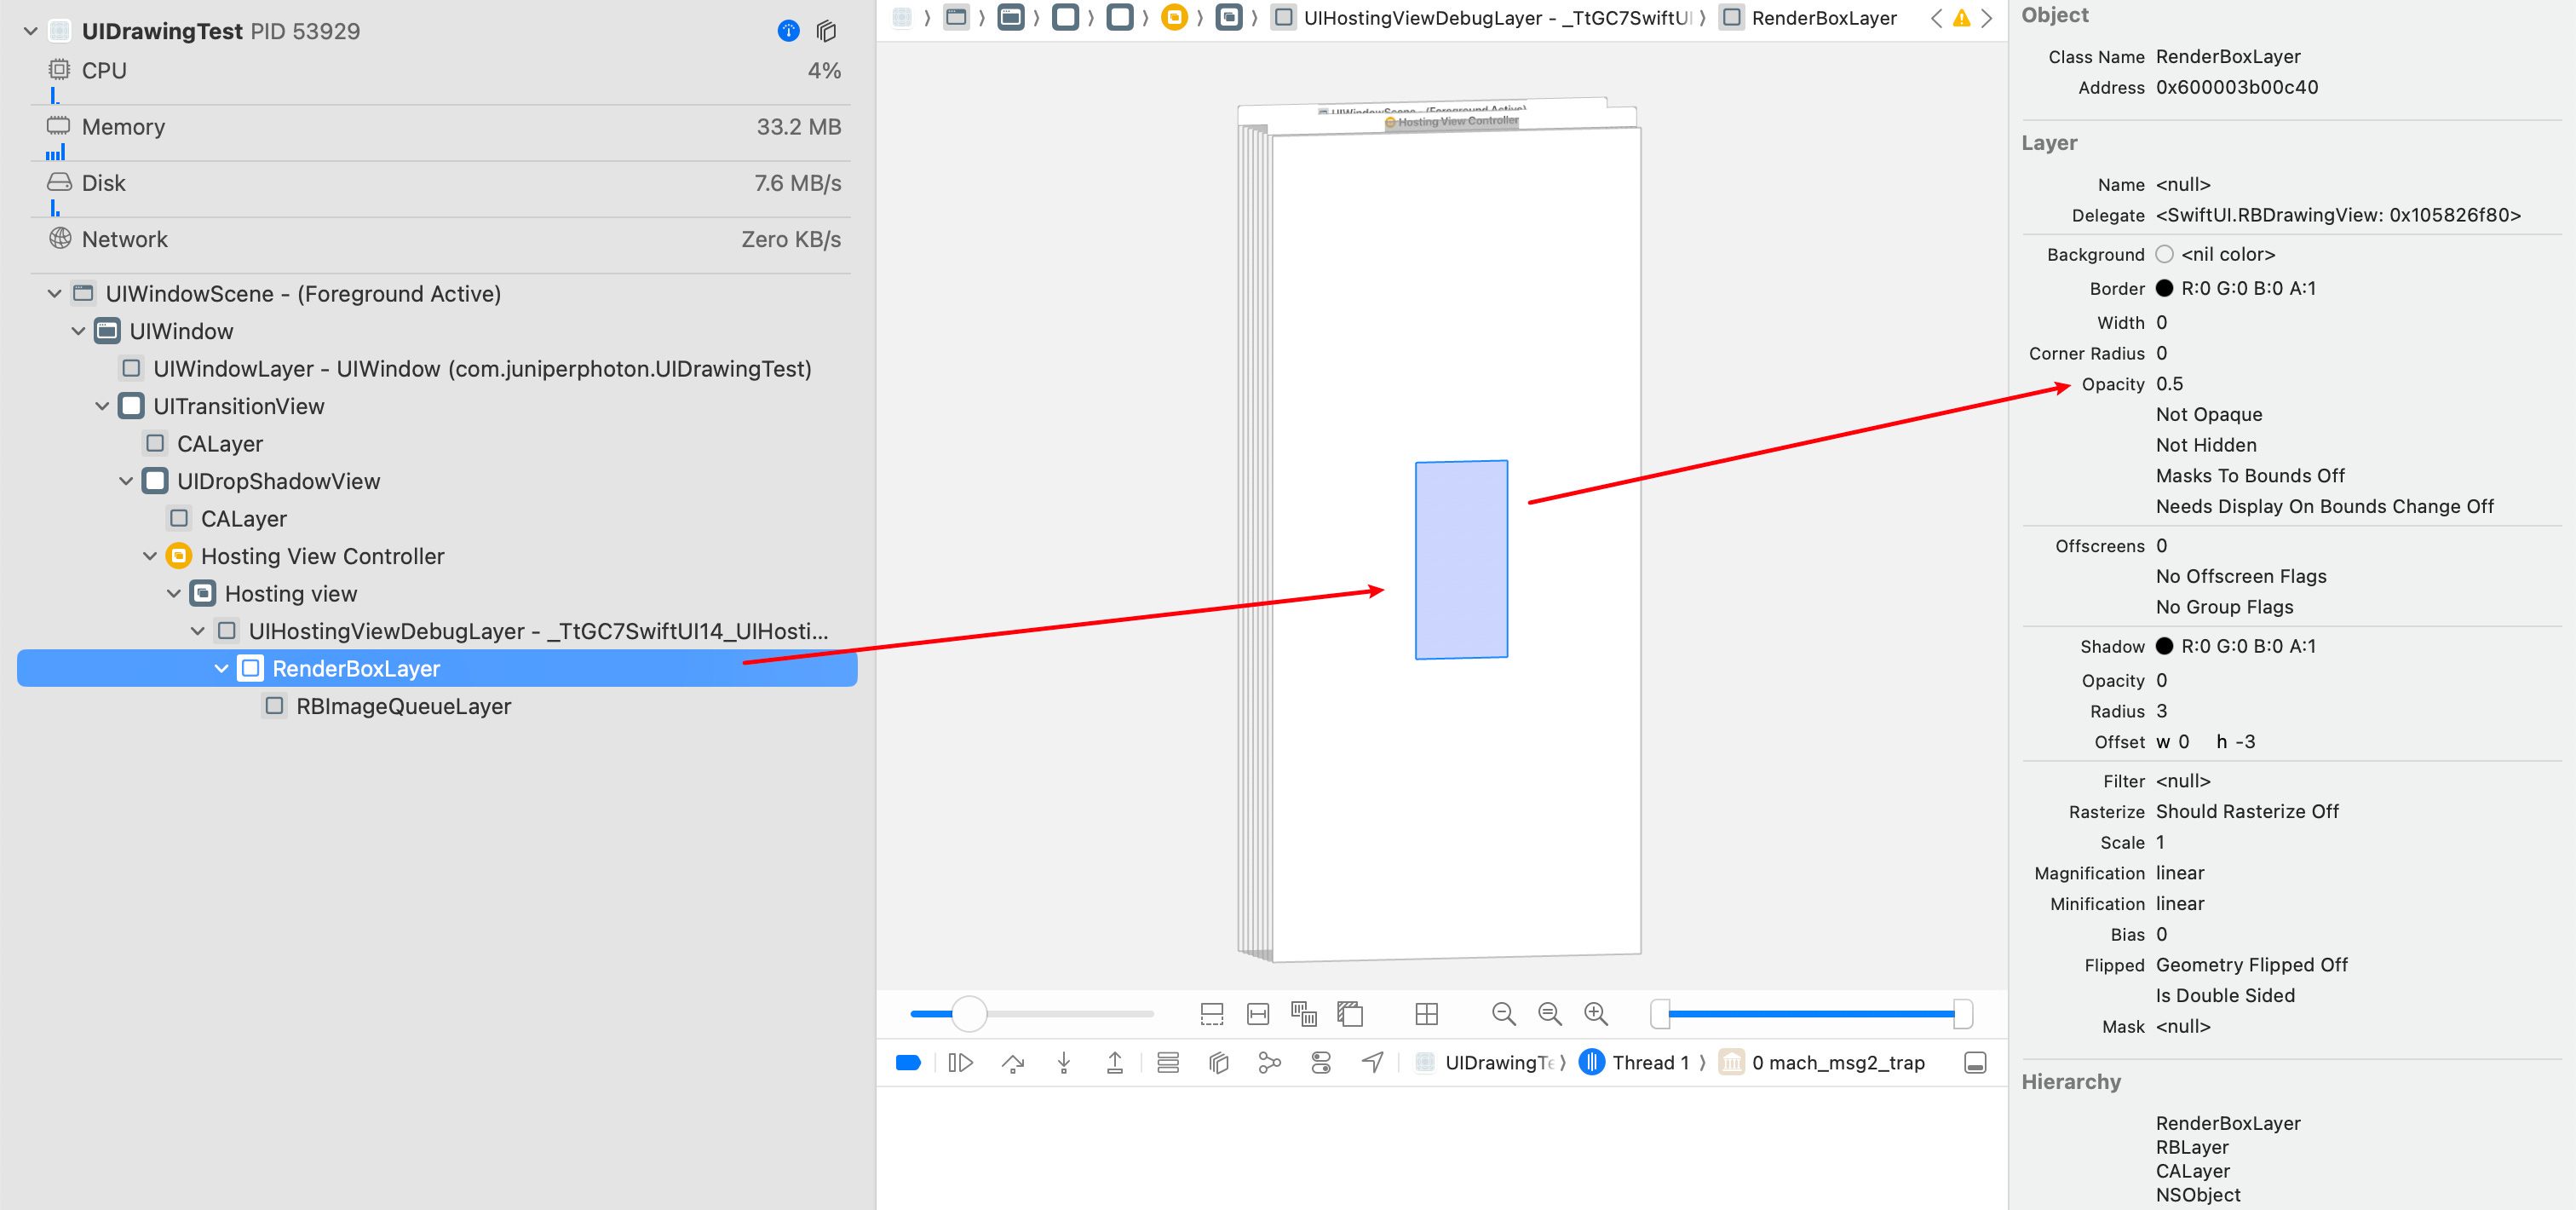
For some unknown reasons, Xcode won’t render the layer correctly in the captured image when using drawingGroup. But it doesn’t affect how we inspect the layer.
Therefore, by using drawingGroup(), no matter how complex the view is, it will always be flatten into one single CALayer:
Use
drawingGroup()with caution. As it may slow down your app and increase memory usage. Even though a small part of content inside that view changes, the whole view would be drawn entirely.
CompositingGroup
There is another way to achieve the “expected” normal opacity blending effect in the mentioned example, and it’s by wrapping them in a CompositingGroup by the compositingGroup() modifier.
The render result will be:
So what happens in the view hierarchy? First, the green rectangle is backed by a CALayer, and its opacity is 1.
There is an additional CALayer as the super layer of those sub layers, with opacity of 0.5.
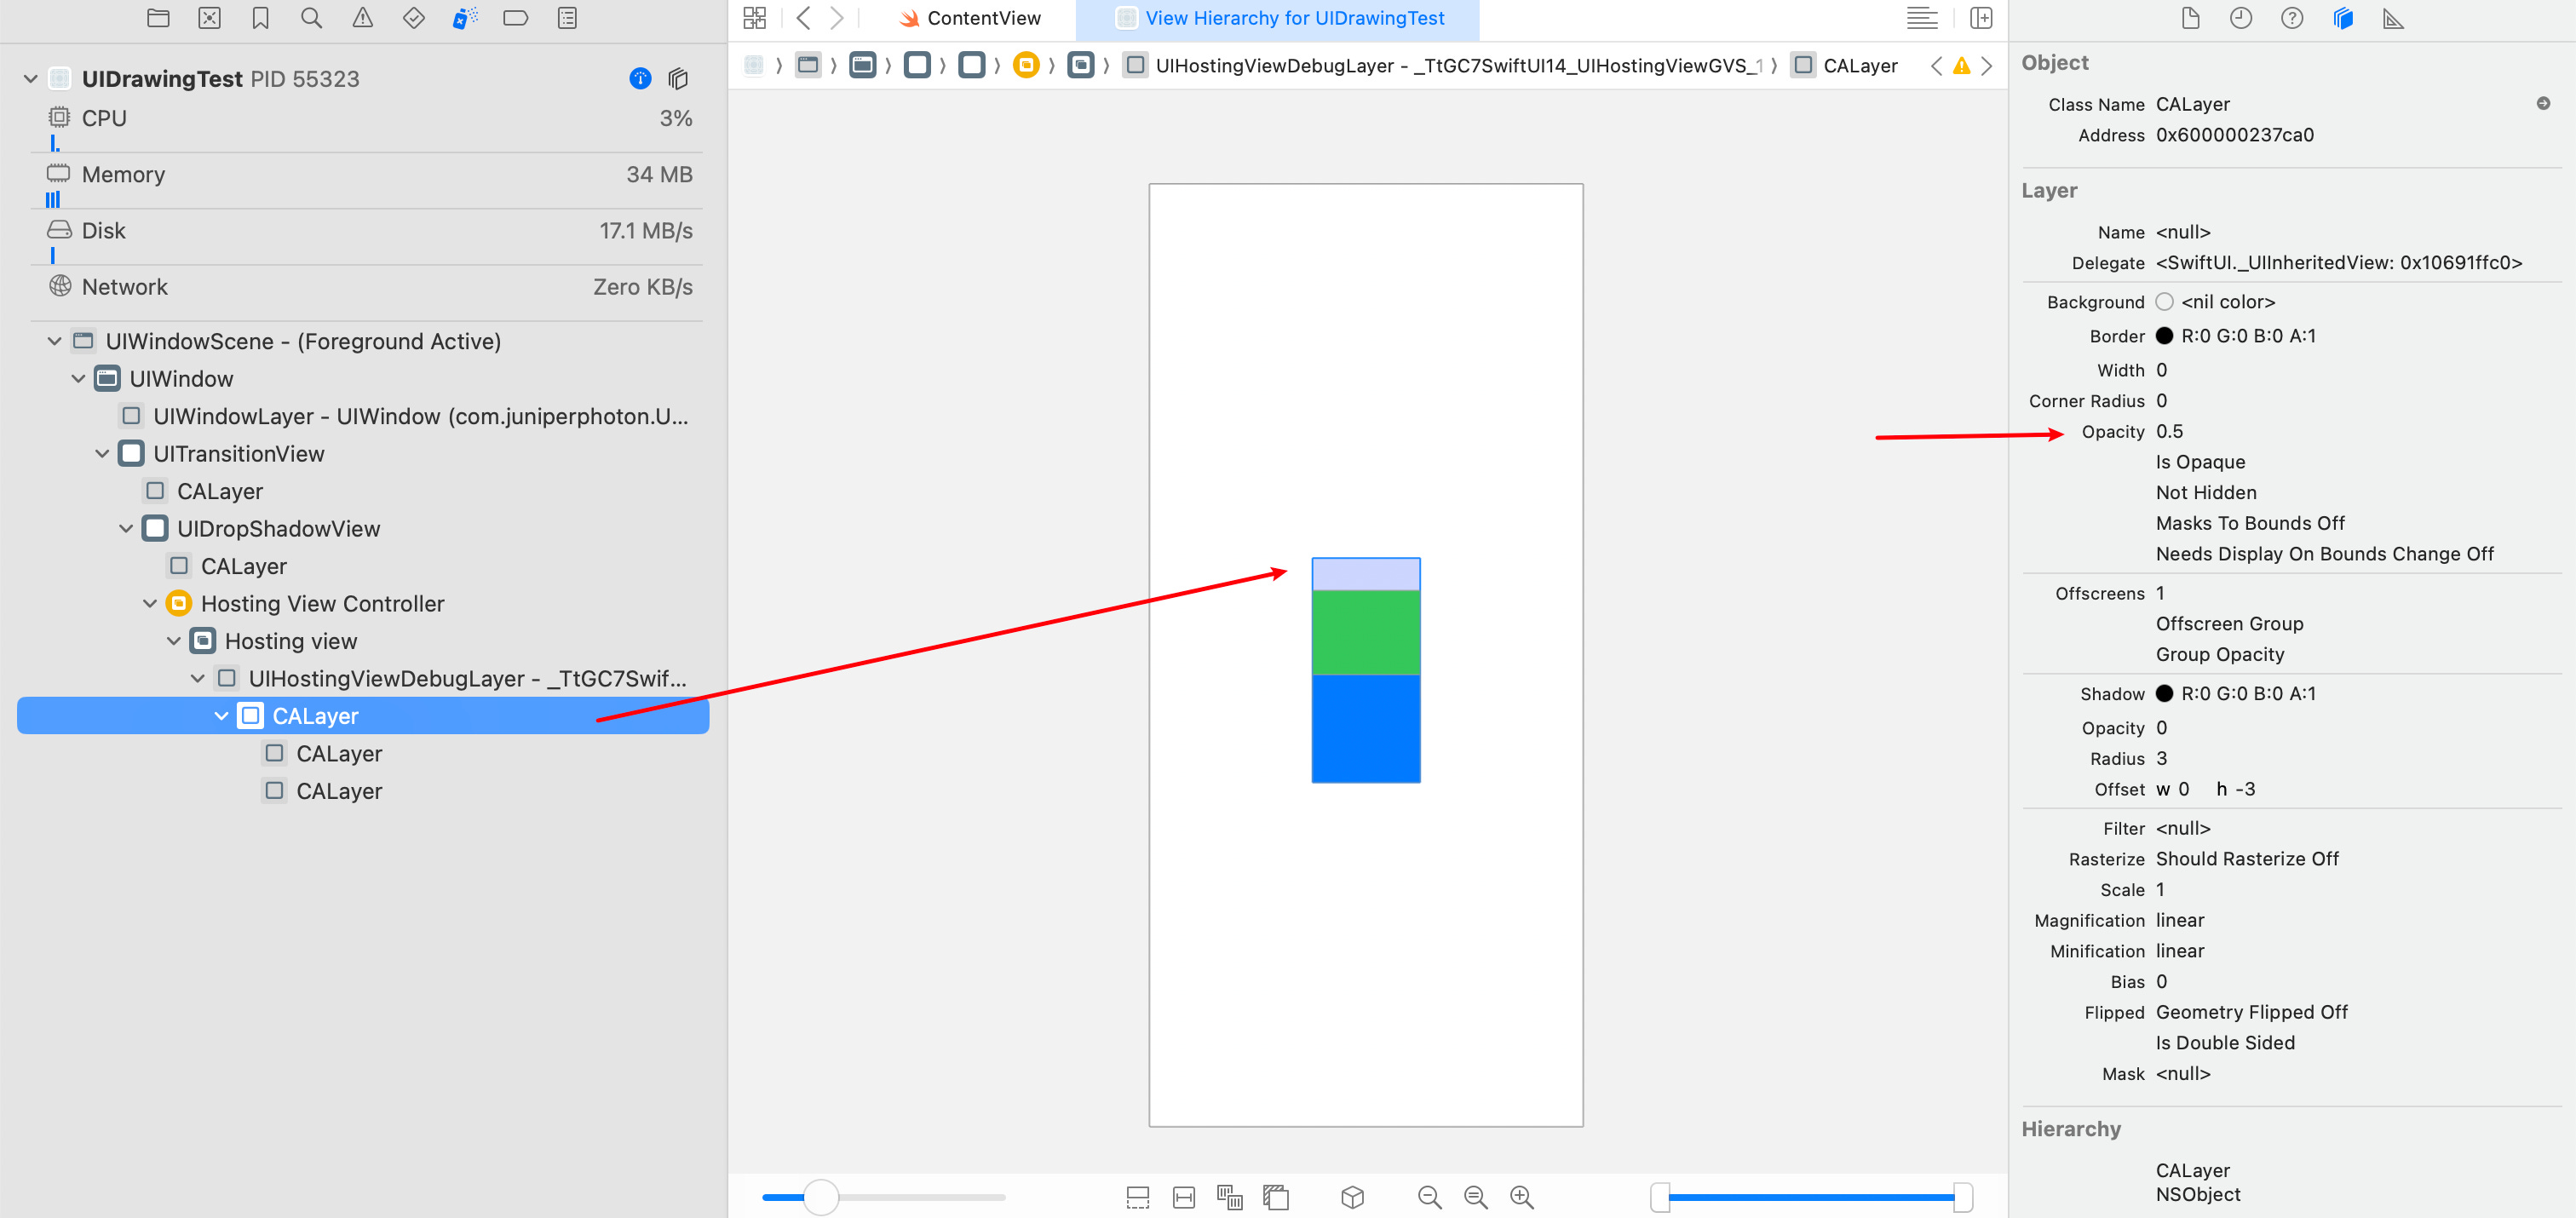
In summary, when using CompositingGroup, those two rectangles are represented as two individual CALayers, as the descendants of an extra CALayer, which has the opacity of 0.5, while the individual CALayers have the opacity of 1.0.
Additionally:
It needs an additional Offscreen texture to draw the final image, by drawing the sublayers into one offscreen texture.
It has a flag of “Group Opacity” in the inspector, which plays the key role of achieving this effect of treating the whole sublayers as one layer before applying the opacity. This “Group Opacity” flag corresponds to the
allowsGroupOpacityproperty setting to true inCALayer. Therefore, if you are recreating this scenario usingCALayer, you must make sureallowsGroupOpacityis set to true.
Note: Having Offscreen count other than 0 will have performance overhead. You should consider optimizing this to avoid Offscreen texture based on your scenario.
GeometryGroup
It’s recommended to read Fatbobman’s article regarding GeometryGroup first, as it describes some information to help you understand GeometryGroup in SwiftUI level.
Understand GeometryGroup is kind of tricky, as the documentation may not that clear:
Isolates the geometry (e.g. position and size) of the view from its parent view.
In my experience, you may need to use this in this scenario: for the view container A, if its geometry like size and position can animate to change, while its own descendants can also animate to change, you should apply the geometryGroup() modifier to make sure its descendants can maintain a stable layout during the animation.
Consider this example:
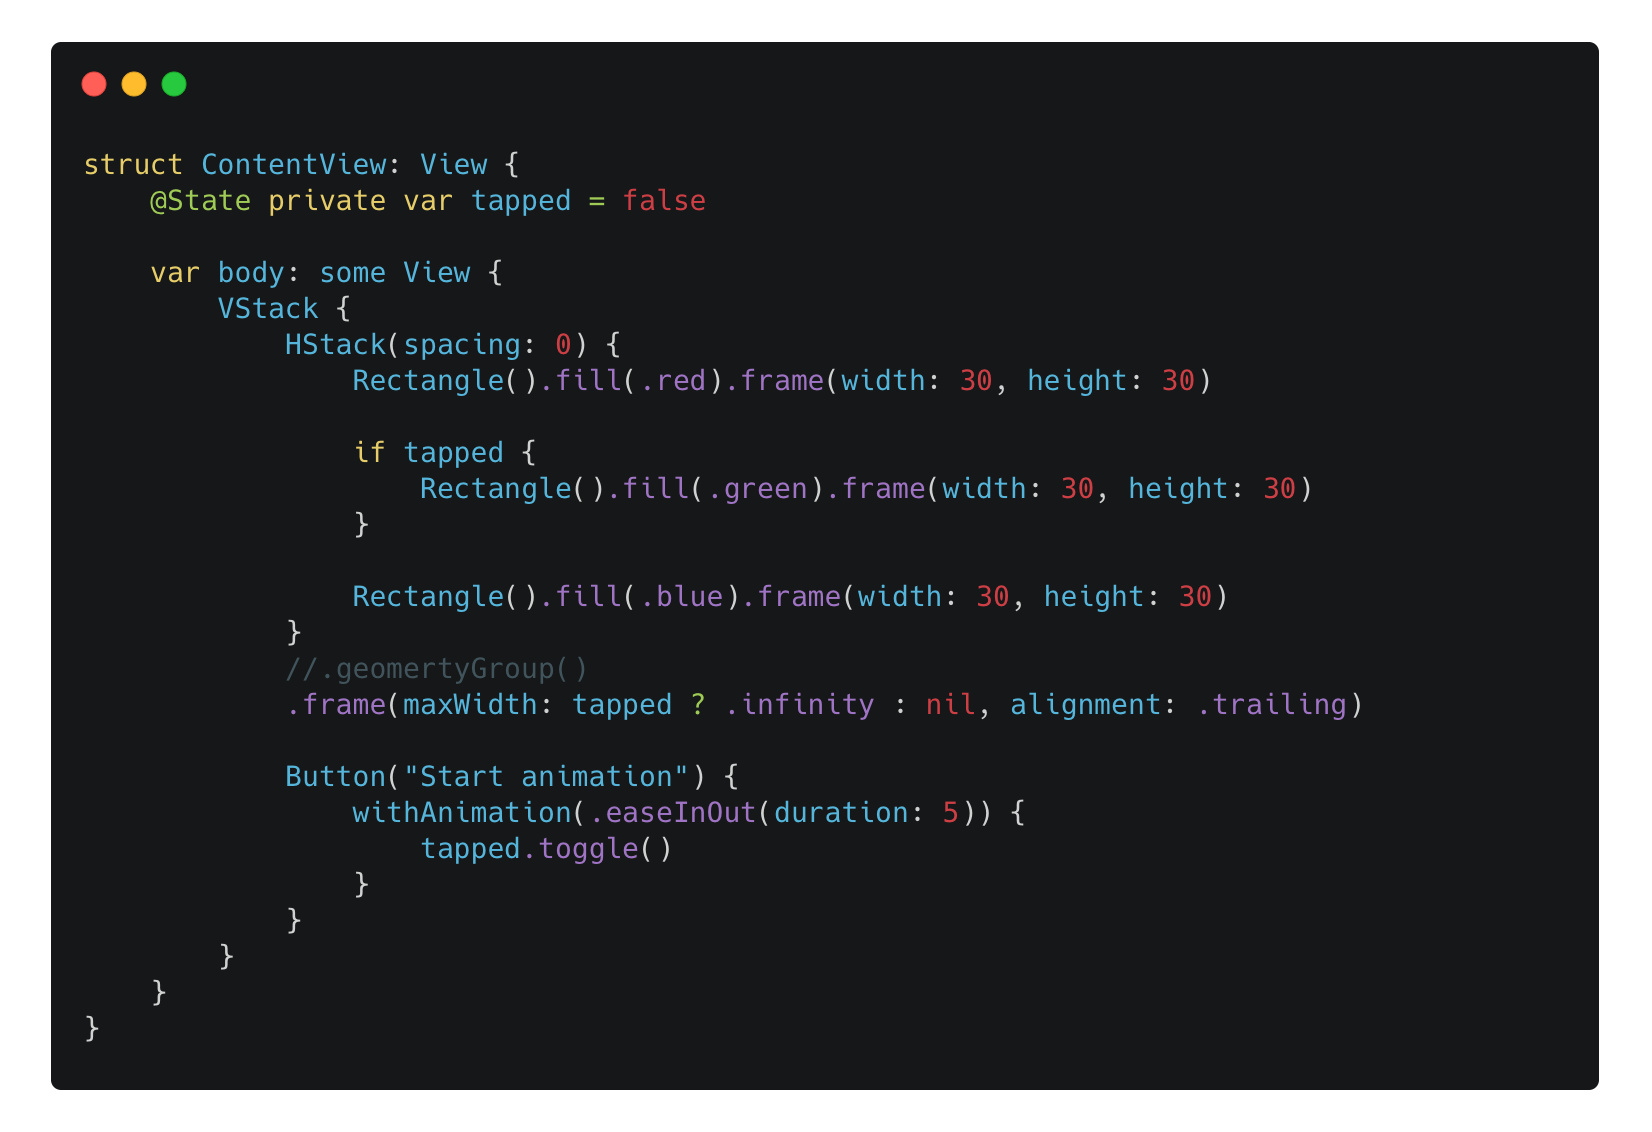
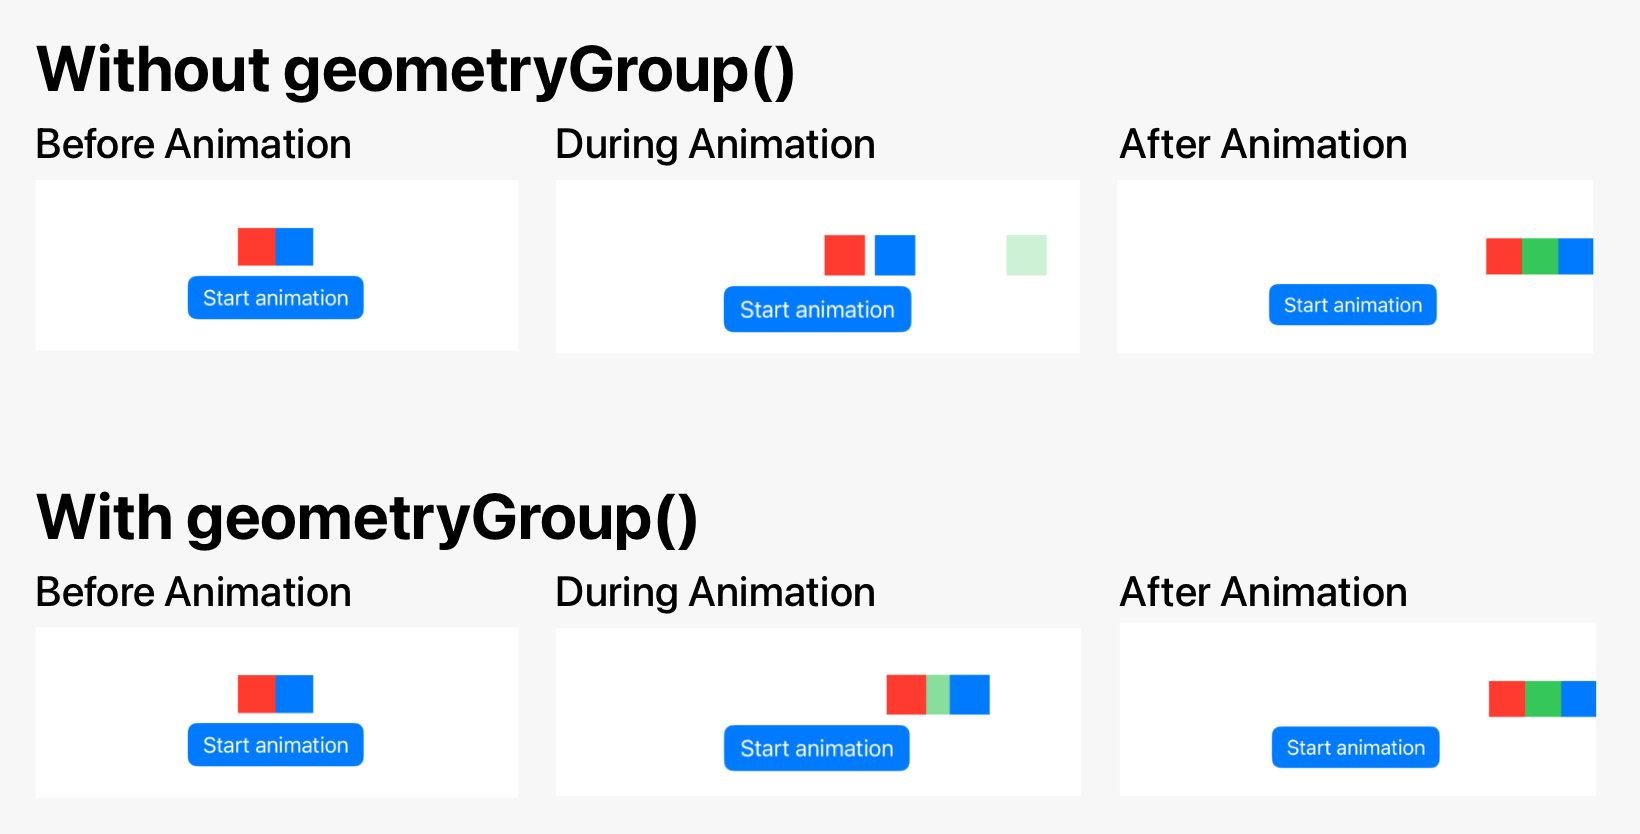
The whole process of animation will look like this with or without applying geometryGroup() modifier.
Notes:
When we tap the button to start the animation, the
HStackresponse to the state changes by changing both of its child (showing the green rectangle) and its geometry position (changing themaxWidthusing the frame modifier).
Without
geometryGroup(), the green rectangle will transit starting from its final position. By default, the opacity transition will be applied, so you can see that the opacity of the green rectangle is increasing during the animation.
With
geometryGroup(), the green rectangle’s position animates in sync with the position of the outerHStackapplied withgeometryGroup(). Normally we would prefer this animation behavior.
After inspecting the CALayer tree, this layout with geometryGroup() will look like this:
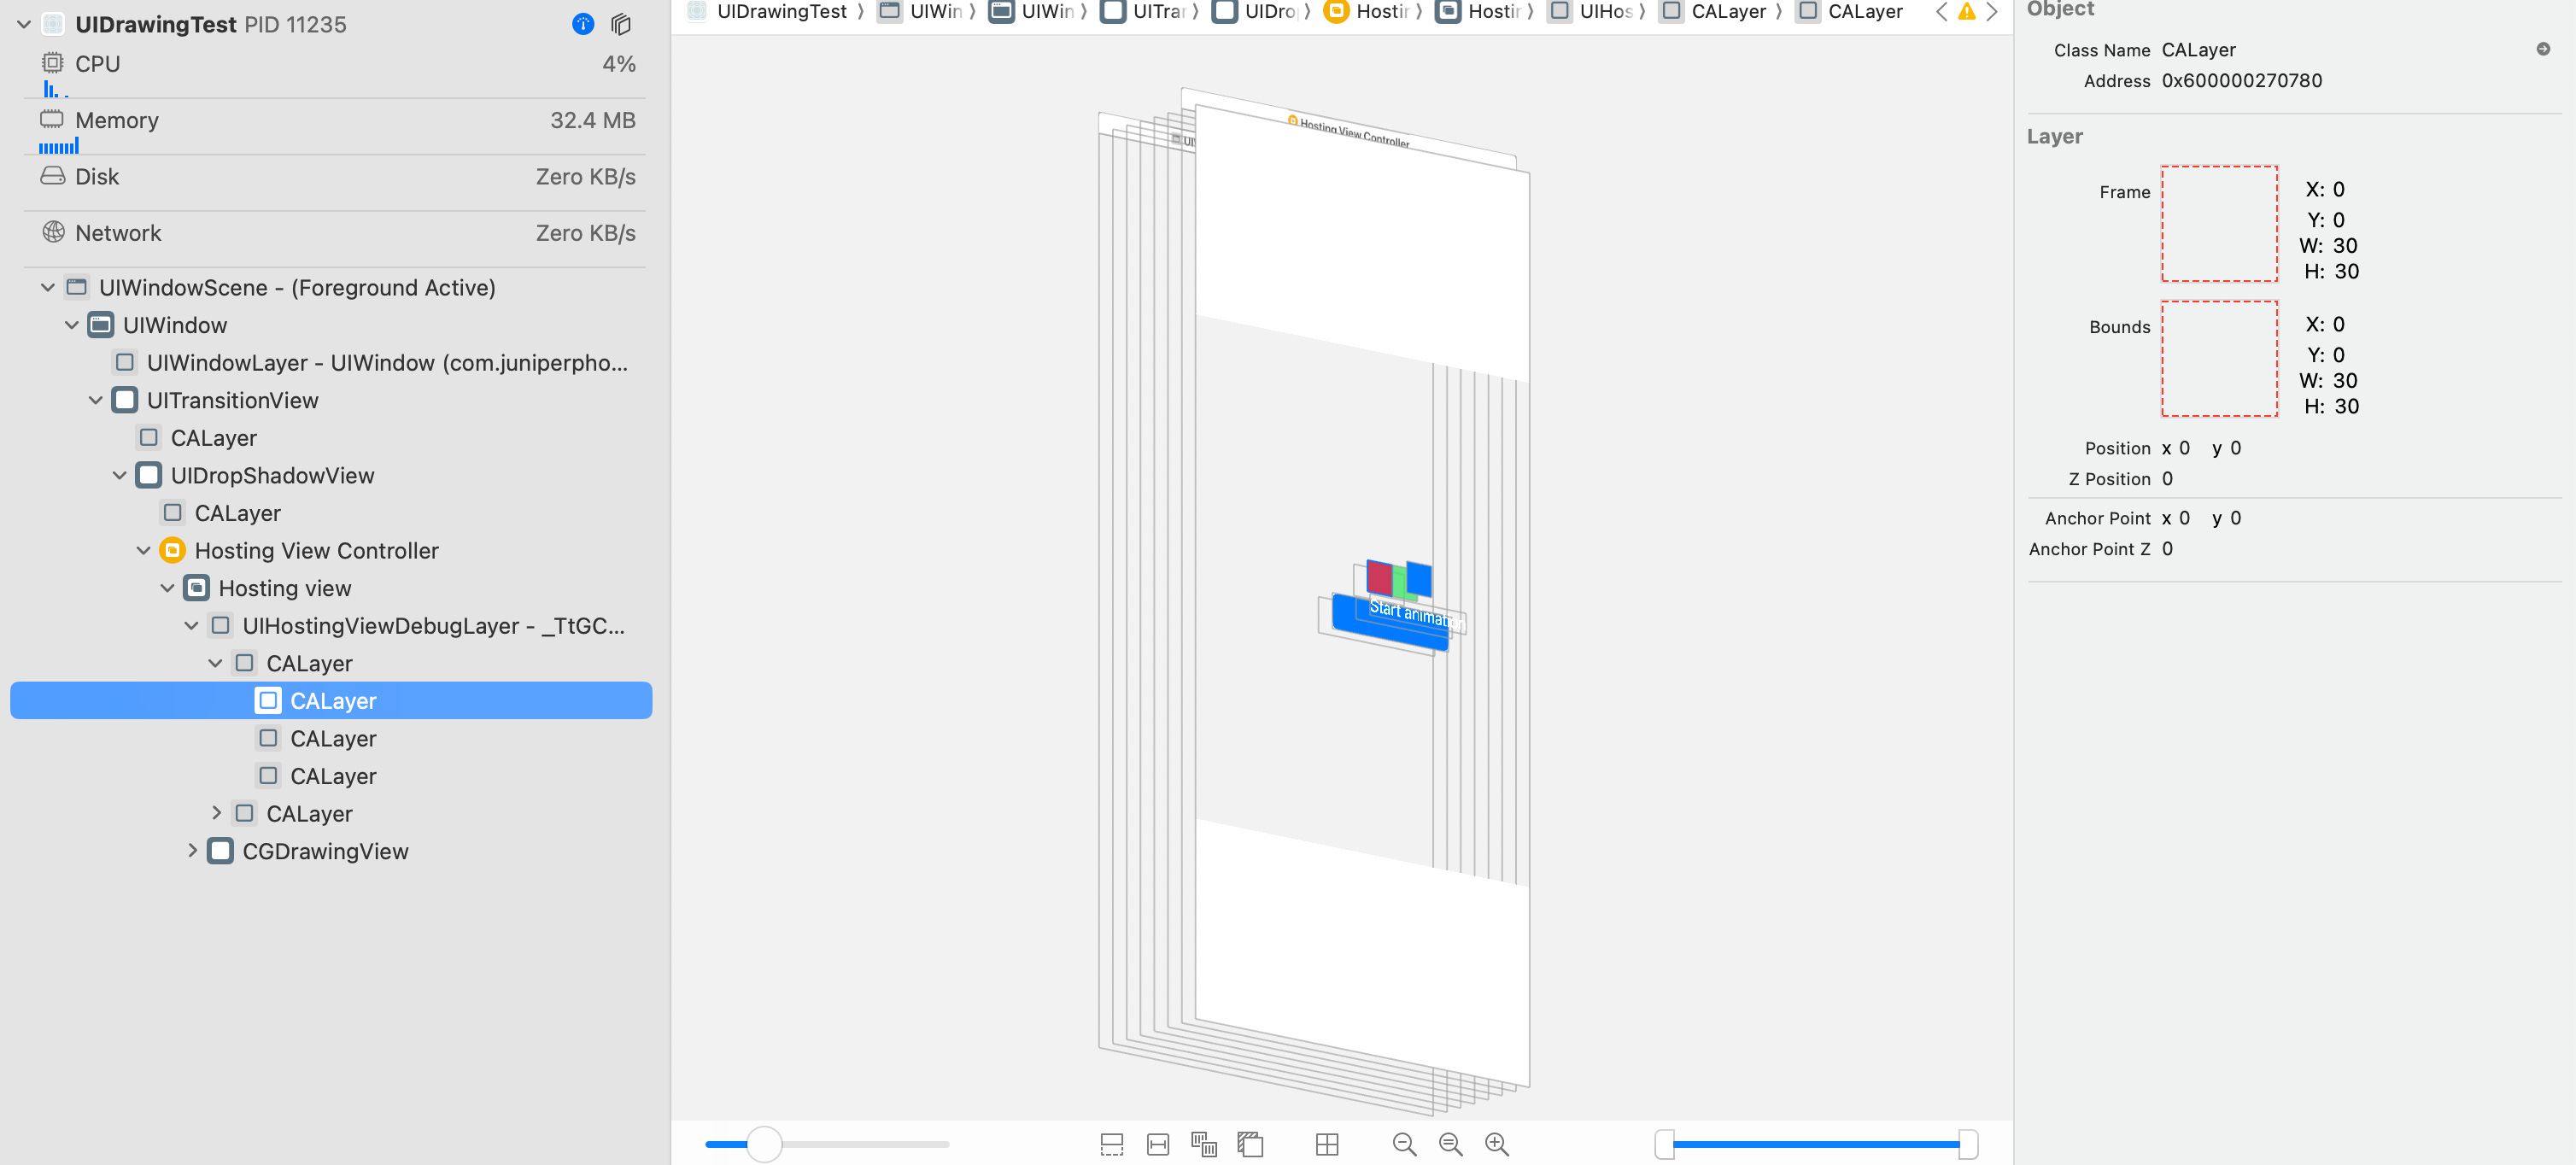
Just like the compositingGroup(), it creates a super CALayer that contains three sub CALayers, and each represents the Rectangle() in code.
With geometryGroup(), during the animation the Frame of the super CALayer will change accordingly, as well as the blue rectangle will make “room” for the green rectangle.
However, this behavior is not entirely due to this layer hierarchy created by the system. If you use compositingGroup(), the same layer hierarchy will also be created, but the underlying Frame calculation behavior varies compared to the compositingGroup().
But this layer hierarchy will still make it possible to make sure the geometry information of the parent layer can be obtained by the sublayers. This leads to the following fact: though in SwiftUI we create a tree level of views, the underlying layers don’t necessarily match the hierarchy.
The following example is from Fatbobman’s article: SwiftUI geometryGroup() Guide: From Theory to Practice:
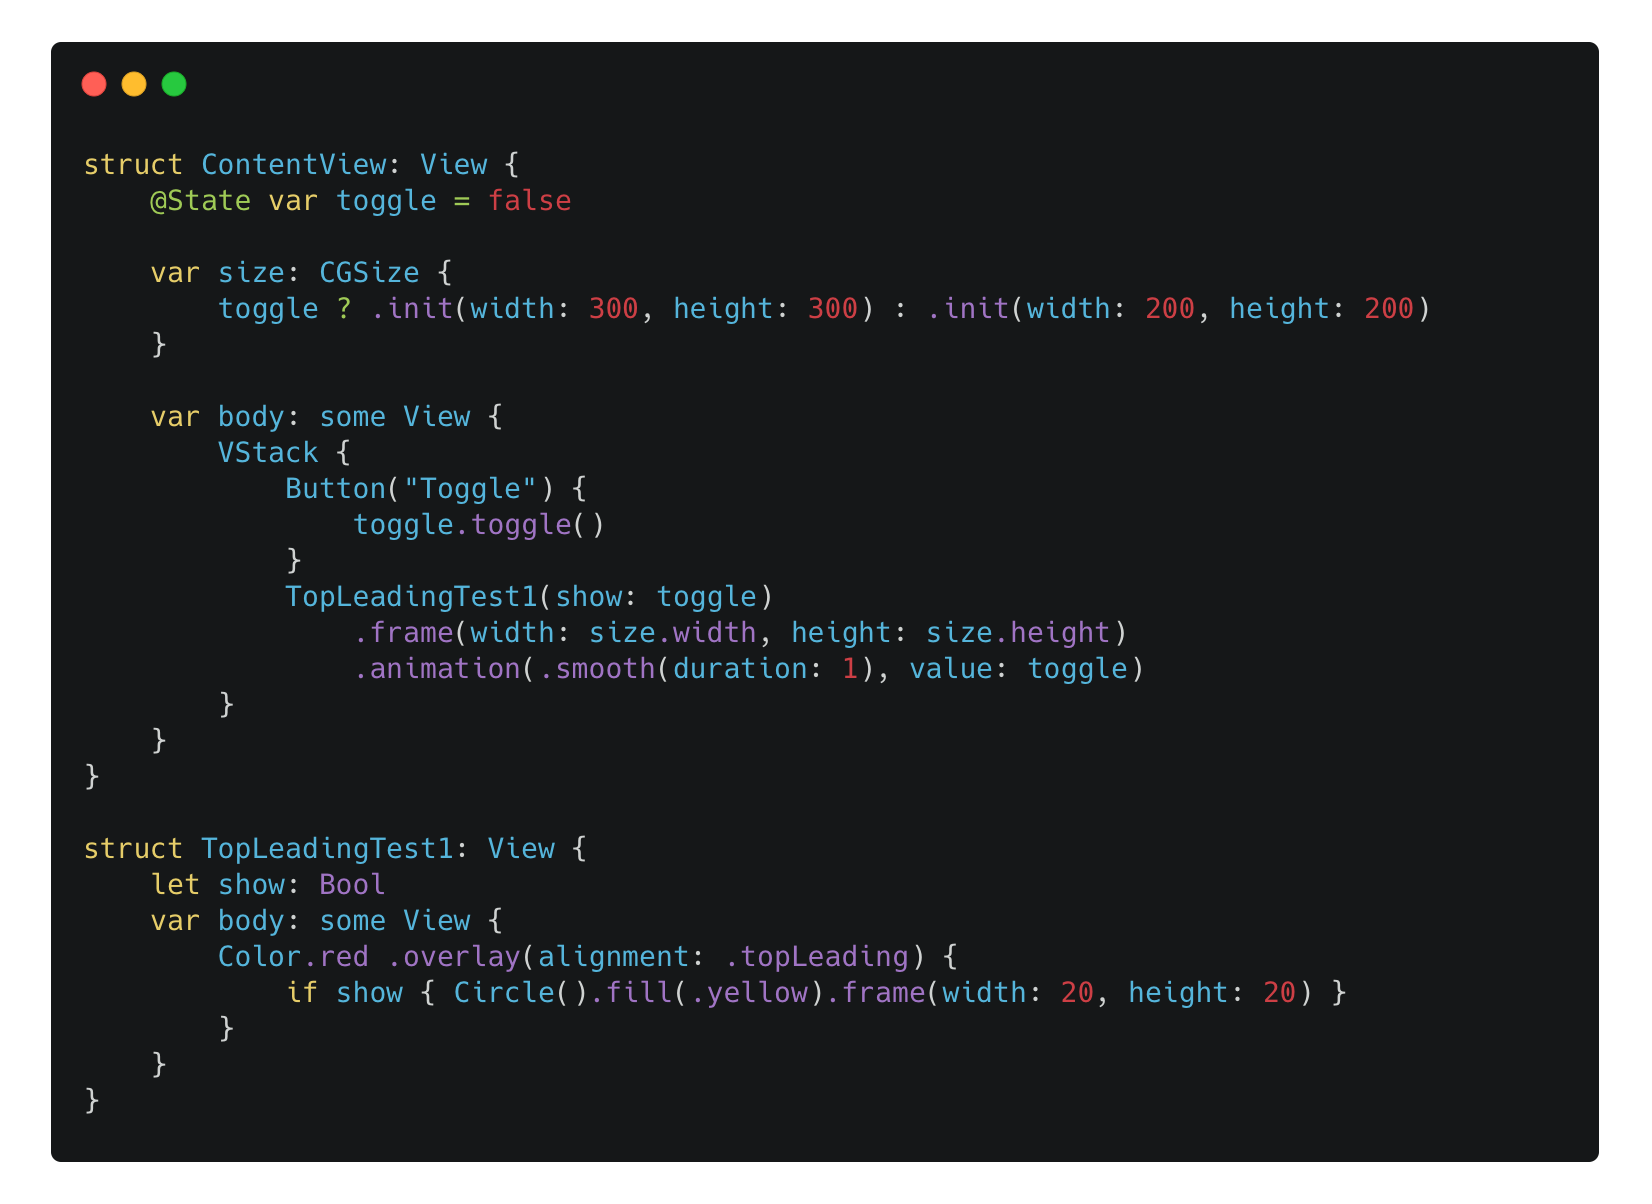
Without using geometryGroup(),the layer hierarchy will be:
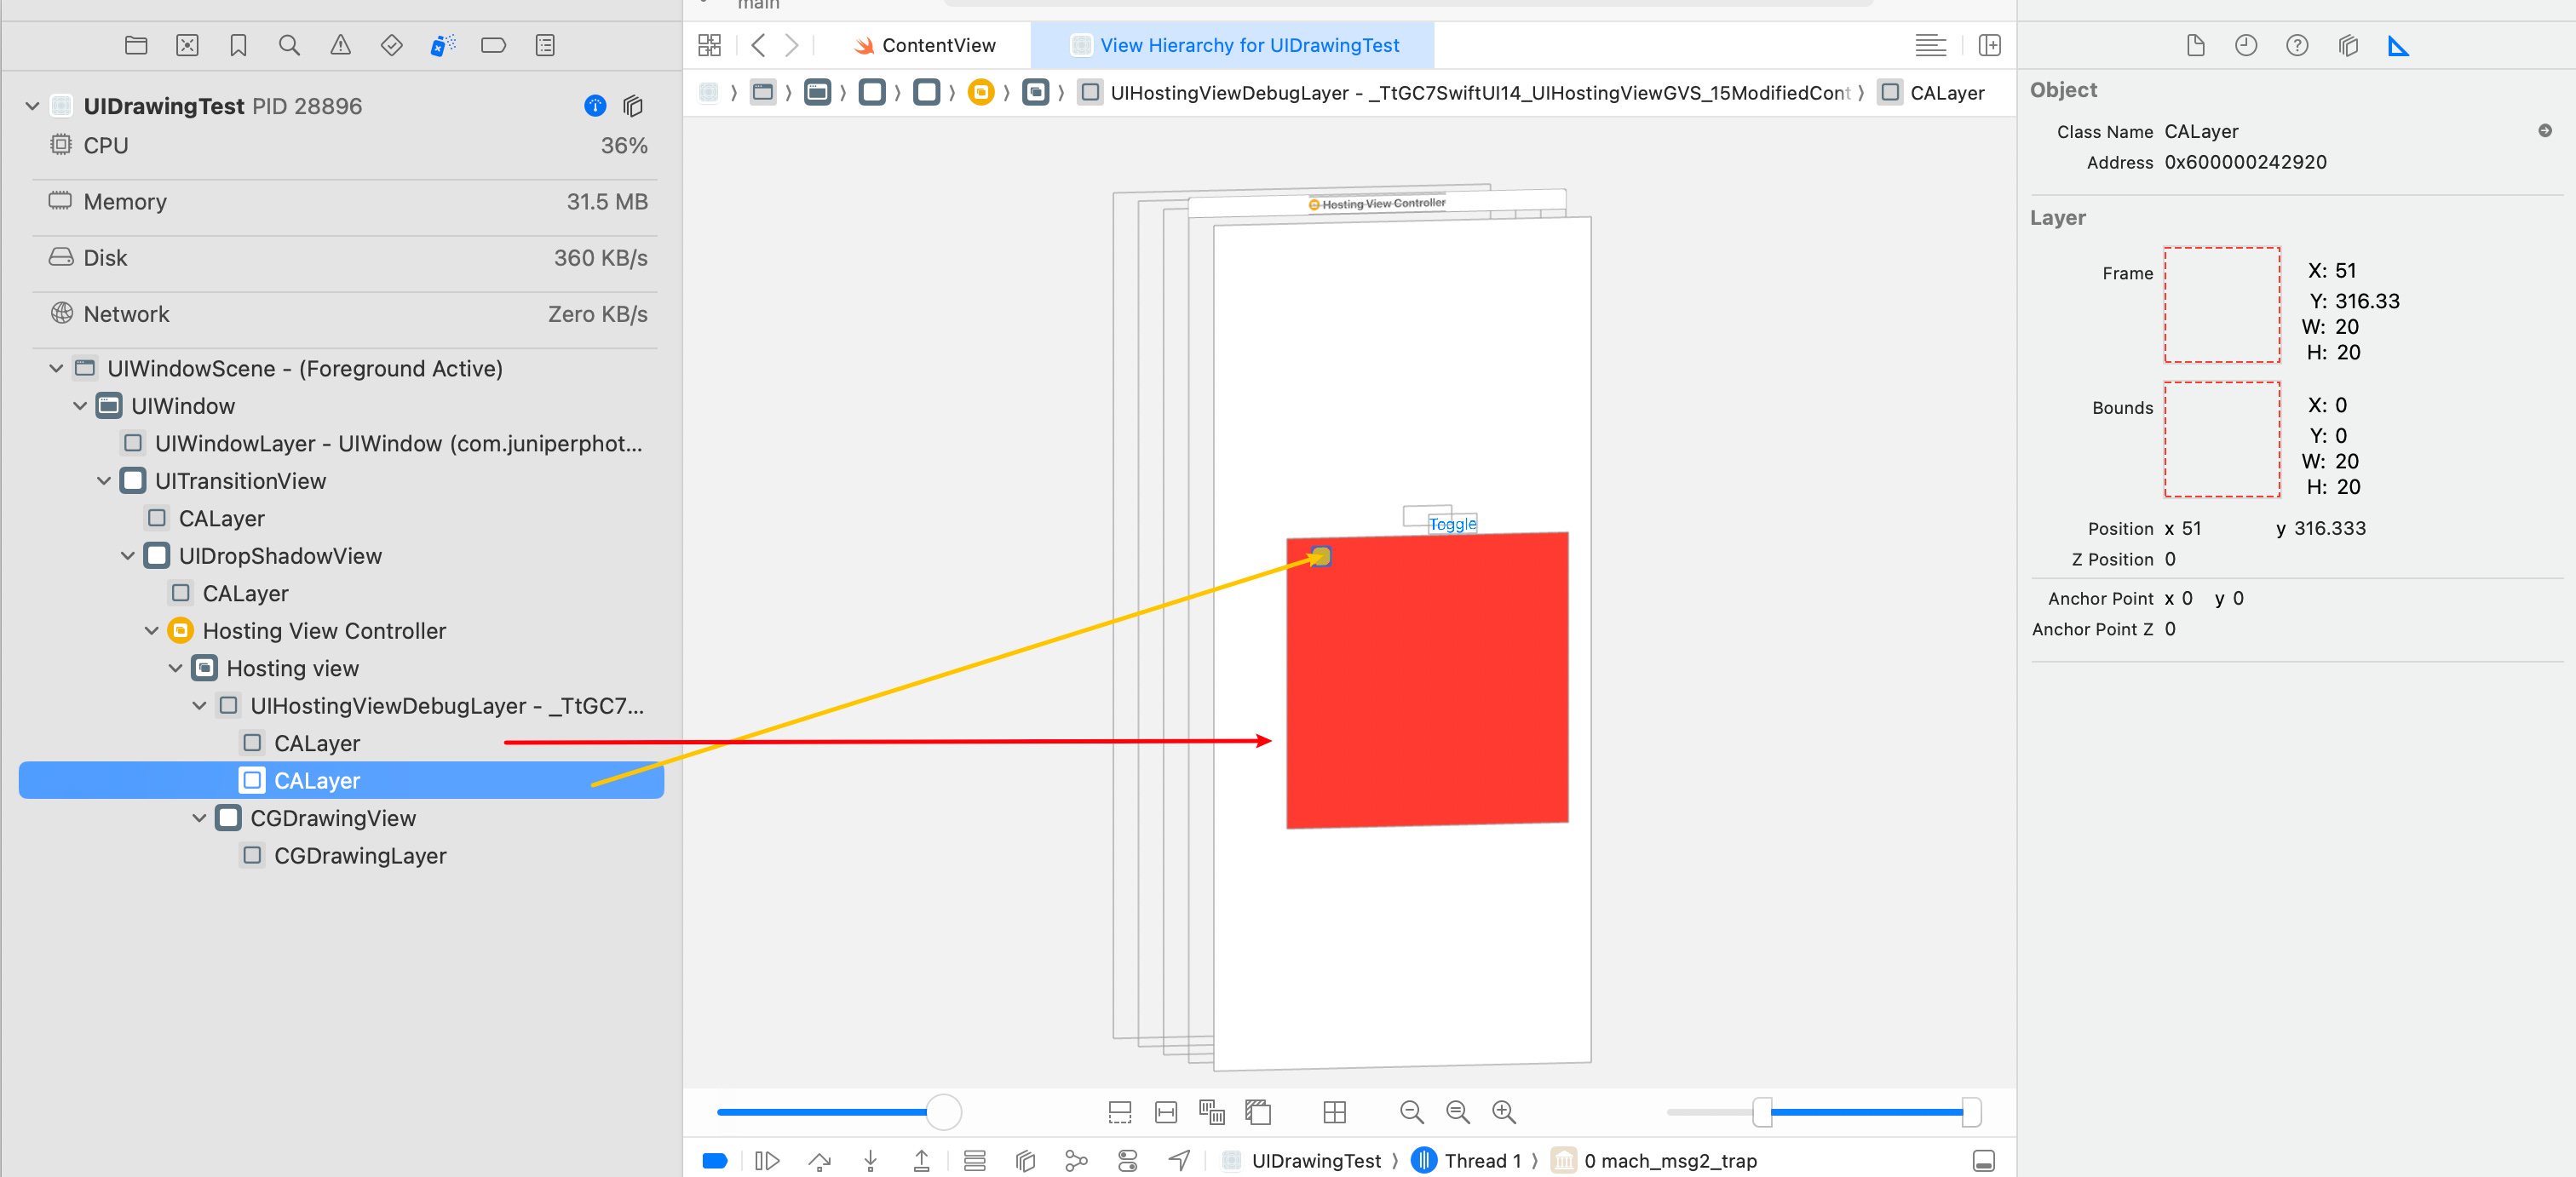
And when using geometryGroup(), that will be:
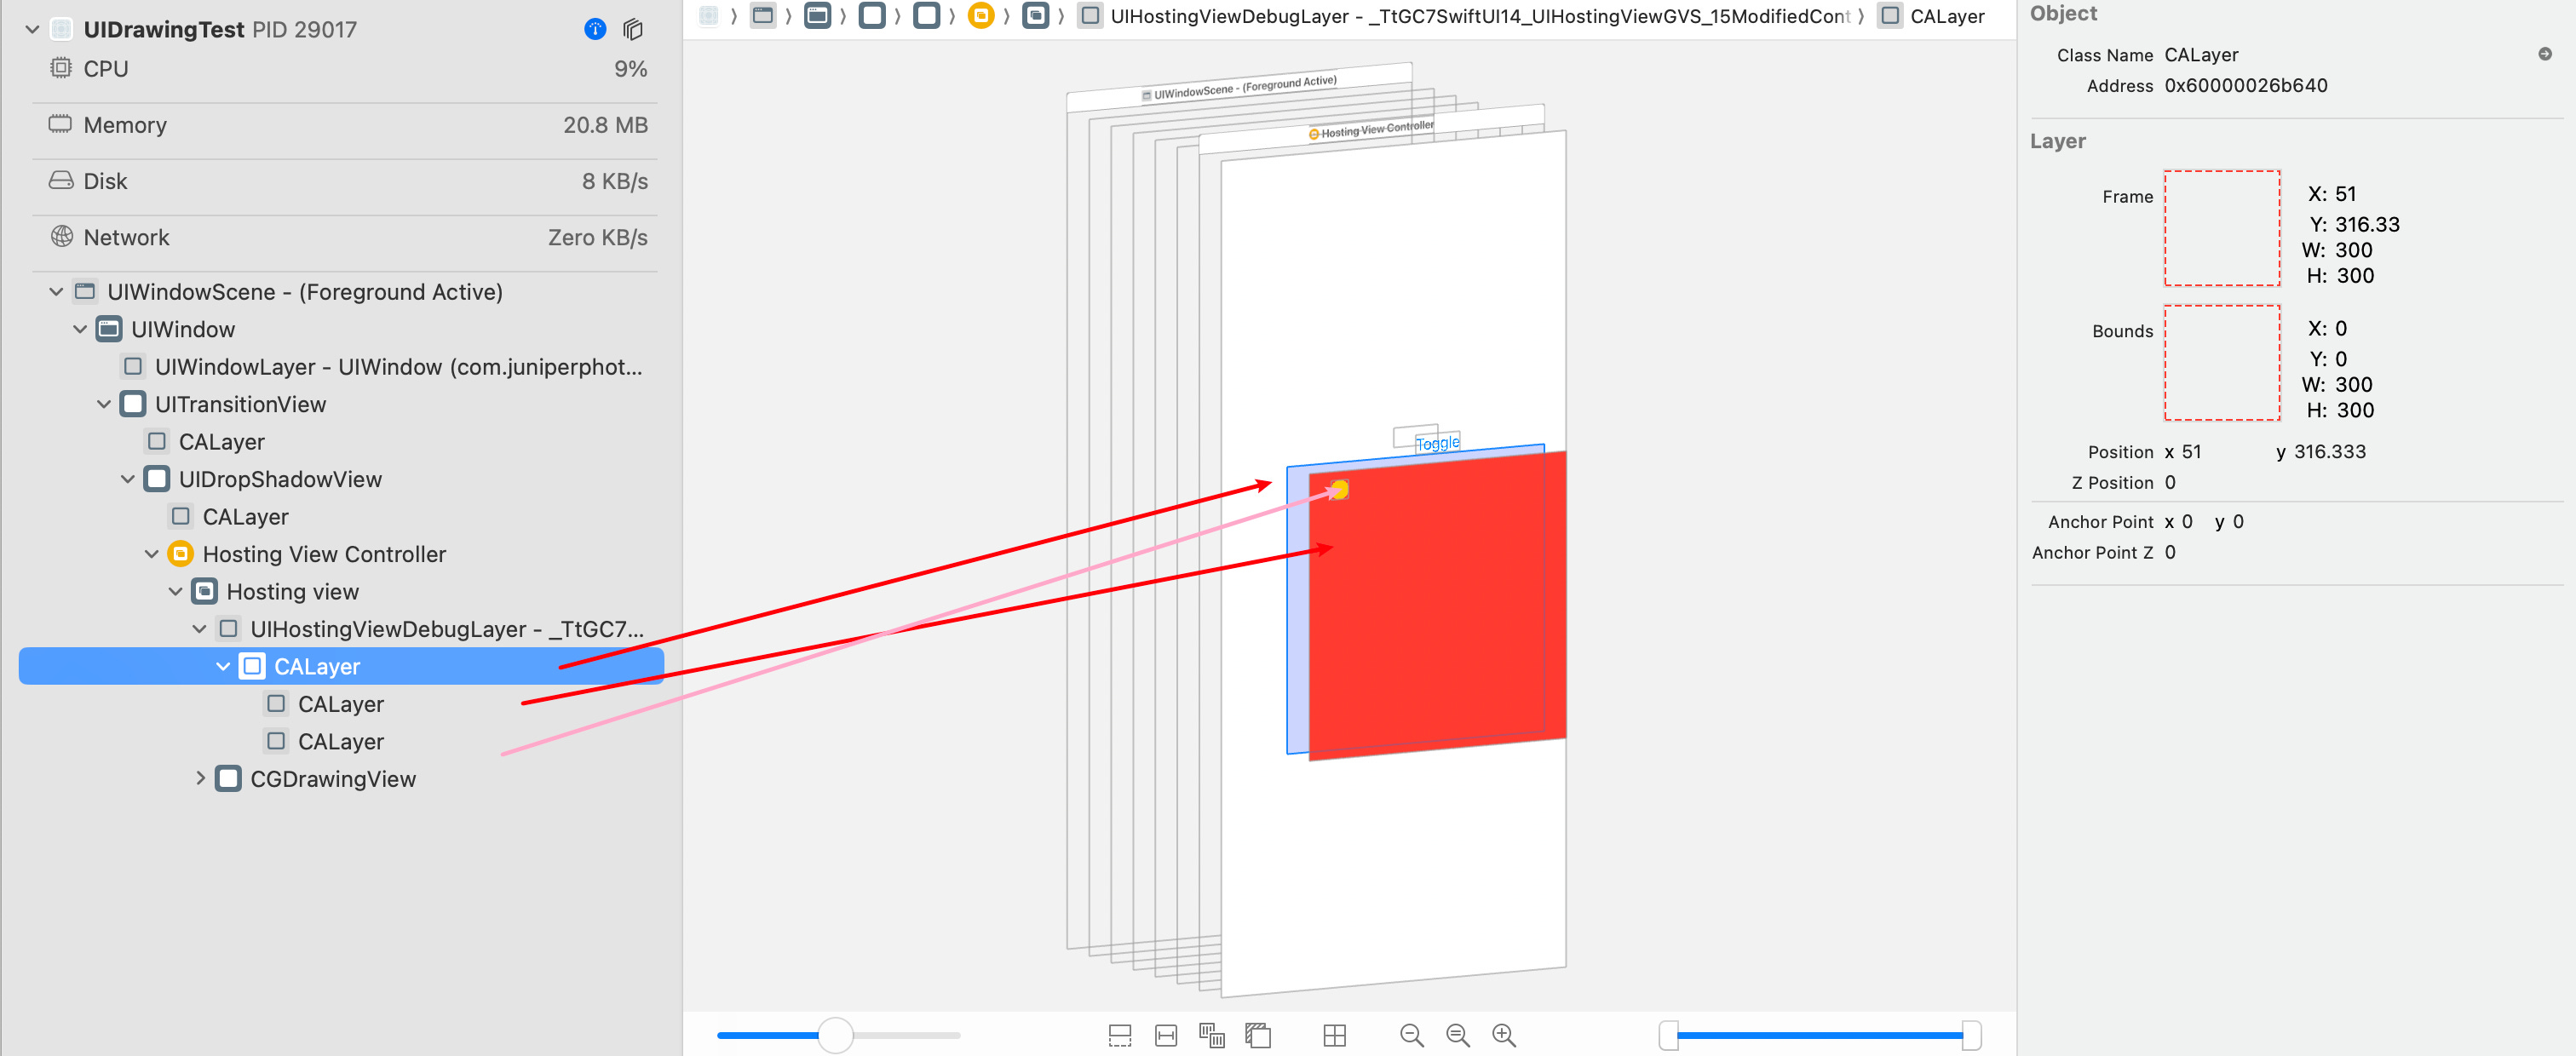
Though in both cases, those two CALayer representing the red rectangle and the yellow circle are siblings, but without geometryGroup(), their sublayer is the one as the root CALayer in this hosting view, which has the same size as screen on iPhone.
Extra: Inspecting your CALayer subclass in runtime
Sometimes it’s helpful to inspect some properties of CALayer, by subclassing it and bridging it to SwiftUI. Like UIView, you need to conform to the UIViewRepresentable protocol to provide your UIView implementation, which also overrides its layerClass property to the CALayer you subclass.
For runtime inspection, you can use CADisplayLink to run some code on each frame:

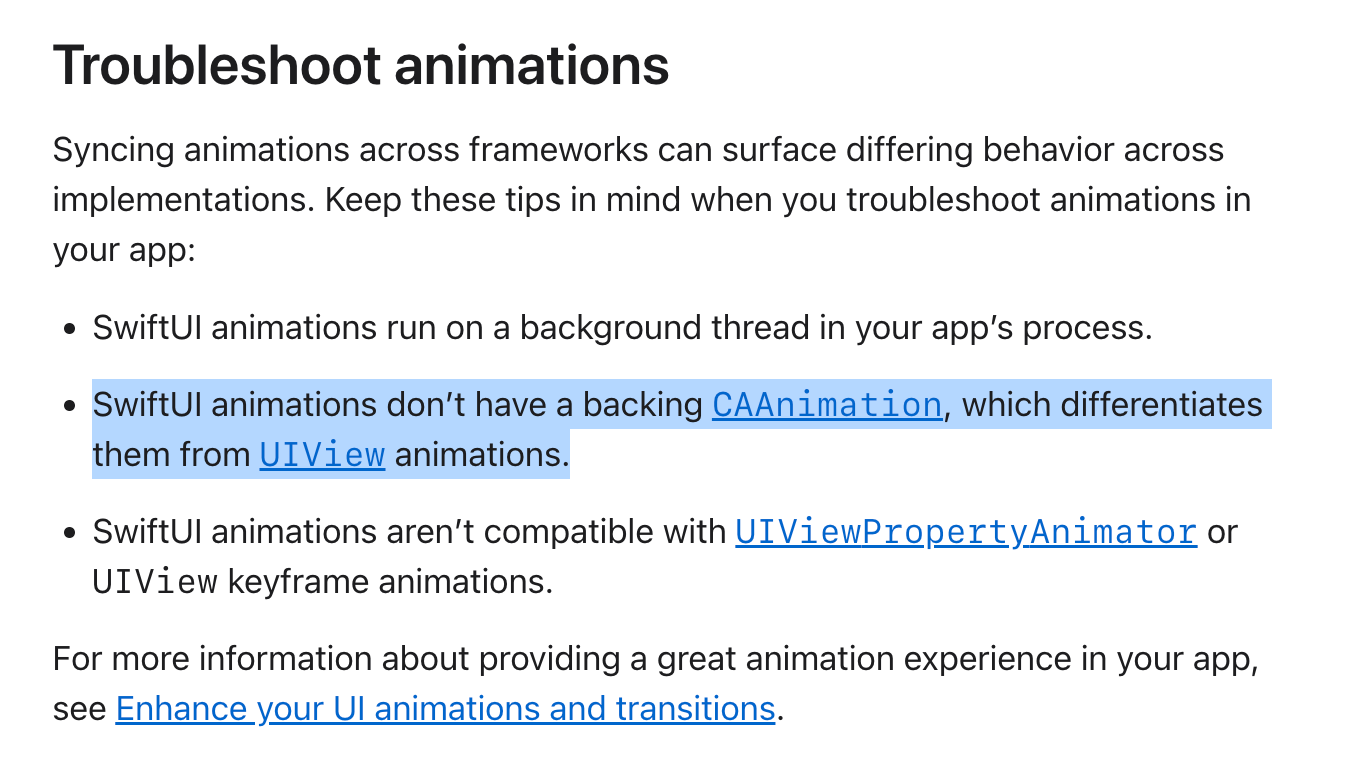
Note: after bridging CALayer to SwiftUI, you may try to check the animation state of CALayer by checking its animation keys in runtime. But the fact is that SwiftUI animation isn’t backed by CAAnimation, as mentioned in the Apple documentation:
SwiftUI animations don’t have a backing
CAAnimation, which differentiates them fromUIViewanimations.
Conclusions
With this article, I hope you now have a better understanding of what’s going on under the hood when using DrawingGroup, CompositingGroup, and GeometryGroup in SwiftUI.
Understanding these differences allows you to choose the right tool for your UI needs, avoid common rendering pitfalls, and optimize performance.