
Inspect & optimize Image Decoding timing in iOS

Displaying images in iOS is both easy and challenging. The easy part is that Apple provides multiple levels of APIs for developers, allowing you to choose what best fits your requirements. The challenging part is that there are pitfalls around these APIs, especially since their documentation is often unclear and they are not open-sourced.
Displaying images effectively involves at least three aspects: CPU usage, memory usage, and disk usage. This article mainly focuses on CPU usage, particularly when the actual decoding process happens, and on which thread and rendering phase it occurs.
Images may be decoded in the Commit phase on the main thread.
Images may be decoded in the Core Animation Commit phase on main thread, even you may think it was happening before and on your background thread.
Consider the following code, which leverages the top-level API from UIKit to create an UIImage object from a URL, and then assigns to a UIImageView.

It’s basically telling the UIKit that, we should show an image provided by a URL in a UIImageView. But as we know, displaying an image from a file requires some steps:
Load the encoded data from the image file;
Decode the encoded data to the decoded pixel buffer, which will actually contain the pixel data as well as other information needed to display an image.
Creating an UIImage from a URL and then assign it to a UIImageView is just a lightweight method: it should execute very fast, and normally we will do it on the main thread.
However, since both the loading and decoding processes take time, when exactly do they occur?
Actually, it happens in the Core Animation Commit phase, as in the app’s render loop in iOS:
Event phase: receiving events and update its UI state accordingly.
Commit phase: processing layout and drawing requests, updating layer tree and submitting layer tree to the render server.
Those phases occur on the main thread.
How do we examine when the decoding occurs? Since it’s a heavy-lifting process, decoding a large image will result in hitches or hangs in the app, which can be examined using the Xcode Instrument.
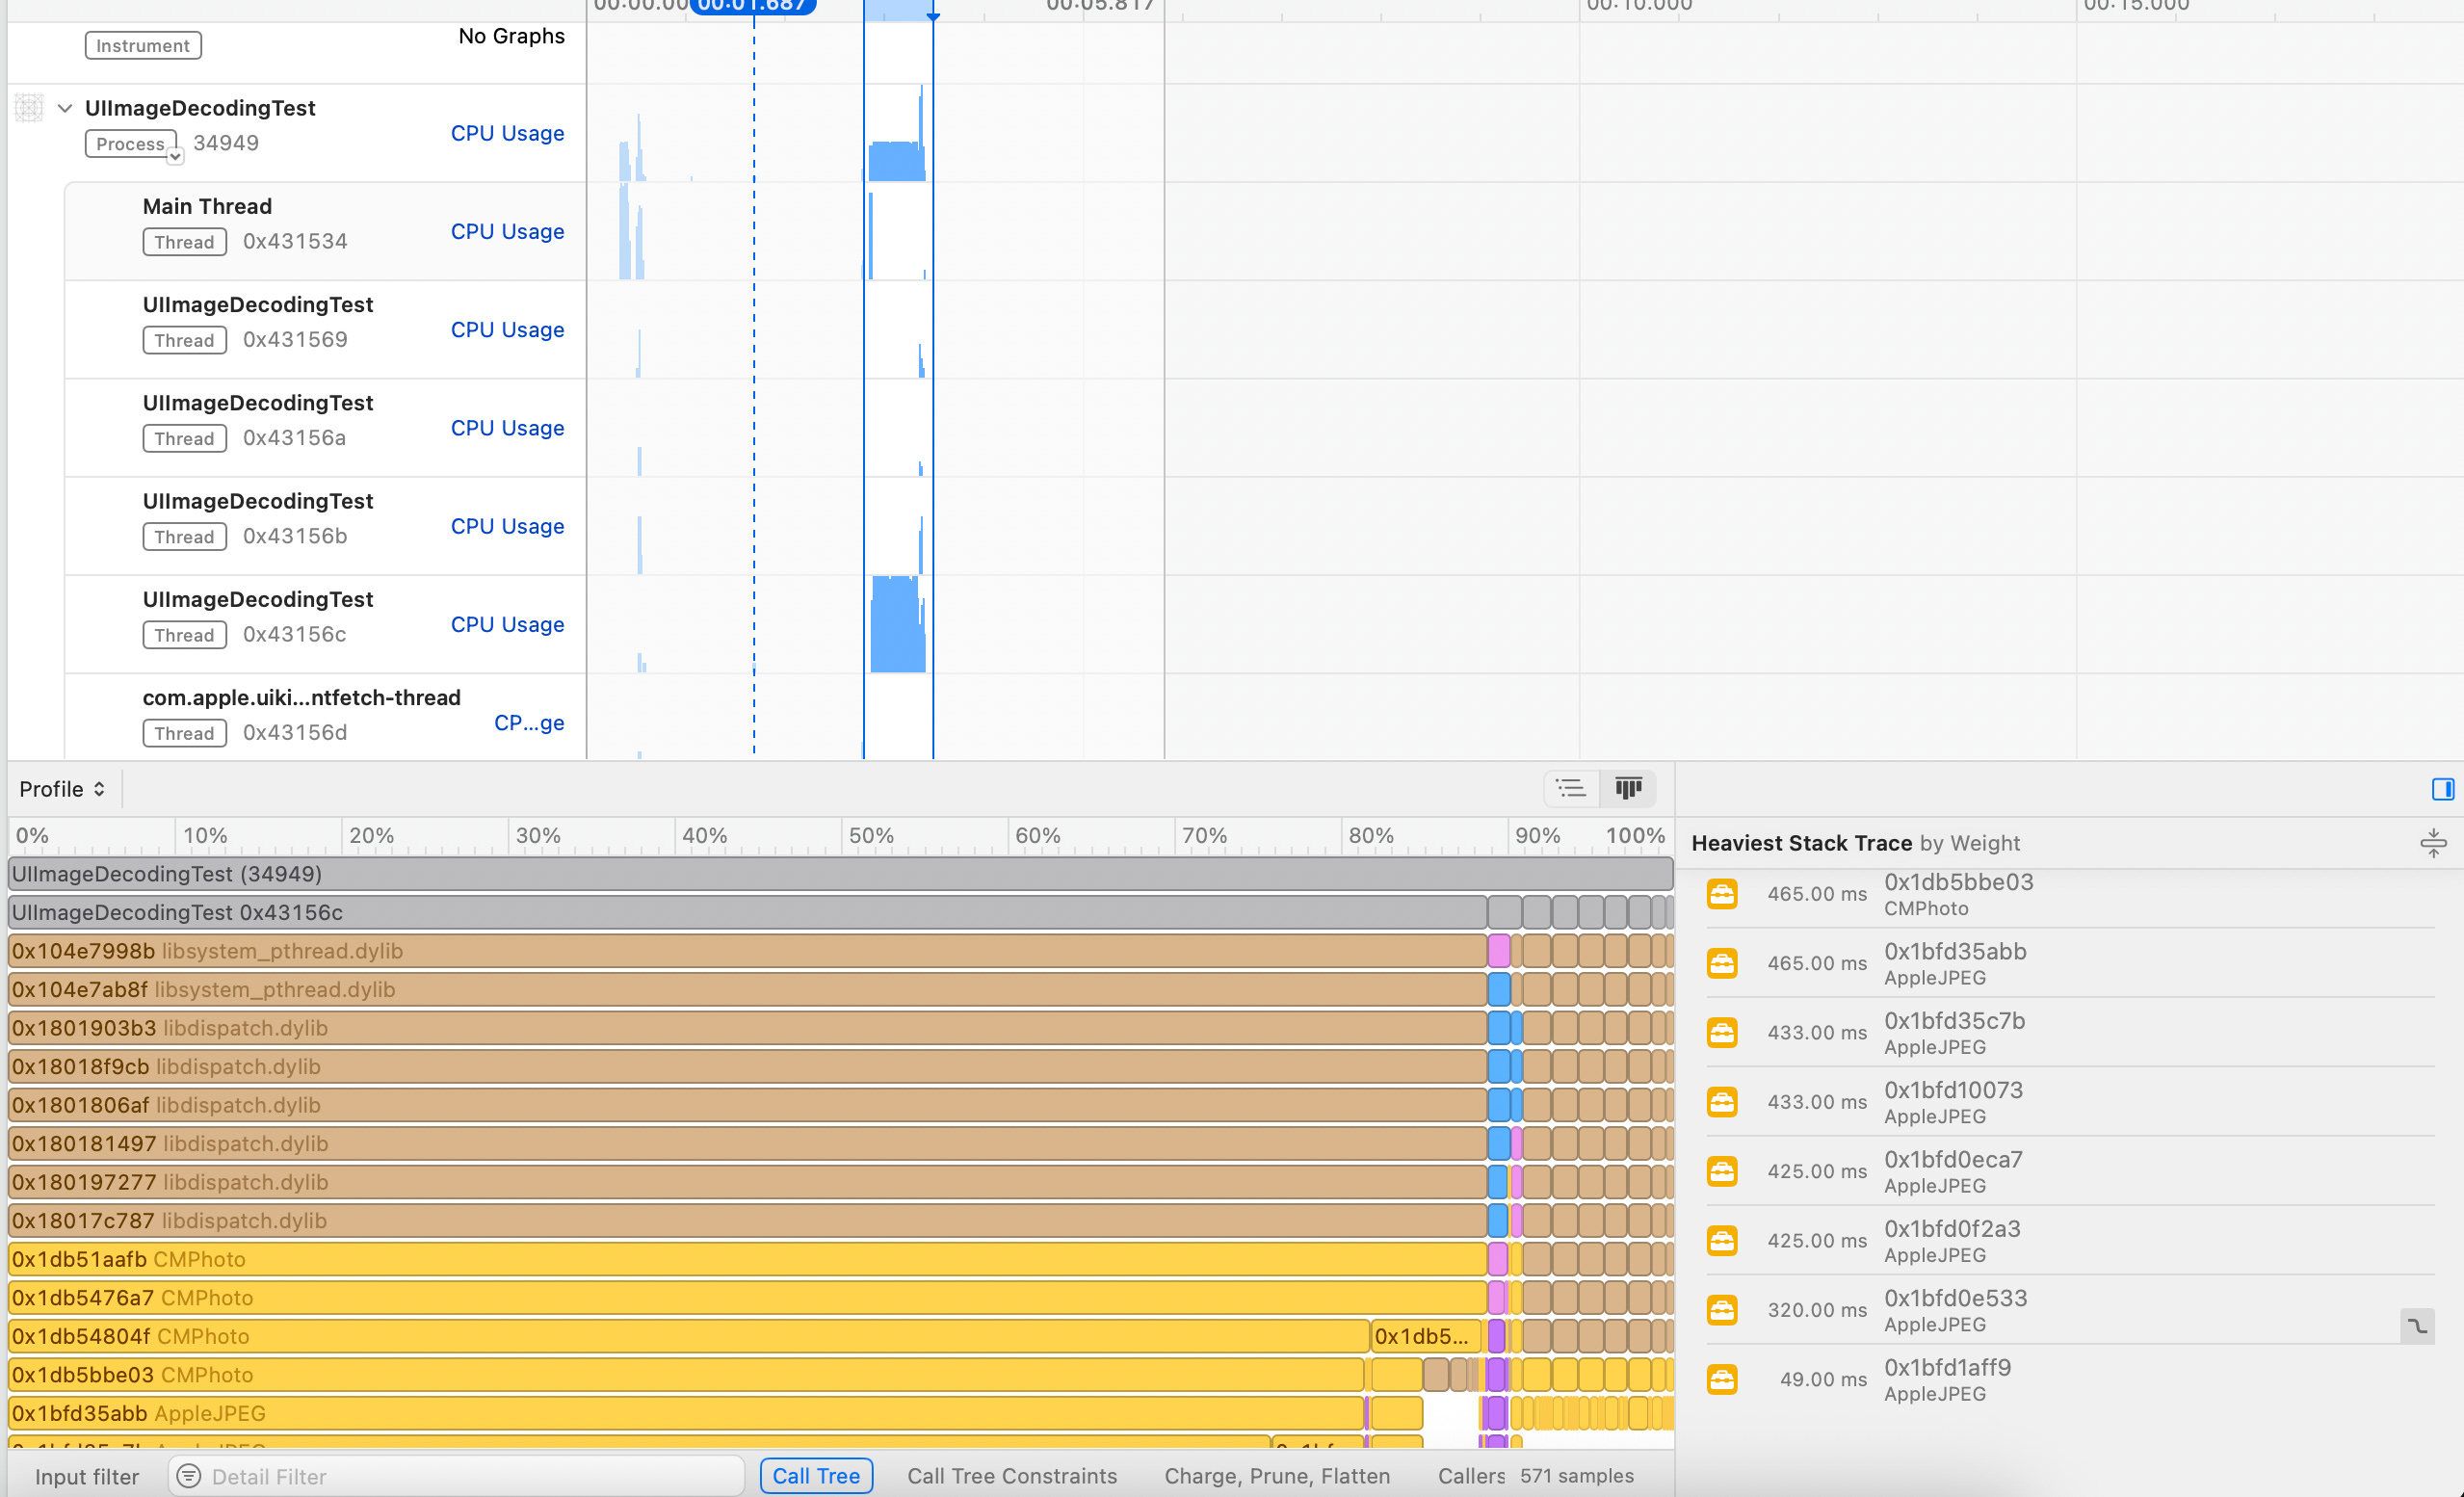
Consider the same code above, which loads a large image from a file (7952 × 5304), and then we use the Time Profile Instrument to examine the hang:
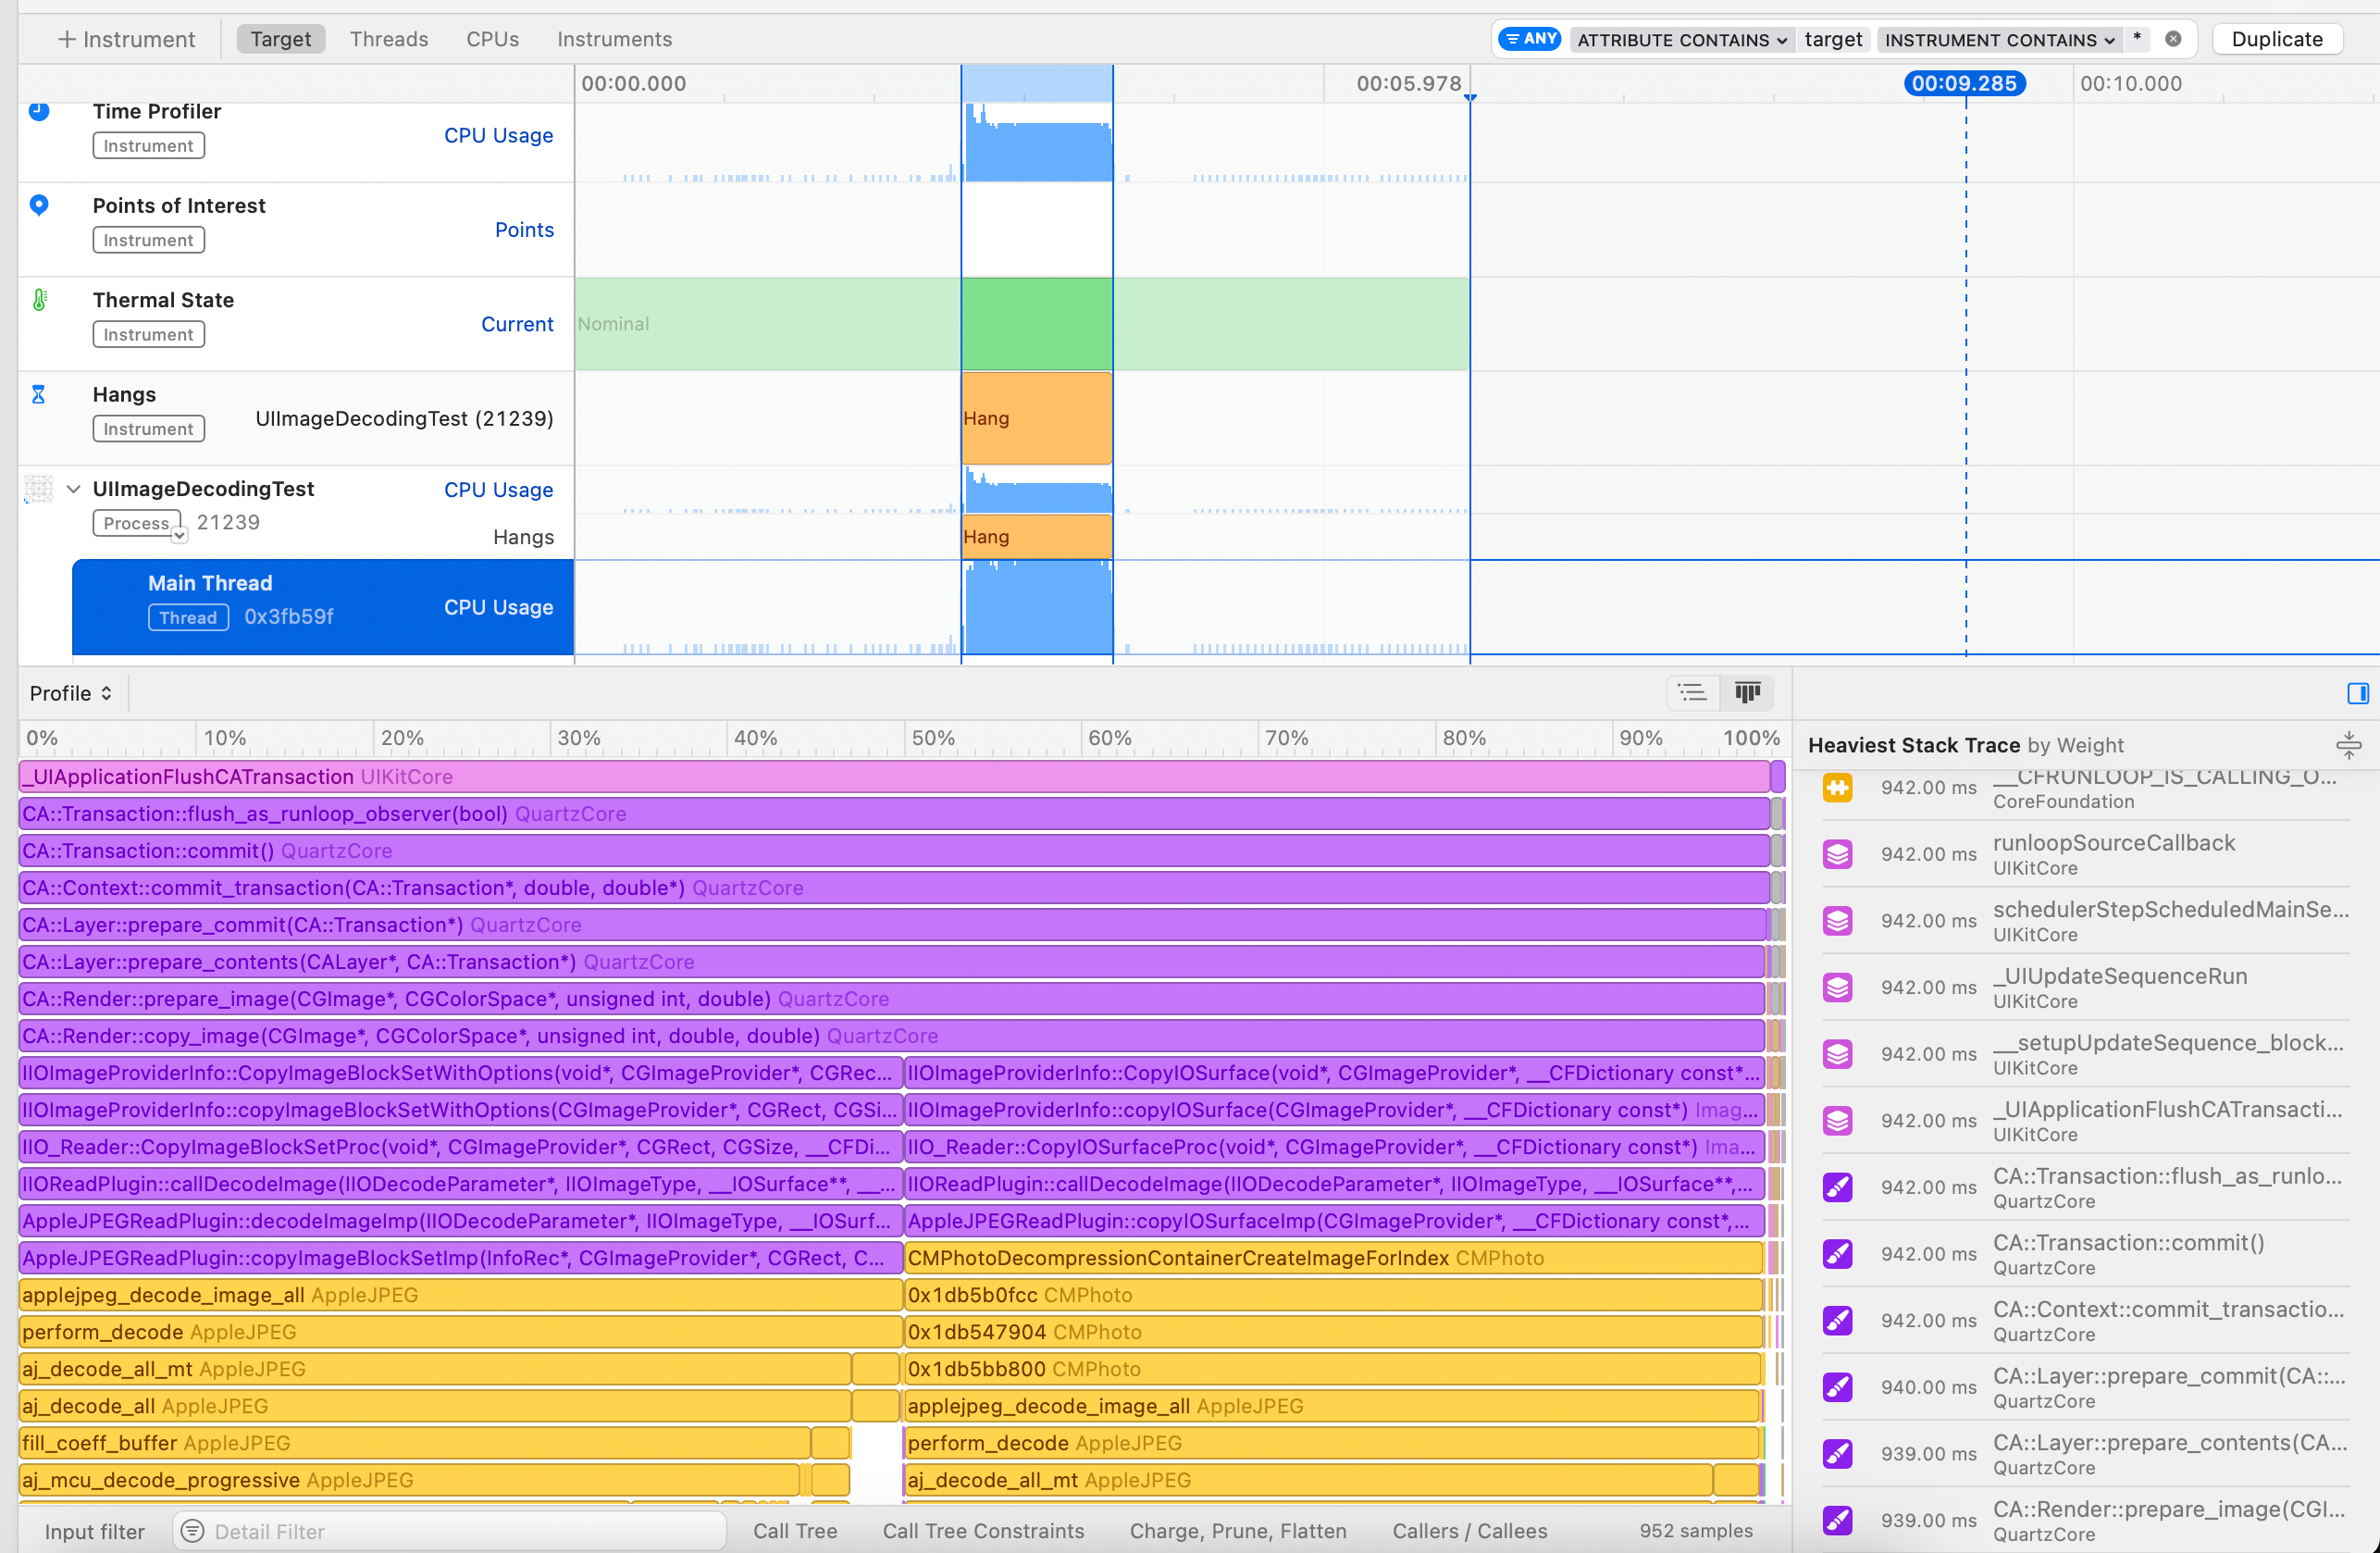
The image above is telling us:
A hang occured (after assigning the
UIImageto theUIImageViewand during the next render update).
According to the flame chart and the thread graph, during the hang, the main thread was mostly running the
CA::Layer::prepare_commitmethod, which will decode the image using some underlying APIs likeAppleJPEGReadPlugin.
The hang existed for almost a whole second.
Here are some takeaways:
When assigning
UIImageto aUIImageViewdirectly, the decoding process will happen during the Core Animation Commit phase on the main thread.
When using SwiftUI, the process remains the same when you using the
Imageview with theUIImagedata source.
The time to decode the images surely depends on the dimensions of the images. You may never notice hangs when decoding small images to views. However, even though it takes relatively less time to decode one small image, for a large amount of images inside a grid view like
UICollectionView, there is a risk that the app will still hitch, even when the images are small (200×200).
Move the heavy lifting things off the main thread in advance
Now, how can we move the heavy lifting off the main thread in advance? There are a few ways to achieve this, depending on how deeply you want to interact with the framework. This section will cover those techniques:
Using
UIImageandUIImageReaderto prepare thumbnail off the main thread
Creating a
CGImageusing ImageIO (and its pitfall)
Creating a
CGImageusing Core Image
Creating a
CVPixelBufferusing Core Graphics
Using UIImage and UIImageReader to prepare thumbnail off the main thread
As the top-level framework, UIKit actually does provide some methods for use to load the thumbnail (or the full resolution) of an image in the background.
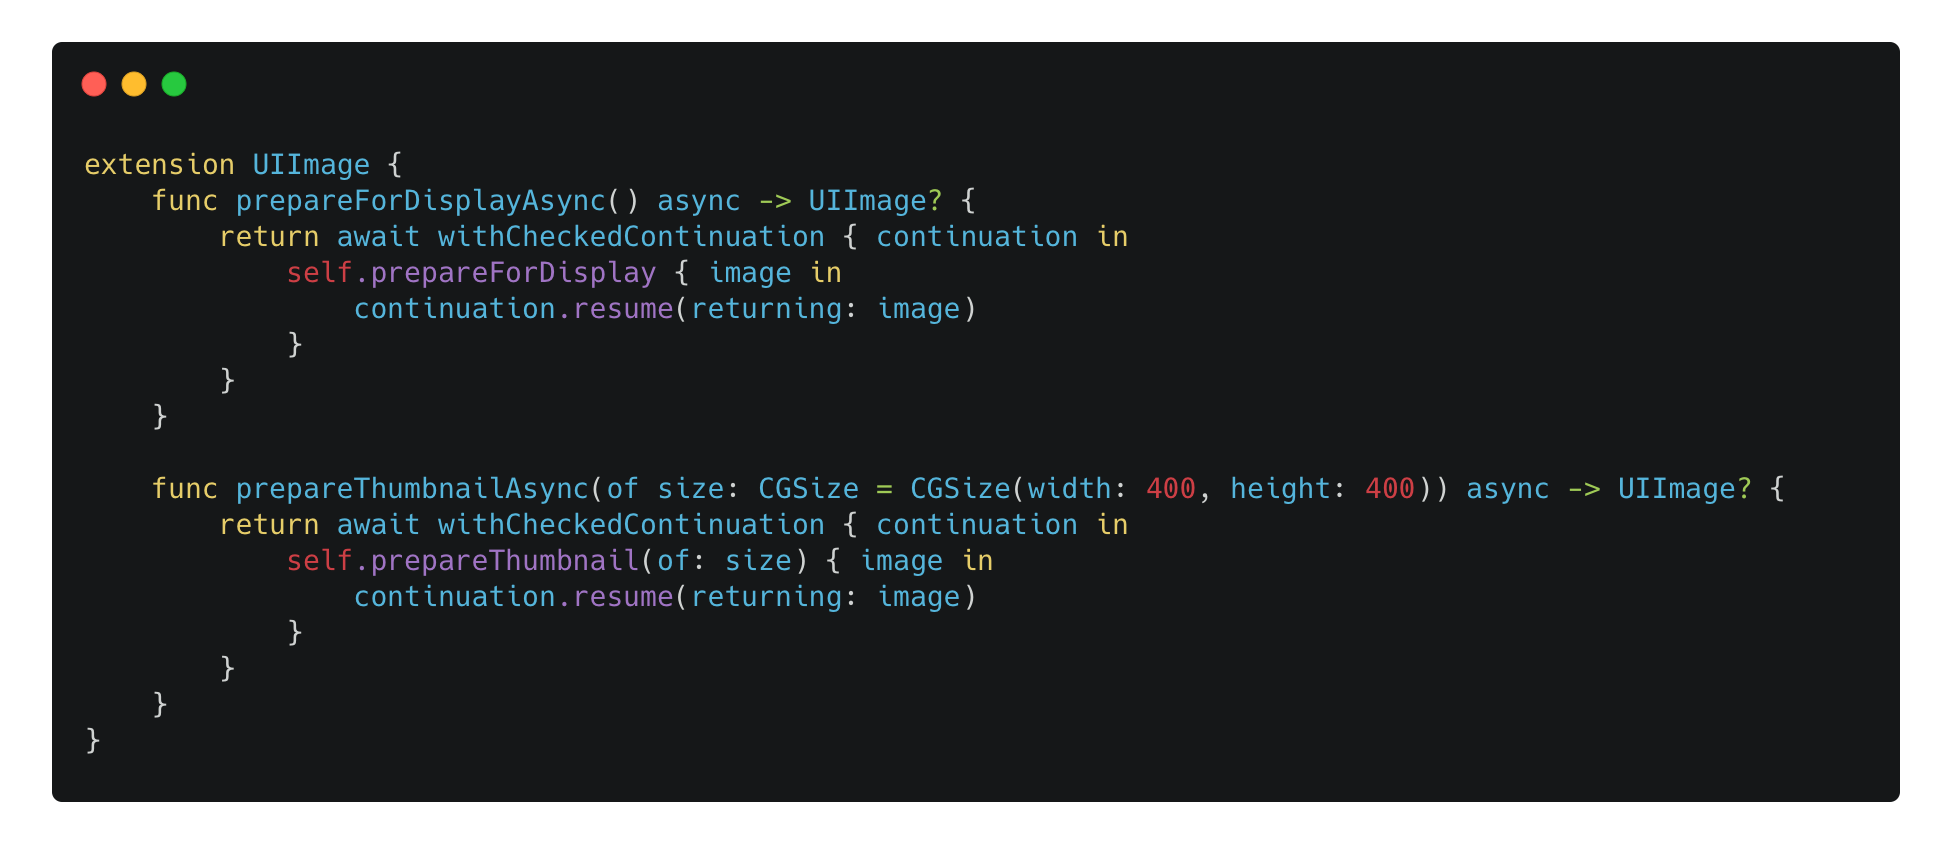
For UIImage, you can use the prepareForDisplay(completionHandler:) method to get a new UIImage that is decoded in the completion handler. Or, by using the prepareThumbnail(of:completionHandler:) method, you can get the thumbnail of a specific size. You can bridge those methods to the Swift Concurrency world:
And here is how you use those APIs:
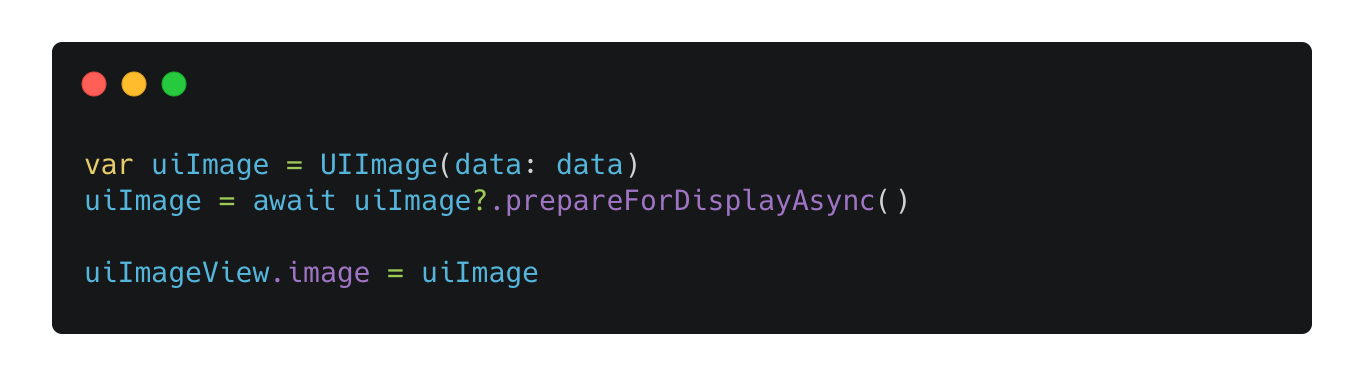
Then, we examine the decoding process by inspecting the flame chart. Now we can see that the main thread is away from being busy decoding images.
As for the new UIImageReader API, it’s introduced in iOS 17, and its main purpose is to provide a way to get a UIImage with HDR.
WARNING: Getting HDR
UIImagein iOS 17 and display it in aUIImageViewwill result in major memory leak internally. Apple have fixed this issue on iOS 18.
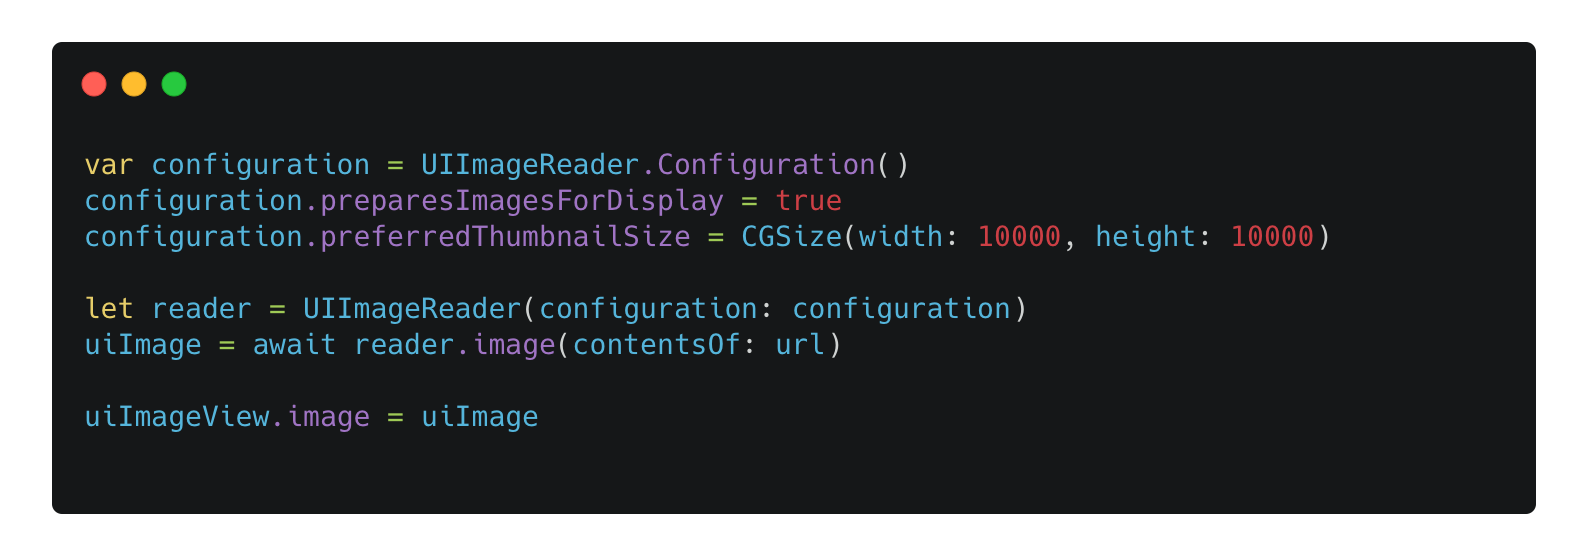
NOTE: Be sure to set the
preferredThumbnailSizeof aUIImageReader.Configuration, even you want to get the full-resolution image. Without doing so will result in the image being decoded in the commit phase mentioned earlier.
Creating a CGImage using ImageIO
Aside from UIImage, CGImage is also a common representation of an image, in relatively high level. Note that getting an instance of CGImage doesn’t necessarily mean the image has been decoded.
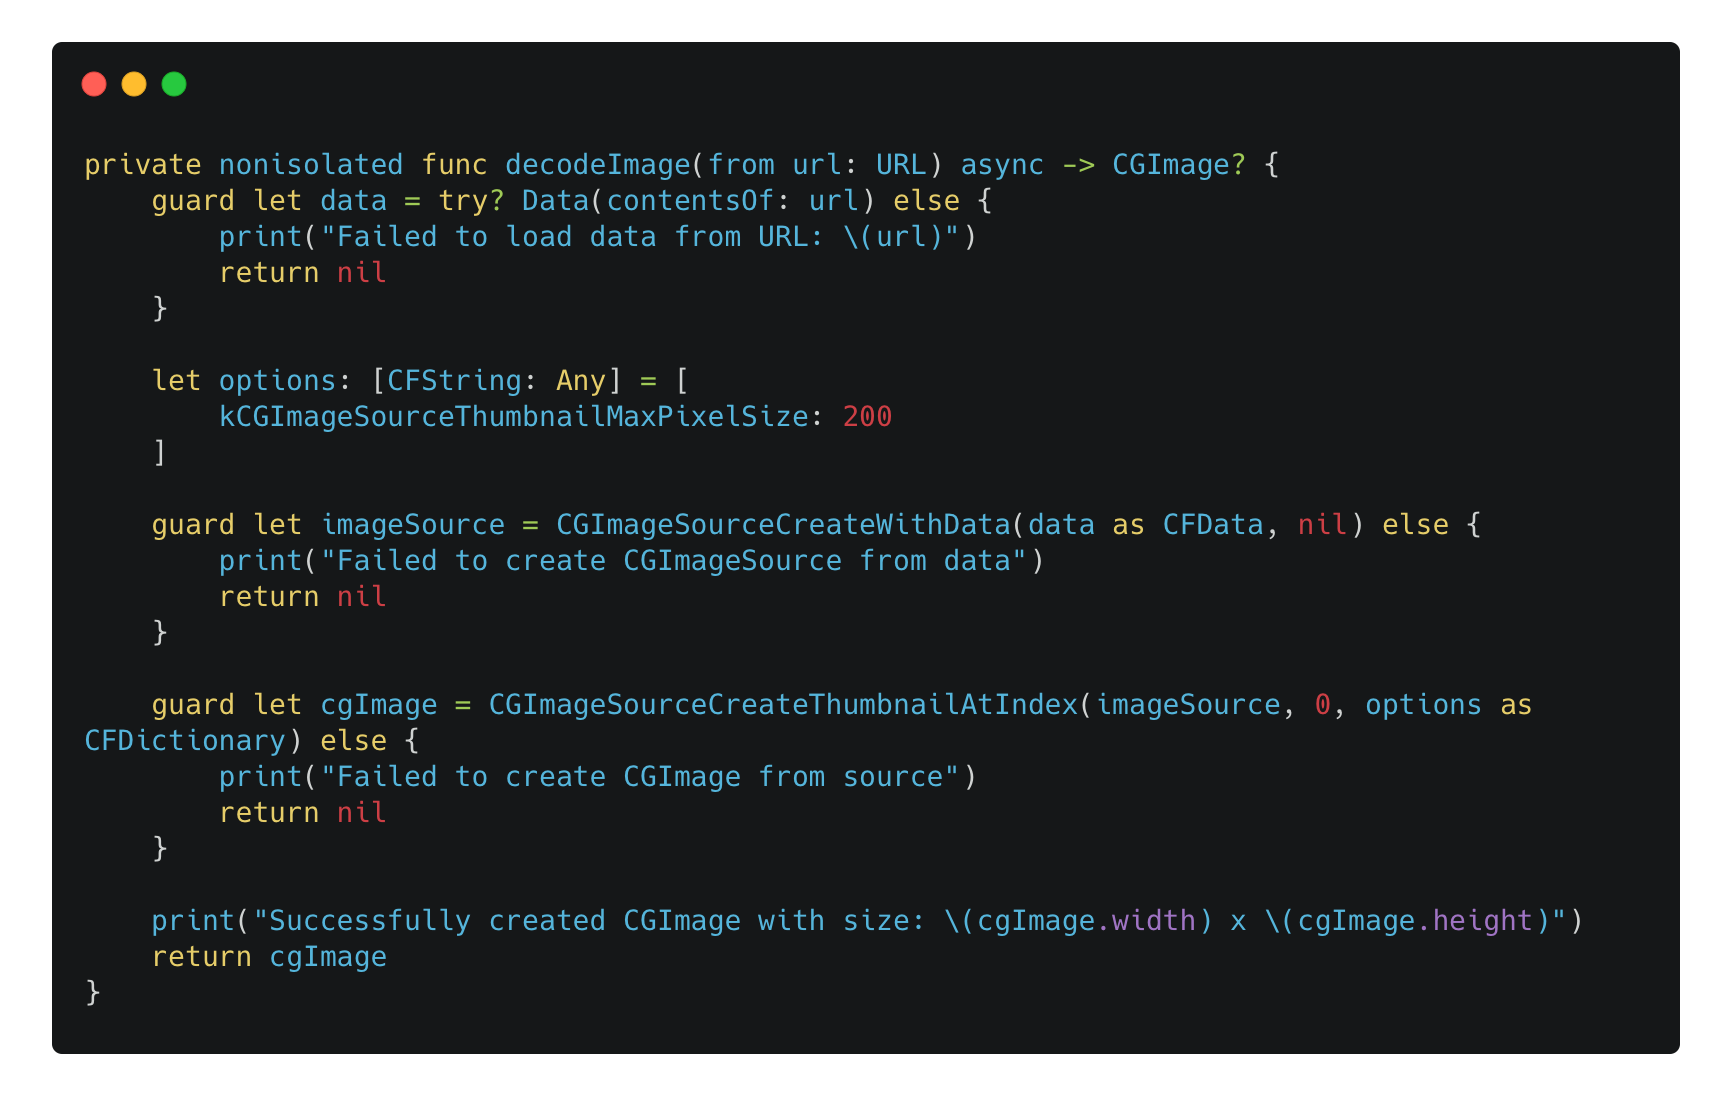
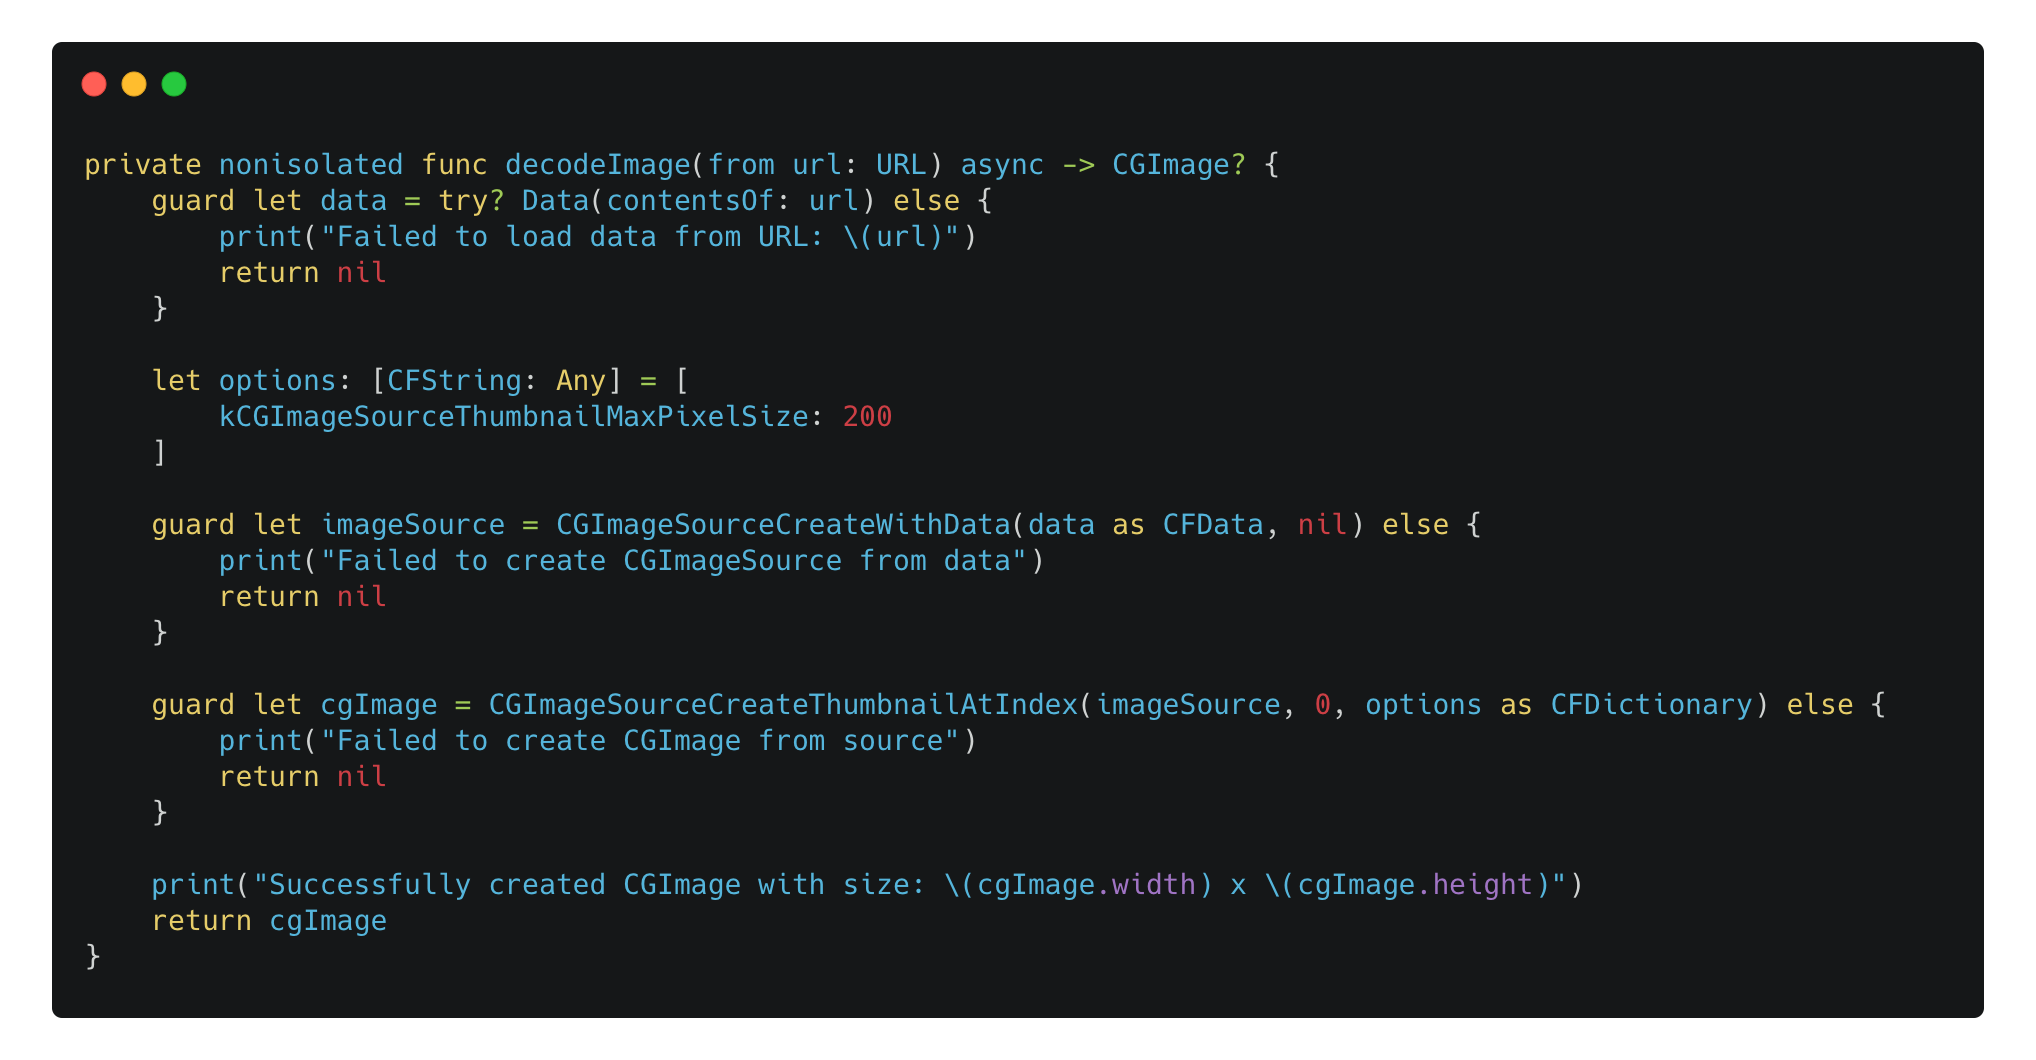
To create a decoded CGImage from a URL:
You create a
CGImageSourceby usingCGImageSourceCreateWithData(:_:_)method.
Then use
CGImageSourceCreateThumbnailAtIndex(:_:_:)
method to create a thumbnail, passing a dictionary as options including the key ofkCGImageSourceThumbnailMaxPixelSize.
NOTE: There is a key named
kCGImageSourceShouldCacheImmediately, and it seems to be able to cache (or decode) the image synchronously in the current method. But it’s actually not true.
Also, you have to make sure that you are using the CGImageSourceCreateThumbnailAtIndex(:_:_:) method even you would like to get the full-resolution image, instead of CGImageSourceCreateImageAtIndex(_:_:_:), otherwise the image will still end up being decoded in the commit phase on the main thread.
Creating a CGImage using Core Image
Note: this method is NOT recommended, especially when you want to display a scaled but still image using the top-level framework. You can create a CIImage as the input image, apply a filter and use the CIContext to create a CGImage.
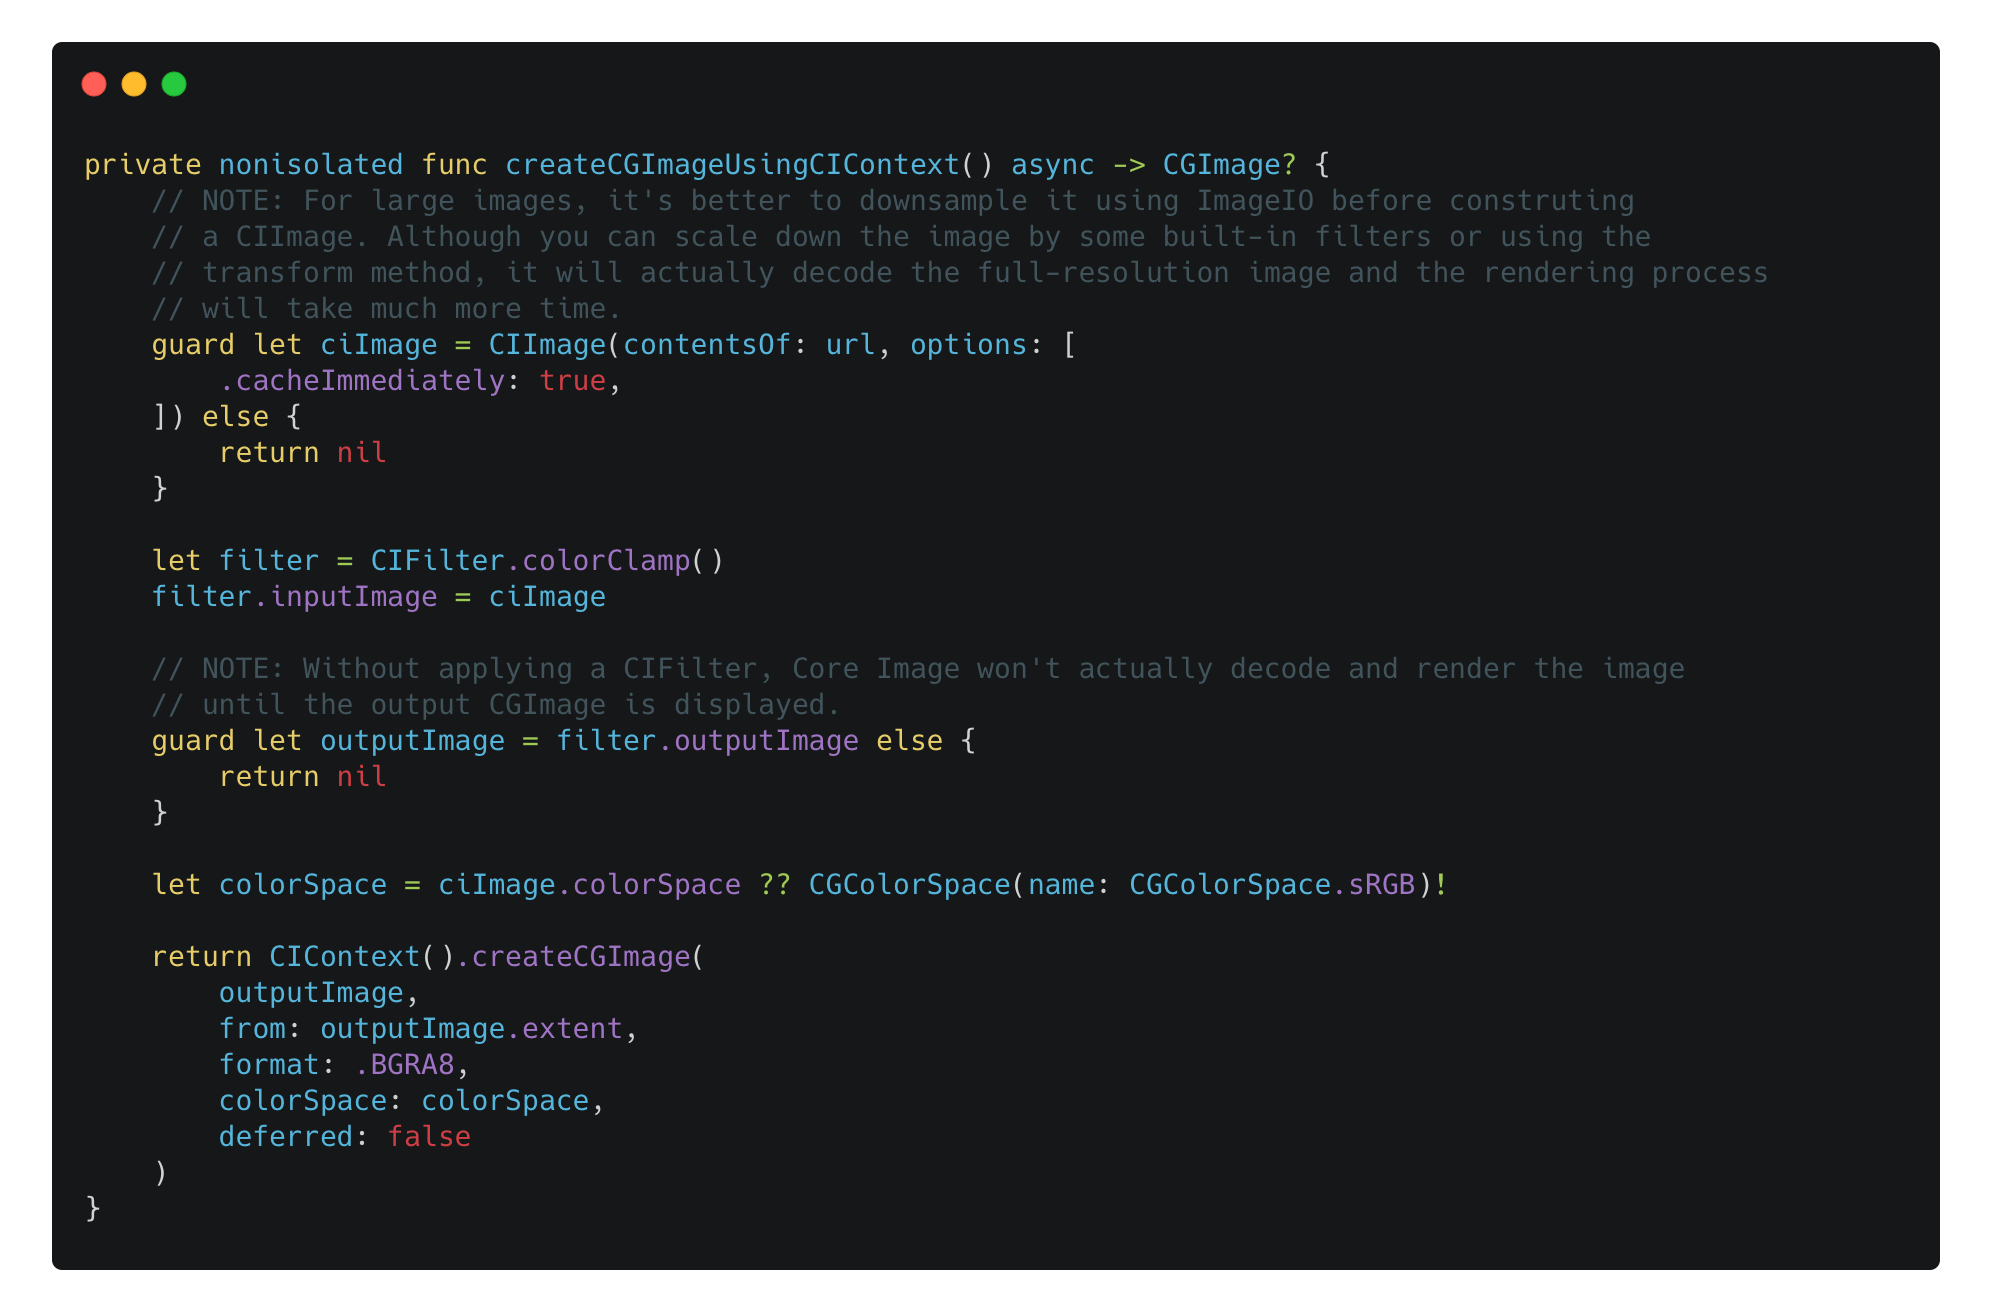
It’s important to know that:
You have to use at least one
CIFilterwhen doing so, otherwise the decoding process will still happen in the commit phase, and setting deferred to false won’t change this behavior.
You can leverage the
cacheImmediatelyoption when constructing aCIImage. This will decode the image right away. However, for some unknown reason, by using this approach, the system will try to do some image conversion using vImage in the commit phase, which will still slow down the main thread.
It’s best to utilize the ImageIO to create a downsampled image, before passing it to do the image processing (if any).
Ultimately, it’s best to render image to a
MLTTexturein aCAMetalLayerwhen using Core Image. Core Image is designed to display dynamic images like in a image processing scenario.
Creating a CVPixelBuffer using Core Graphics
Alternately, you can create a CVPixelBuffer using Core Graphics. As for CVPixelBuffer, it really contains the pixel buffer of our image, as the name suggested, as well as other information about the pixel data (for example, the color space related properties).
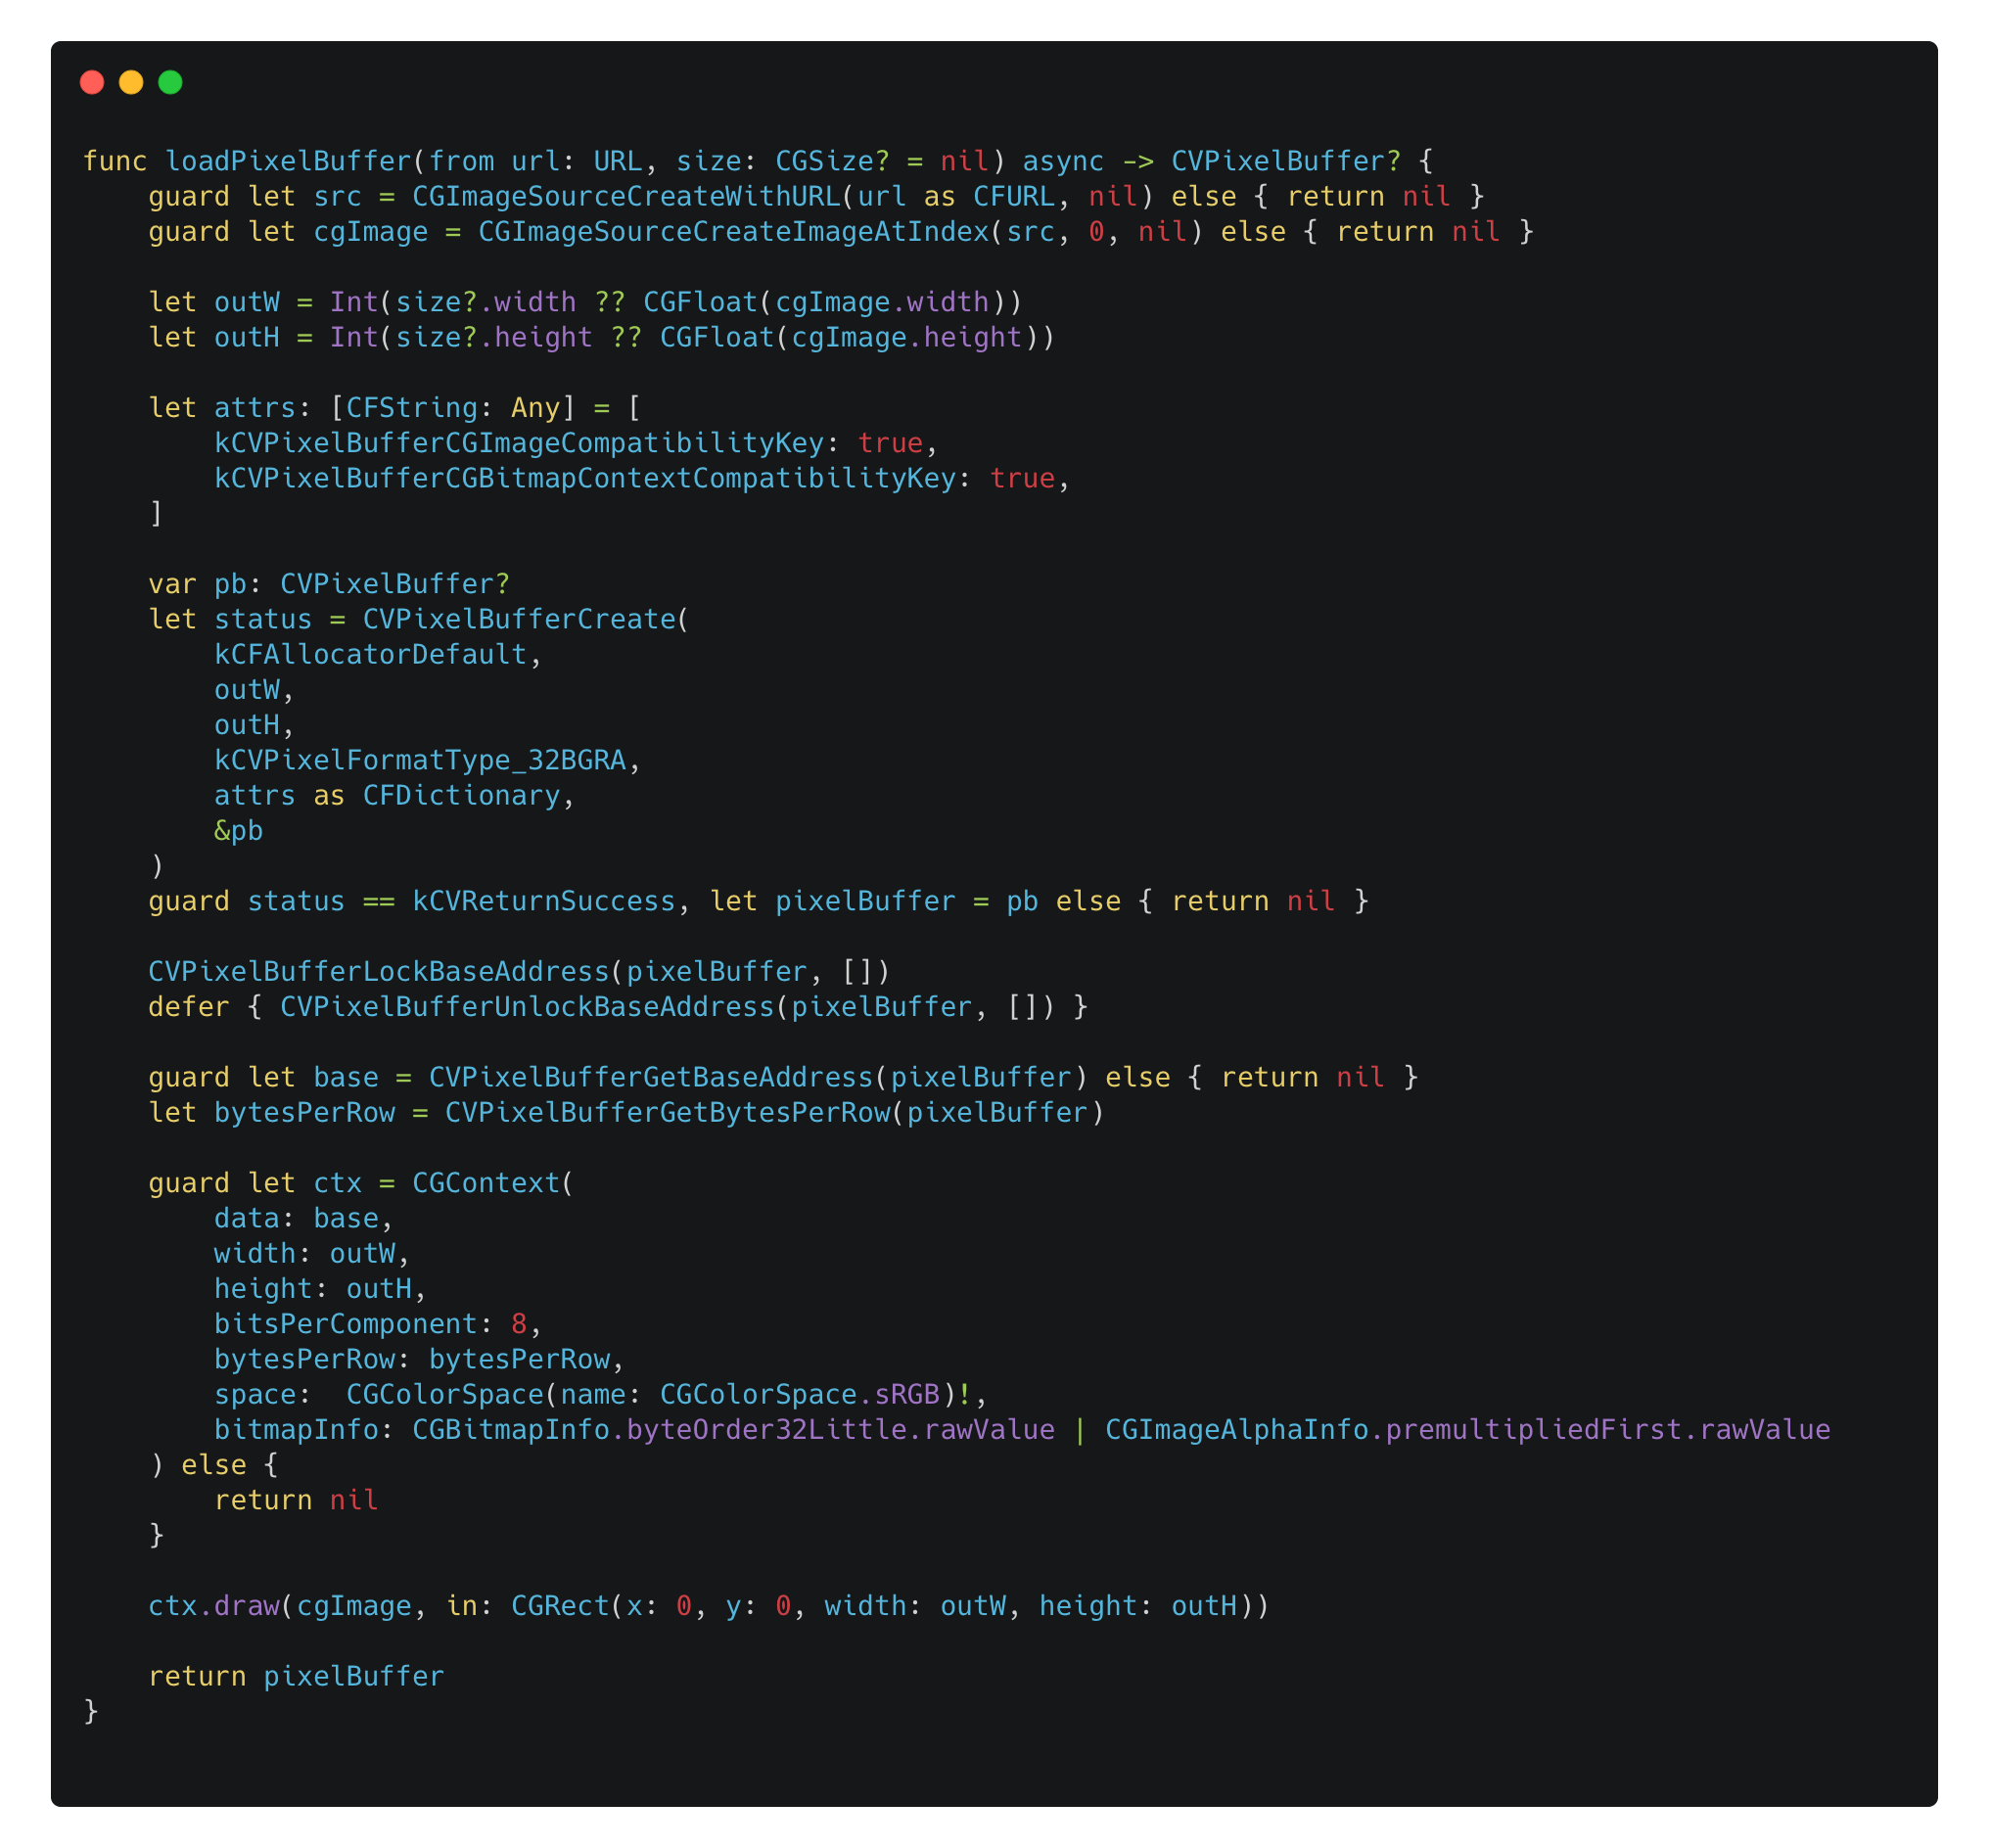
There is no way to directly display a CVPixelBuffer using top-level view. Instead, you create a CGImage from a CVPixelBuffer:
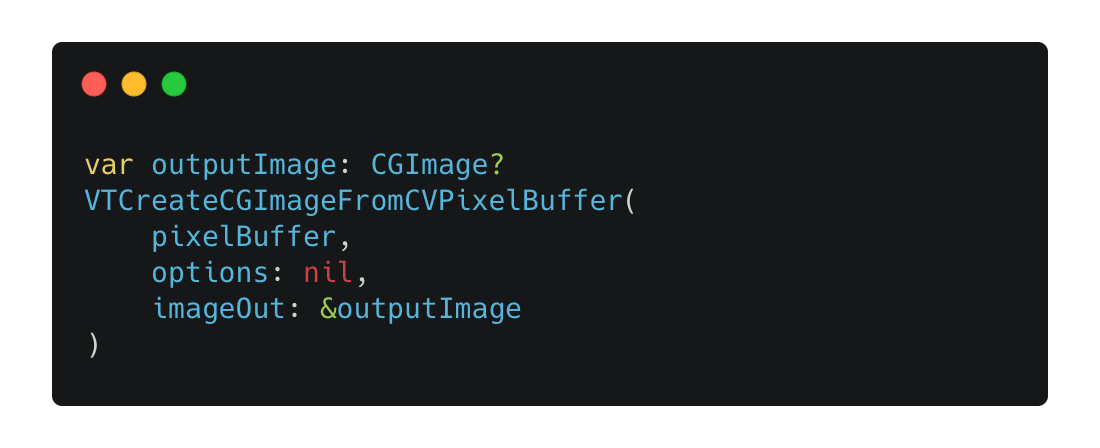
Then, if you are using UIKit, create a UIImage from a CGImage, and assign it to a UIImageView; Or if you are using SwiftUI, use the Image view with the initializer with CGImage to display it.
This approach isn’t straightforward, and it’s not that useful, especially when you don’t need to access the underlying bitmap data in a CVPixelBuffer.
Additionally, if you prefer, you can also utilize Core Image to render your image to a CVPixelBuffer using the render(_:to:) method of CIContext.
Some best practices
Though sometimes it’s good to just use some 3rd-party libraries like Nuke to display images, especially for those images that aren’t managed by the Xcode Assets. Since we are doing the “raw” way manually, here are some best practices you can follow.
It’s still OK to use top-level APIs
Total time = quantity x decoding time per image.
The rule is that, the total decoding time equals the image quantity times the decoding time per image. Therefore, based on your actual scenario, you may want to follow those rules, even if you are using the top-level API like the UIImage and UIImageView as well as the Image view in SwiftUI:
Keeping images as small as possible. For image assets, use proper image resolutions to match your destination view.
Using images as less as possible, especially for UI elements. Using images in some UI elements like buttons are OK. But if you are using built-in assets to build a photo wall for your paywall or launch page, you may need to think deeply regarding this decoding timing issue.
Prefer to use ImageIO to downscale images before further processing
The ImageIO framework does provide a fast way to create a downsampled image, as mentioned before. This should be the start point of your image processing workflow. And as I mentioned earlier, using the transform method of a CIImage using lanczosScaleTransformFilter can help get a smaller image as the result. However, as the source image isn’t small at first, the whole downscaling process still takes time.
Additionally, if you are using CIRAWFilter to decode a RAW image with some customized settings, it’s also best to set the scaleFactor property to match the target resolution you need, as decoding a RAW image can really take time.
Use caching techniques
You don’t want to decode the same image all over again if it can be reused or displayed multiple times given some circumstance, such as in a scrolling container. Using some caching techniques can really help improve both the CPU performance and memory usage.
Tip: prefer to use Xcode Assets as possible. If you are displaying the same image in a list with a large amount of items using the top-level API like
Imagein SwiftUI, the decoded result will still be cached and reused internally, even the decoding process occur in the early frame in the commit phase.
Avoid copying images between main and graphics memory
Finally, we should avoid copying images between main and graphics memory, especially for the scenario where the image is changing dynamically, for example, in a photo editor app, user can adjust some parameters and you will need to process the image based on the adjustments.
In this case, as you may need to use GPU to process the image like applying some effects in shaders, you should leave the processed image buffer in the graphics memory, instead of copying the image buffer from GPU, and then draw it in a CPU context.
For example, if you are using Core Image to process an image, the target render destination should be the MTLTexture, managed by the MTKView. To achieve the best performance, you should create a downscaled input CIImage using ImageIO, and then use CIContext’s startTask(toRender:from:to:at:) method with a custom CIRenderDestination that return the MTLTexture managed by the MTKView, which host a CAMetalLayer.