
Creating Core Image Metal Shader Library in a Swift Package Plugin

I wrote an article pinpointing some pitfalls and solutions when building Metal Shaders for Core Image Kernels, which replies on setting Build Settings flags to build the Core Image Metal shaders library and the shaders must reside inside within a specific Xcode target.
But nowadays, developers often modularize their apps into different Swift Packages, and Swift Package Manager does a good job at helping us distributing code or binaries locally or remotely. But there is one thing it can’t help us with out of the box: compiling and linking Core Image Metal Shaders.
When compiling and linking Core Image Metal Shaders, the -fcikernel and -cikernel flags must be set, otherwise the build will just simply fail. There is currently no way to specify these flags when building a Swift Package.
Imagine this scenario: you have a Swift Package that utilizes Core Image custom kernels to provide image processing features, and it contains some Swift code to read from a compiled Metal Library. But due to that limitation, the shaders can’t be placed inside the same Swift Package as the Swift code, which brings inconvenience to the client.
Luckily, we can build a Swift Package Plugin to achieve this.
You can still leverage Framework and Xcode Build Settings to create the metal library, and even distribute it using CocoaPods. However, this article will mainly focus on using Swift Package.
Brief introduction to Swift Package Plugin
Introduced at WWDC22, Swift Package Plugins provide a way for us to interact with the source code and build system of a Swift Package.
There are two types of Swift Package Plugin: Command plugin and Build Tool plugin.
Command plugins let you define custom commands that can be invoked manually via the command line, or using the Xcode UI. These are useful for tasks that aren’t needed on every build, such as formatting or running static analysis tools.
Build tool plugins allow you to run custom tools as part of the build process, such as generating source code or compiling your custom code. To create a Core Image Metal Shader library based on the .metal files, we need to build our Build Tool plugin.
Creating Build Tool plugin
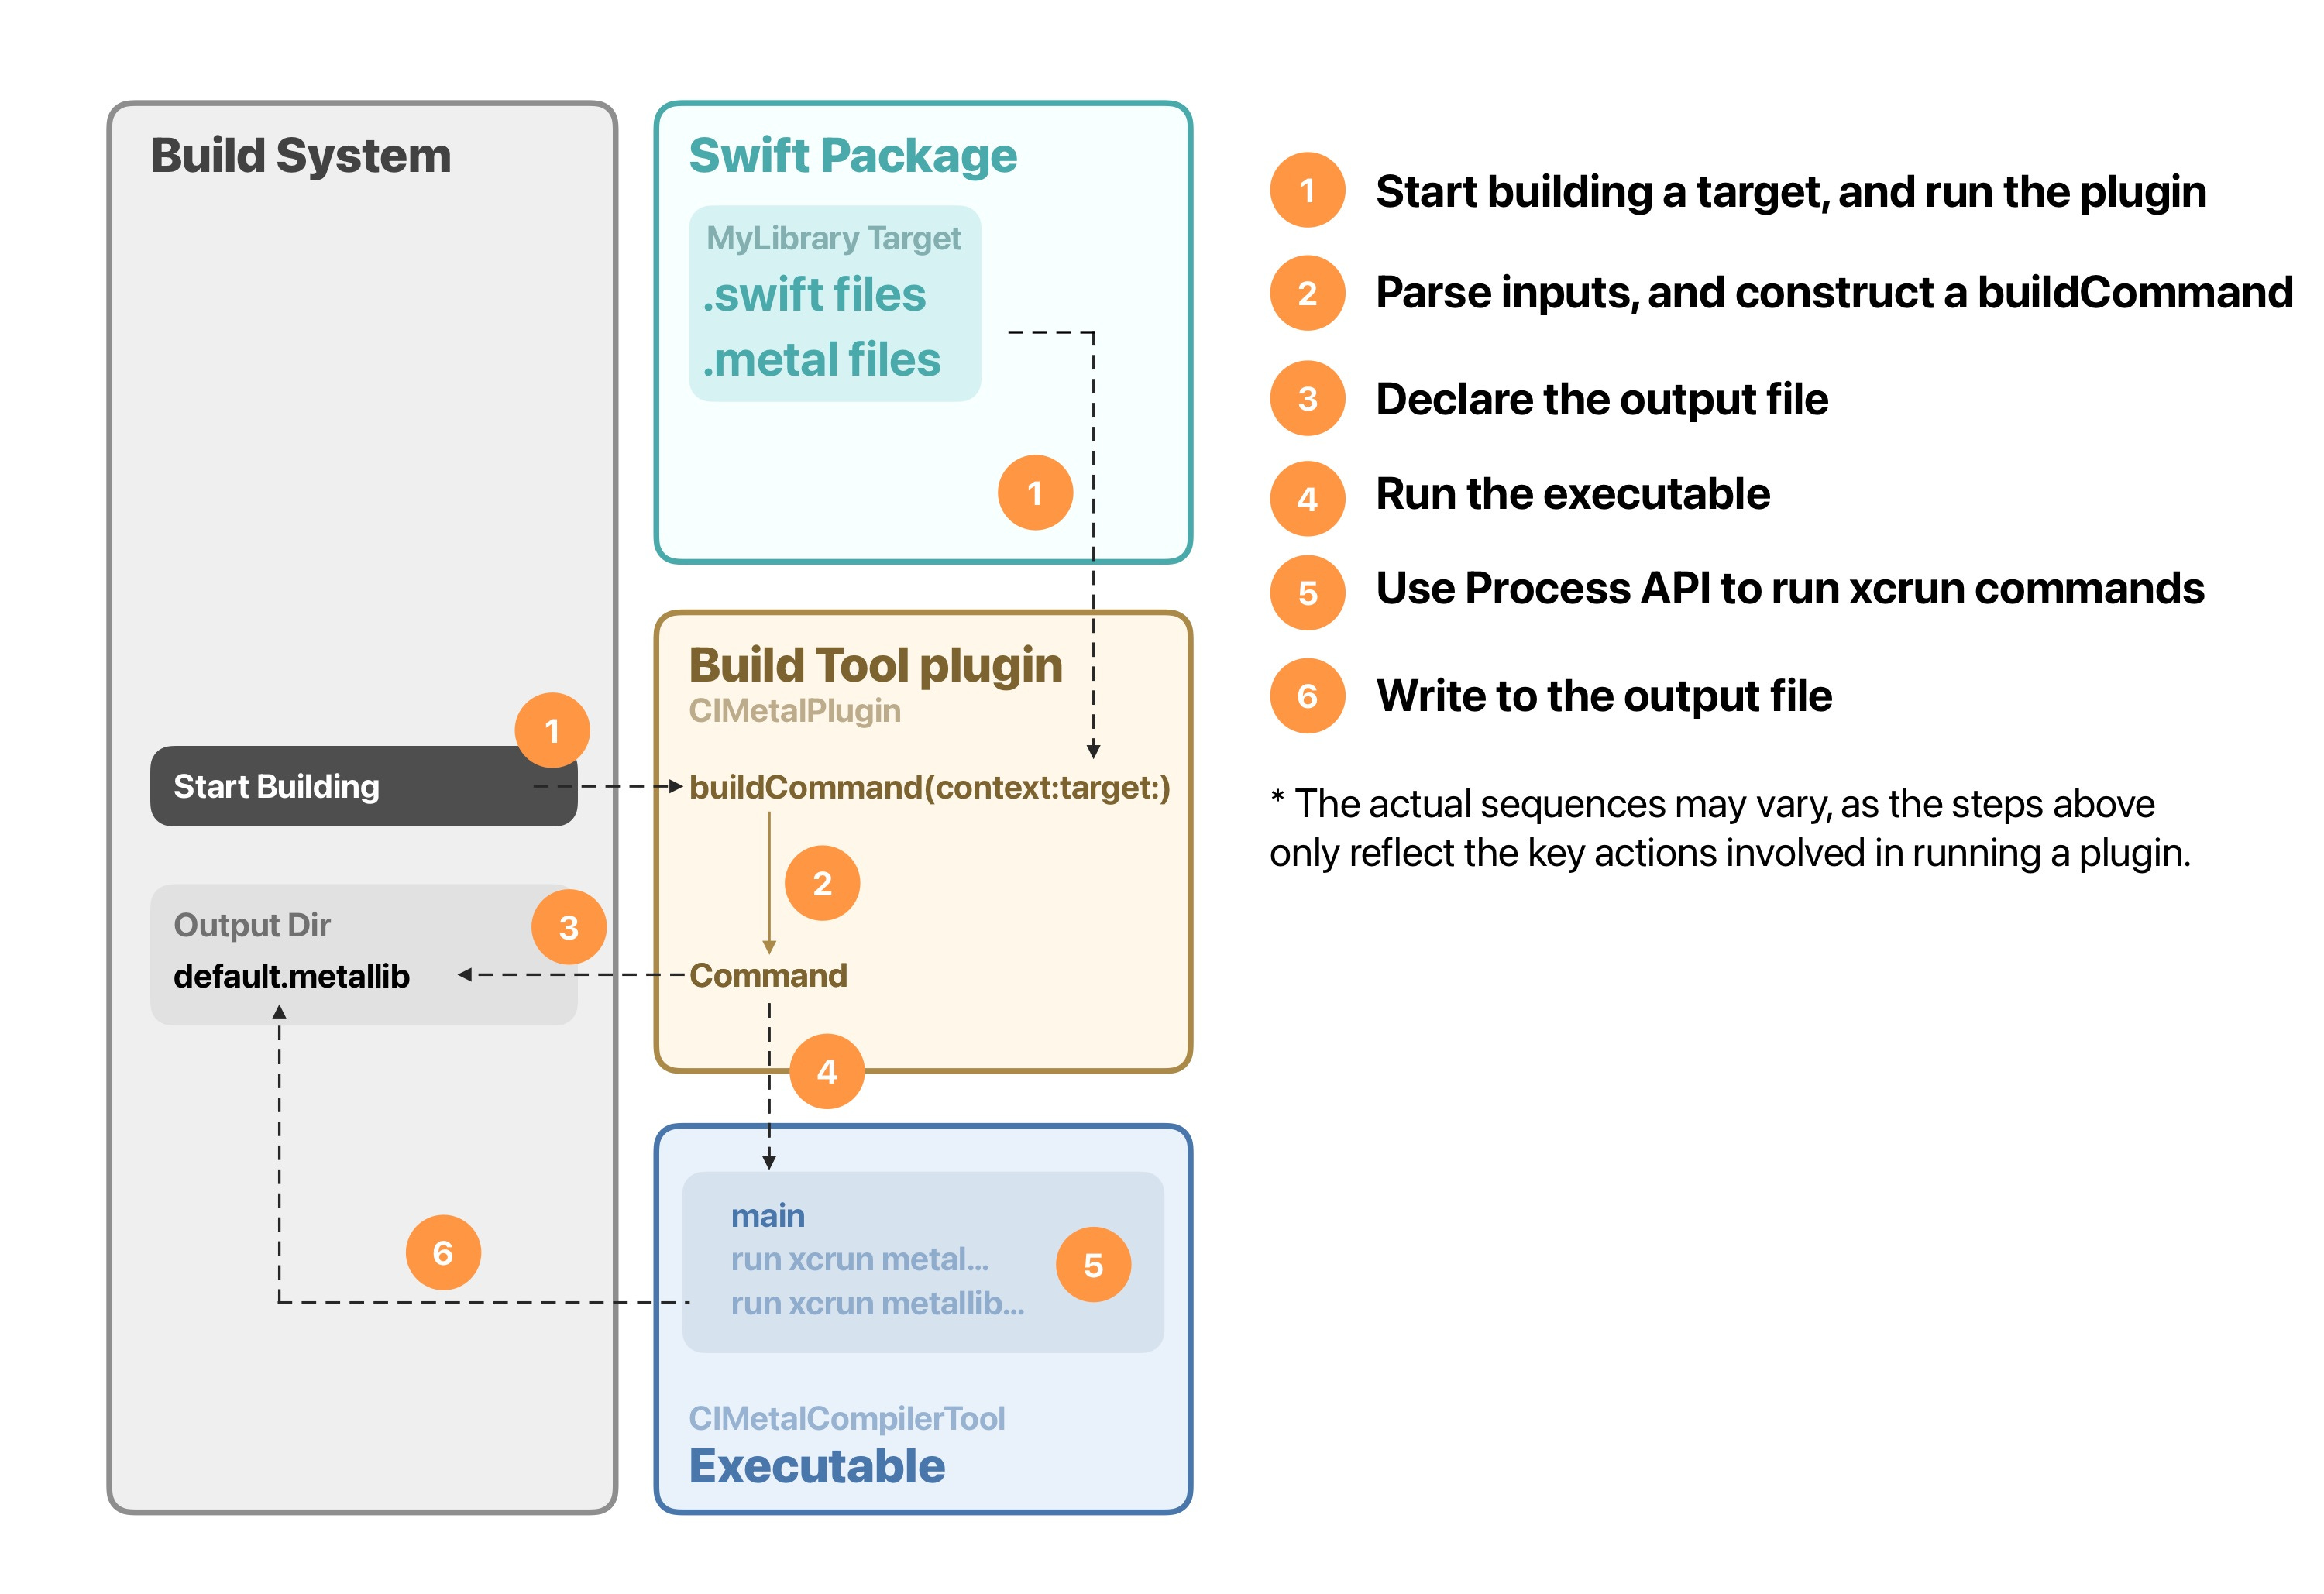
Before moving on, here is a diagram illustrating the plugin system we are about to build:
Before you start writing code for your plugin, you must decide where to put the plugin code.
If your plugin can be used and shared by different Swift Packages, it’s recommended to create a new Swift Package to contain the plugin only, and any Swift Packages that rely on the plugin should declare it as a dependency, just like adding other libraries.
In our case, a plugin that compiles and links Core Image Metal shaders can be shared by different Swift Package. So we should create a dedicated Swift Package to contain the plugin.
Creating a Swift Package plugin is just as easy as creating a Swift Package library: instead of declaring .library(name:targets:) in the Package/products parameter, you declare .plugin(name:targets:); instead of declaring .target(name:) in the Package/targets, you declare plugin(name: capability:) .
Here is how the Package.swift of a Swift Package plugin should look:
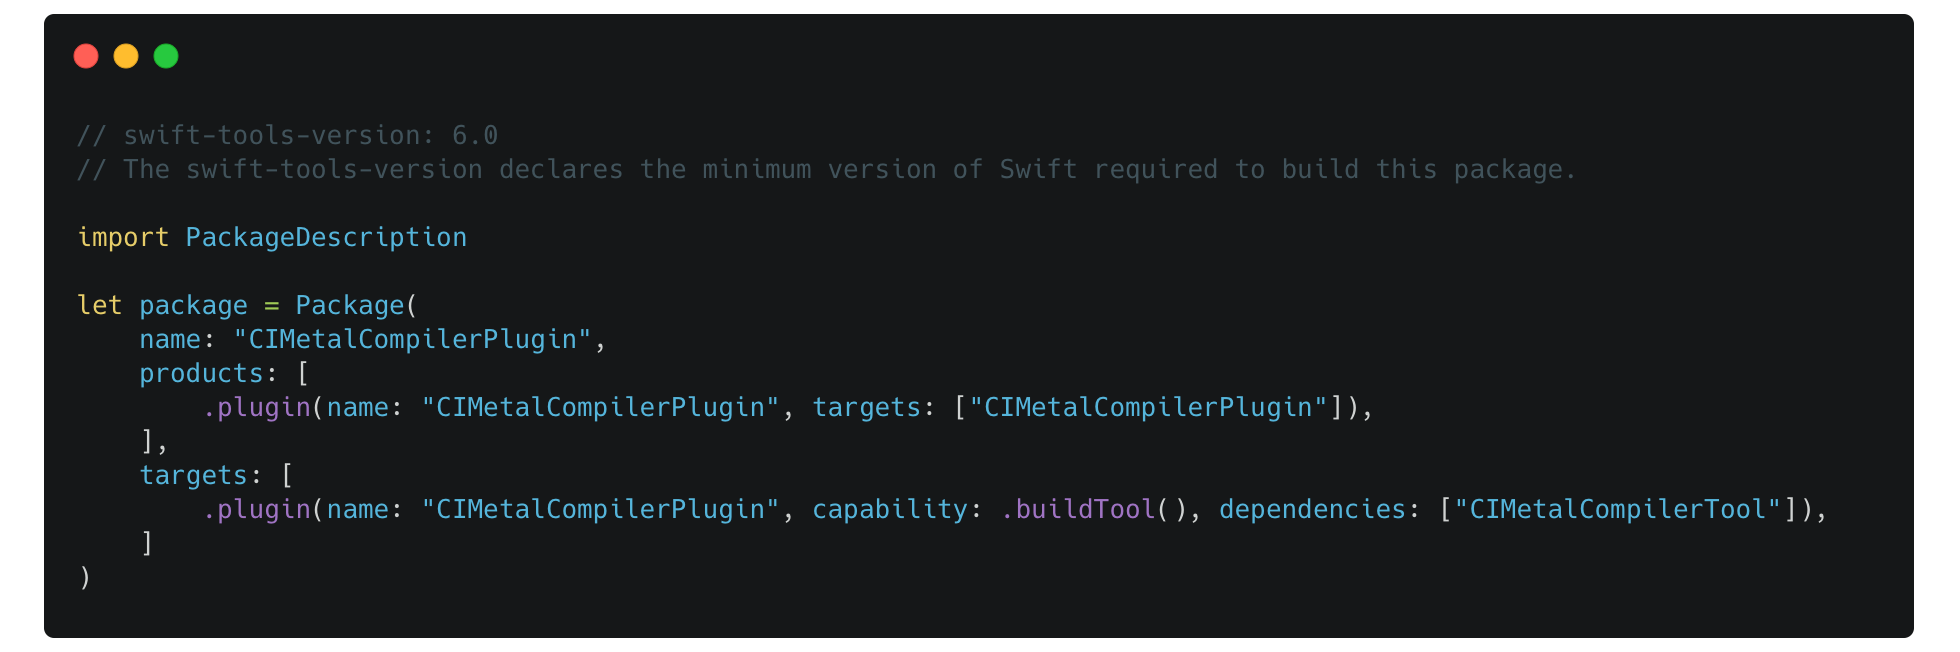
Note: the top most
swift-tools-version: 6.0declares the minimum version of Swift required to build this package, and for Swift Package plugin, it requires Swift 5.6.
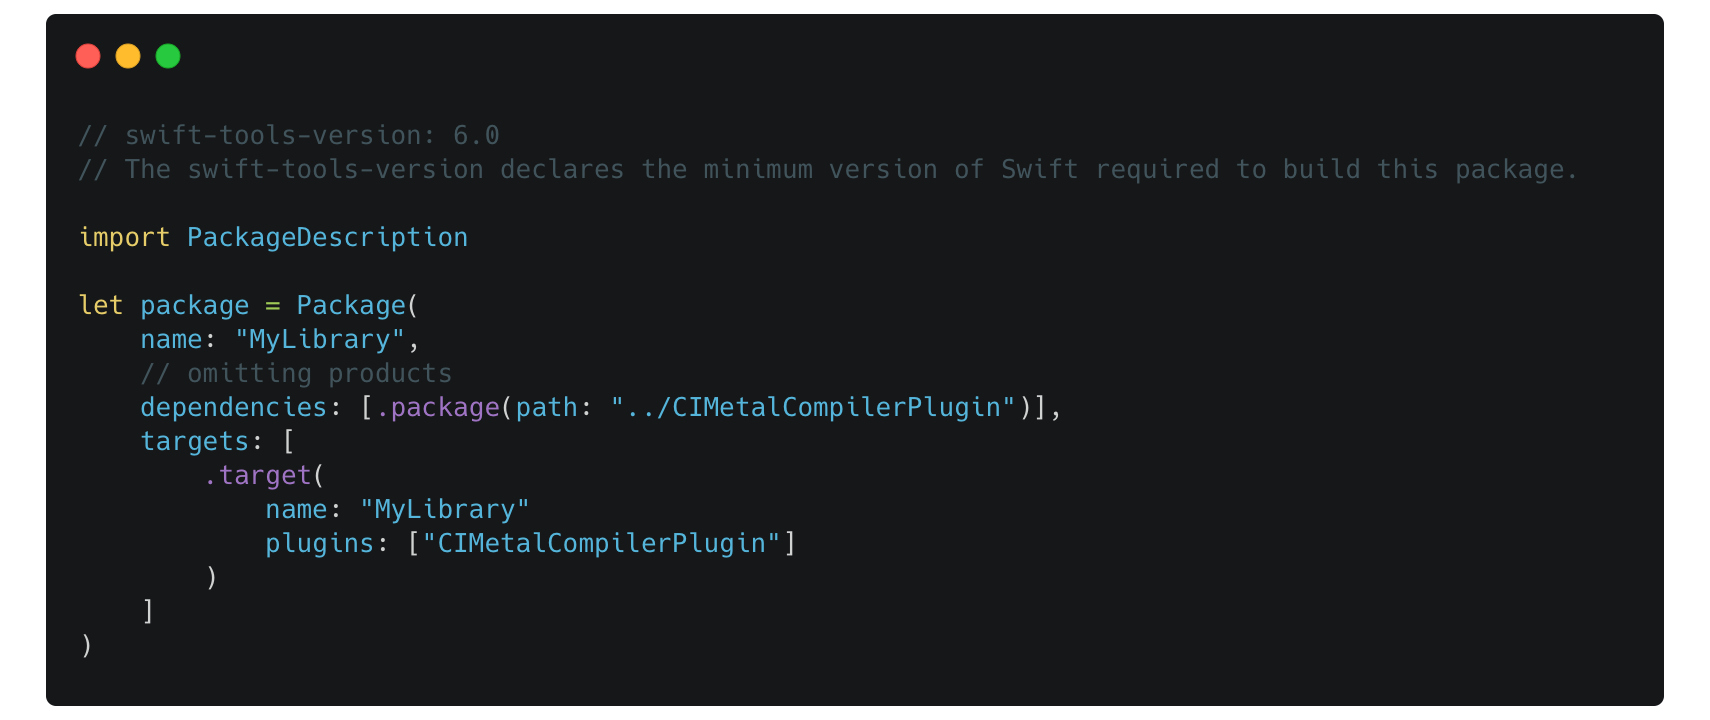
The plugin named CIMetalCompilerPlugin then can be seen by the client Swift Package, and the client can add it as a dependency and use it as the plugin for a target.
Here is how the Package.swift of a client Swift Package should look:
Implementing BuildToolPlugin protocol
Start creating your own Build Tool plugin is as simple as creating your library:
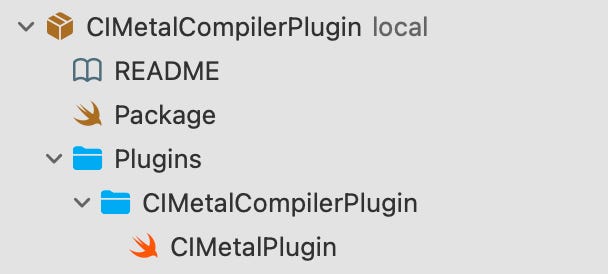
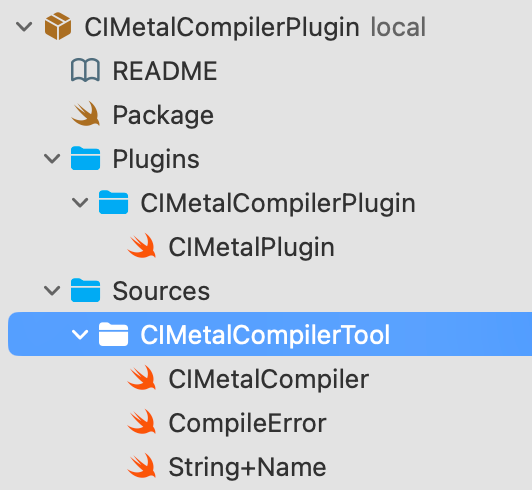
Create a directory named
Pluginsinside the root directory of your Swift Package.
Create a directory named after your plugin inside the
Pluginsdirectory. The name should match the target name specified inPackage.swift.
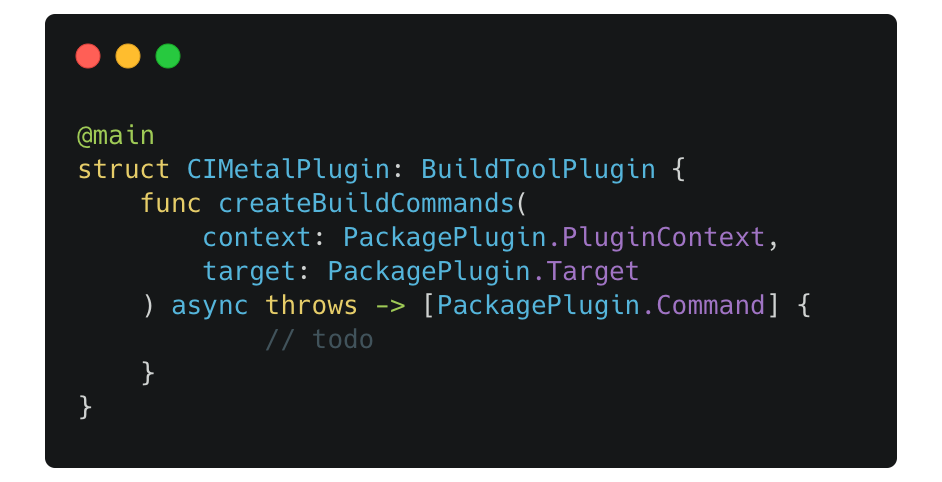
Create a swift file, declare a struct that conforms to the
BuildToolPluginprotocol and mark it as the main entry with@main.
By conforming to BuildToolPlugin protocol, you need to implement the createBuildCommands(context:target:) method, which takes context and target as parameters and returns an array of PackagePlugin.Command.
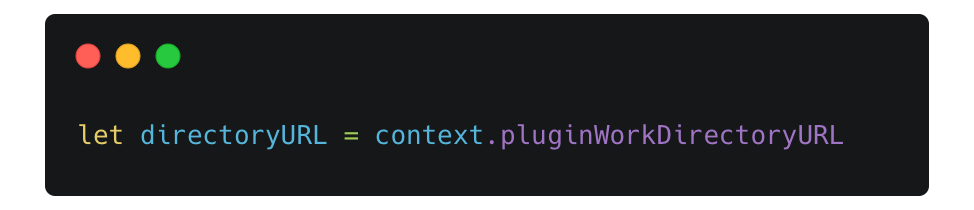
The context provides information about the package for which the plugin is invoked, as well as additional details based on the plugin's intent and requirements. The plugin runs in a sandboxed environment, and any files should be written to the provided directory:
To access files inside a target:
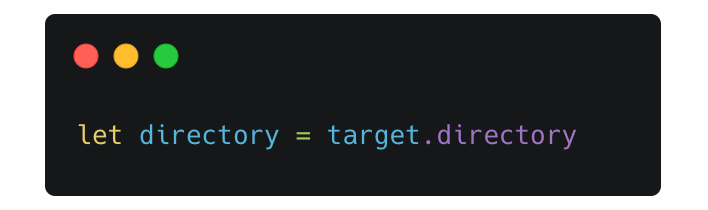
For example, we can find all metal files that reside in a target’s directory:
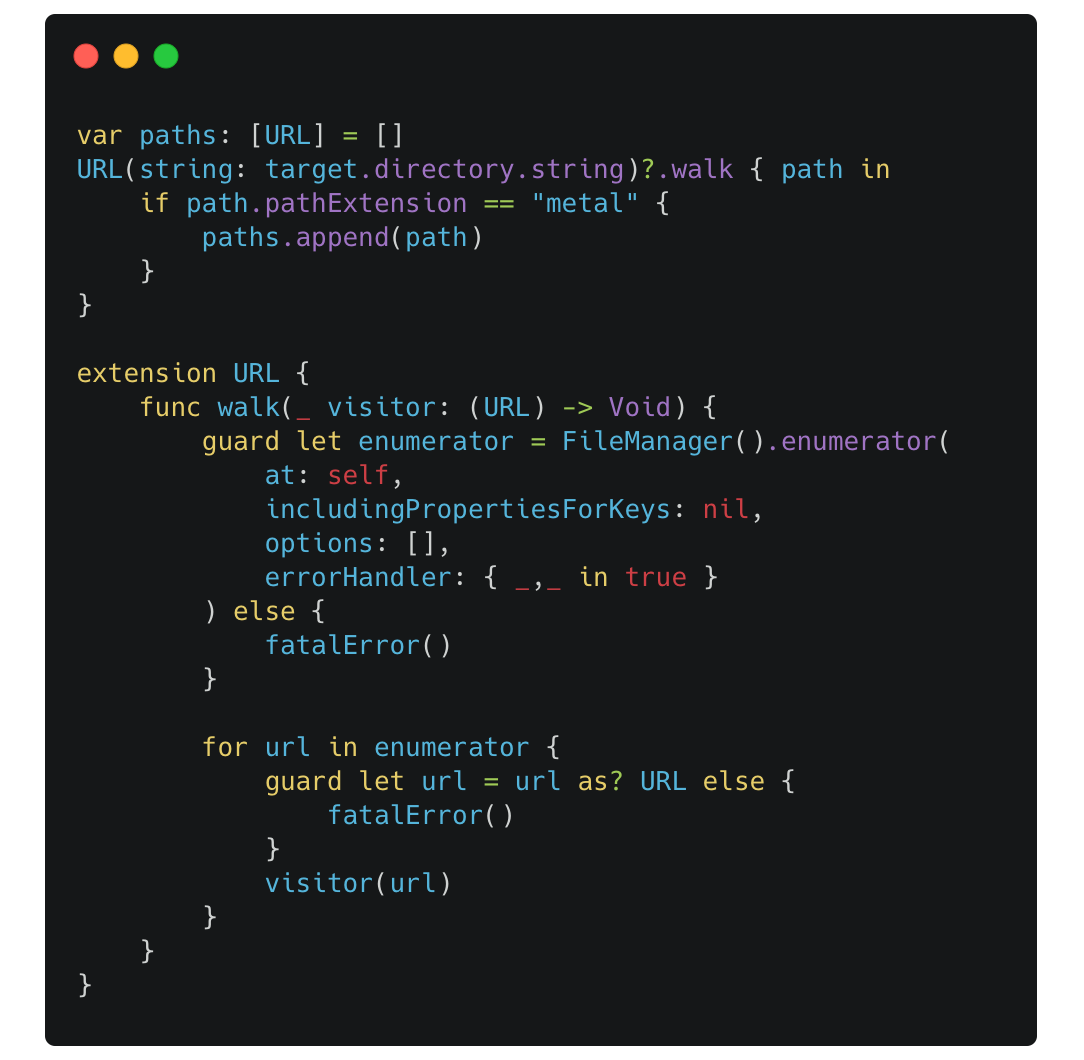
Our CIMetalPlugin should do the following things:
Read all the
metalfiles of from the target’s directory.
Create a cache directory inside the
pluginWorkDirectoryURLfor later use.
Return a
buildCommandto execute theexecutablethat will be created soon, passing some necessary parameters like the cache dir, input files and the output file.
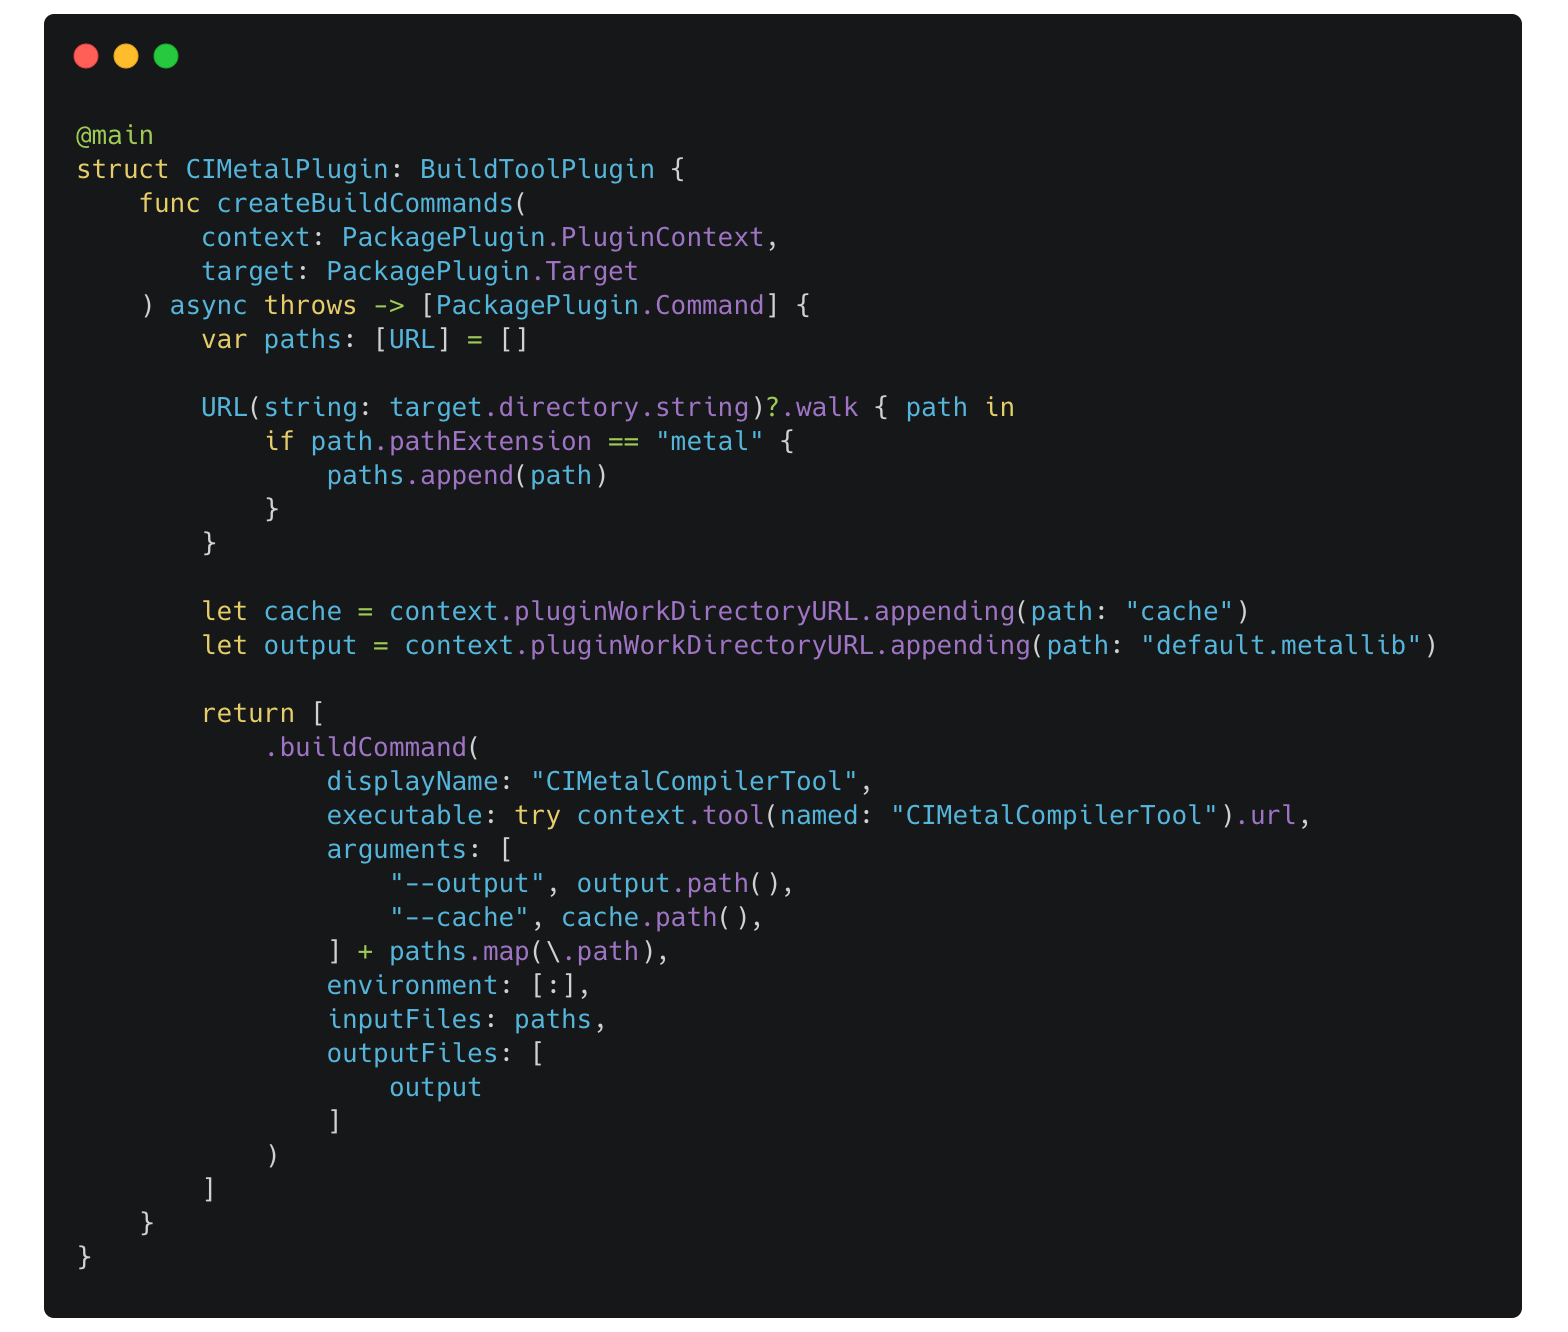
Notes:
We return a
buildCommandthat will be run each time the build system determines it should. Since the job of our plugin is to build and output a specificdefault.metallibfile, we should usebuildCommand. The other option isprebuildCommand, which runs before each build and can’t execute our own executable. TheprebuildCommandshould be use if the output files can’t be determined by the input files.
The
inputFilesparameter should match the files passed to the executable, as it joins theoutputFilesas the input-output for the build system to determine whether the build should run.
As the name suggests,
outputFilesare the predefined output files that should exist after the command completes. If they exist and no errors are thrown during the process, the build system will treat them as build output and copy them to the next process node.
For our plugin, the output file is
default.metallib, which will be treated as a resource to be copied into the built bundle. If the output files are Swift files, they will then be compiled as the part of the build.
CIMetalCompilerToolis an executable that we will create soon, as compiling and linking Core Image Metal shaders requires several steps.
Implementing CIMetalCompilerTool executable target
An executable target, as the name suggests, provides an executable for the plugin to use. You can think of it as a Mac process that can run during the build process to execute your code.
To declare a executable target, first declare it in the Package.swift file:
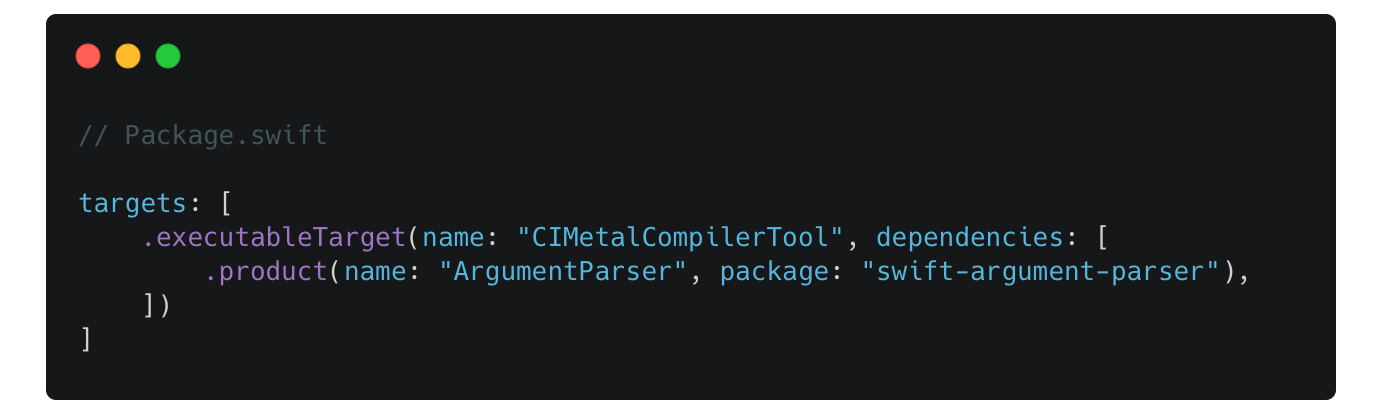
For CIMetalCompilerTool, it relies on a library named ArgumentParser to help parse arguments from the command line interface and reference them in code.
Then in the Swift Package’s Sources directory, create the target files:
For CIMetalCompiler.swift, declare a main entry struct to be executed.

So far, we have implemented the following logic:
Defined a Build Tool plugin named
CIMetalPluginthat reads themetalfiles from a target.
The plugin then runs the executable named
CIMetalCompilerTool, passing the input metal files and the expected output file.
Next we should utilize the xcrun command to compile and link our Core Image Metal shaders.
Compiling and linking Core Image Metal shades requires the following steps:
Compile the shaders to intermediate representations.
Link those intermediate representations.
Merge them into a single
default.metalliblibrary that can be used directly in code.
The equivalent approach using command line interface is shown as following:

To run the xcrun command, we need to use the Process class from Foundation. After constructing a Process instance, set the executable URL to point to xcrun, and then set the necessary arguments. Then, try running the process instance, wait until it finishes and read the terminationStatus.
The following code is equivalent to the first xcrun metal -c -fcikernel command shown above:
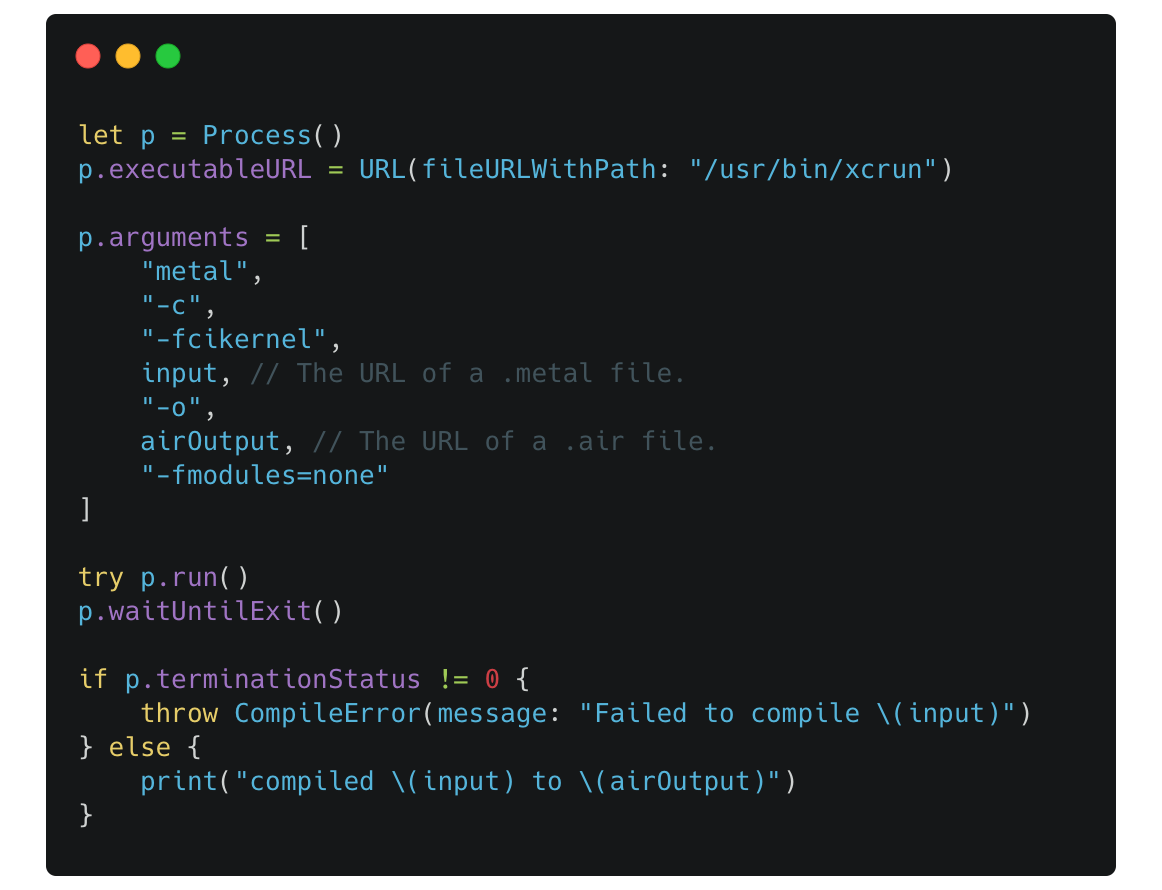
Clang enables Modules for Metal by default. Enabling Modules will cause the build to fail when running on Xcode Cloud, as it may not have permission to write files to the system default cache directory. Thus, disabling Modules by specifying
-fmodules=noneor specifying the dir in the plugin sandboxed dir -fmodules-cache-path=xxxxwill solve the issue.
The intermediate outputs should be placed inside the cache directory, which is located in the context.pluginWorkDirectoryURL. Writing or reading files outside the sandboxed directory will fail. It’s up to you to decide whether to clean the cache directory or not after the output files are generated.
Additionally, printing logs can help with debugging your plugin, as they will appear in the build log:

With the explanation above, the only thing left to do is execute the equivalent commands using the Process API, which will be omitted.
Open-sourced CIMetalCompilerPlugin
This blog serves as a walk-through guide to create a Build Tool plugin for Swift Package. I also have an open-sourced CIMetalCompilerPlugin that you can use directly in your Swift Package. Check it out: