Workaround for tricky issues when setting up camera using AVFoundation
Introduction
Setting up a camera workflow is straightforward when building an iOS or macOS app. You can set up the camera session using AVFoundation, retrieve the preview pixel buffer on the delegate, and display the preview in a view.
However, you may encounter some tricky issues that are difficult to investigate and solve while building your product. Recently, I finished developing my first indie camera app, PhotonCam, and managed to resolve some of these tricky issues. If you come across the same issues (and if you haven't noticed them yet), you can try the workaround described below.
The solutions are referred as workaround because I believe they are the bugs from the AVFoundation and should be fixed by Apple.
Note that you can use AVCaptureVideoPreviewLayer to display the preview stream on a view. However, this way won’t let you process the pixel buffer like applying a shader before displaying it. By using this way, the issues described below may not be encountered.
Demo
I have set up a demo to demonstrate these issues and their solutions. First, you can run the code to see what has happened, and then continue reading this article.
The whole environment to reproduce those issues are:
Xcode 15.1 with latest iOS 17 SDK
Minimum deployment is iOS 16.0
iPhone 14 Pro/iPhone 15 Pro with latest iOS 16.x or iOS 17.2. iPhone 12 with latest iOS 16.x
The camera session is set up in the following ways:
Create and configure
AVCaptureSession
Set up
AVCaptureVideoDataOutputwith delegate to receiveCMSampleBuffer
Create
CIImagewithCMSampleBufferand render theCIImagewithMTKView
Preview image shift vertically after taking the first ProRAW photo
Starting with iOS 14.3, we can set up to use ProRAW to capture photo.
Apple ProRAW combines the information of a standard RAW format along with iPhone image processing, which gives you more flexibility when editing the exposure, color, and white balance in your photo. With iOS 14.3 or later and an iPhone 12 Pro or later Pro models, your phone can capture images in ProRAW format using any of its cameras, including when also using the Smart HDR, Deep Fusion, or Night mode features.
ProRAW setup
Capture a photo with ProRAW is quite easy and will need a few steps only.
First you configure the AVCaptureVideoDataOutput to enable the ProRAW when setting up the AVCaptureSession.
Always consider compatibility across different devices when setting the properties. Here we didn’t simply set the
isAppleProRAWEnabledto true. Instead we read theisAppleProRAWSupportedproperty to check first.
When you are about to capture the photo, set up the AVCapturePhotoSettings in the following ways.
Get the available raw formats from AVCapturePhotoOutput .
Find the first raw format that is ProRAW:
Create AVCapturePhotoSettings with the ProRAW format if it exists:
And that’s it. Then you pass this AVCapturePhotoSettings instance to the capturePhoto(with:delegate:) method:
The issue
However, there is a strange issue when capturing photos with ProRAW enabled. Here are the steps to reproduce this issue:
Make sure ProRAW is enabled when setting up camera session in code
Launch the app, make sure the ProRAW is enabled, keep the iPhone still and take one photo
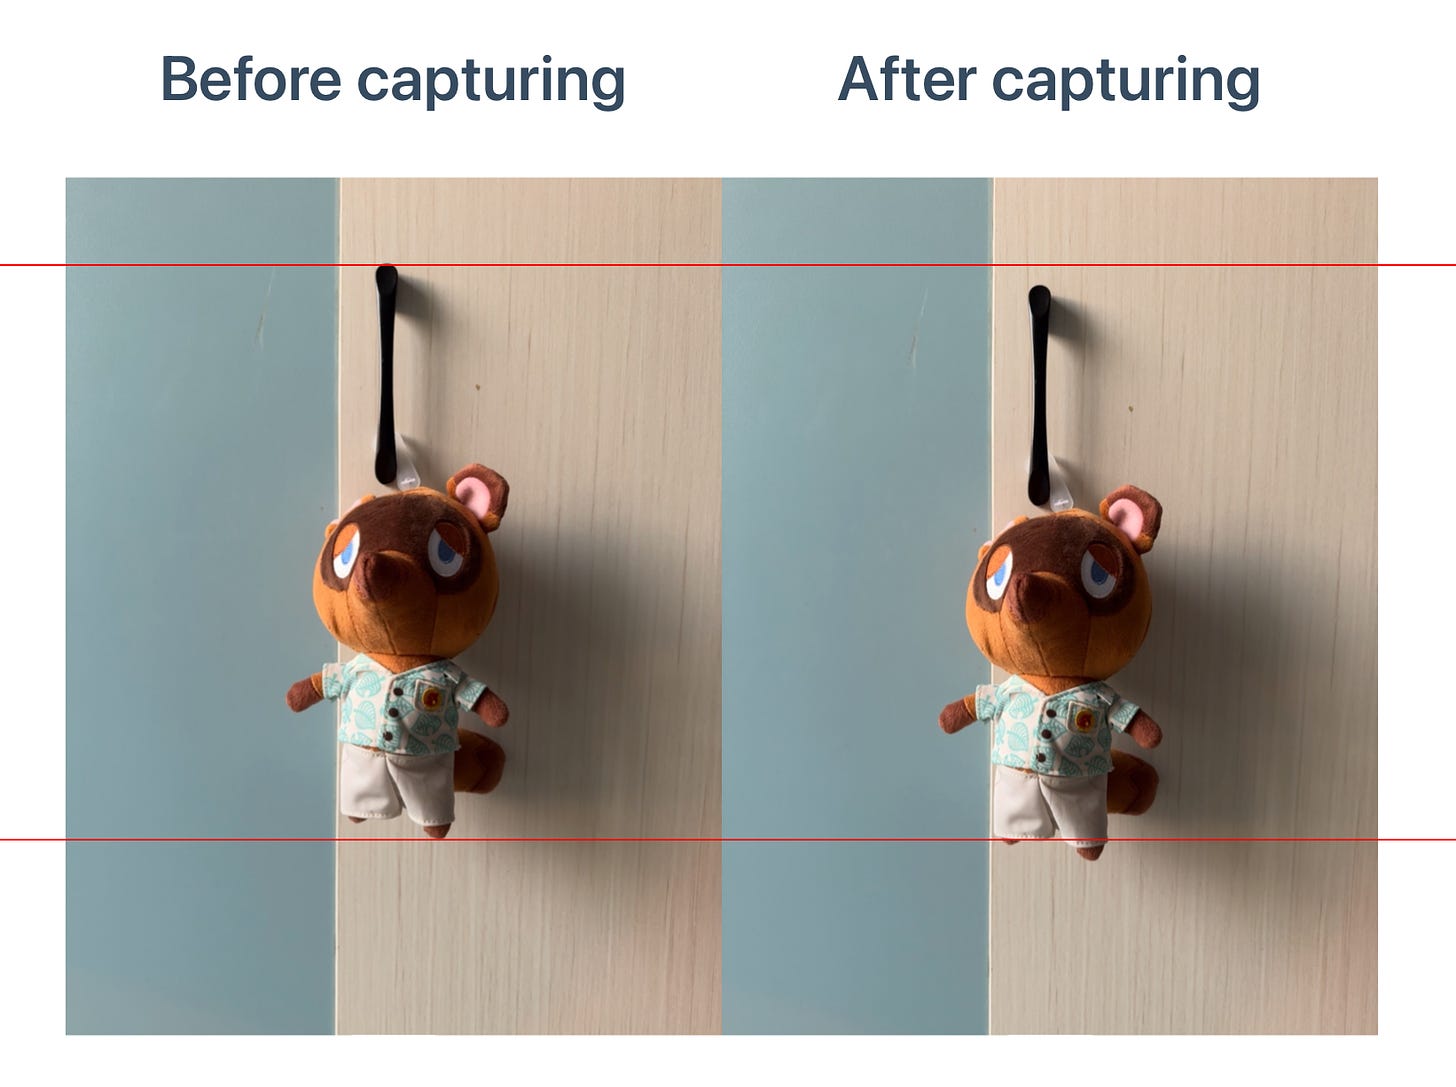
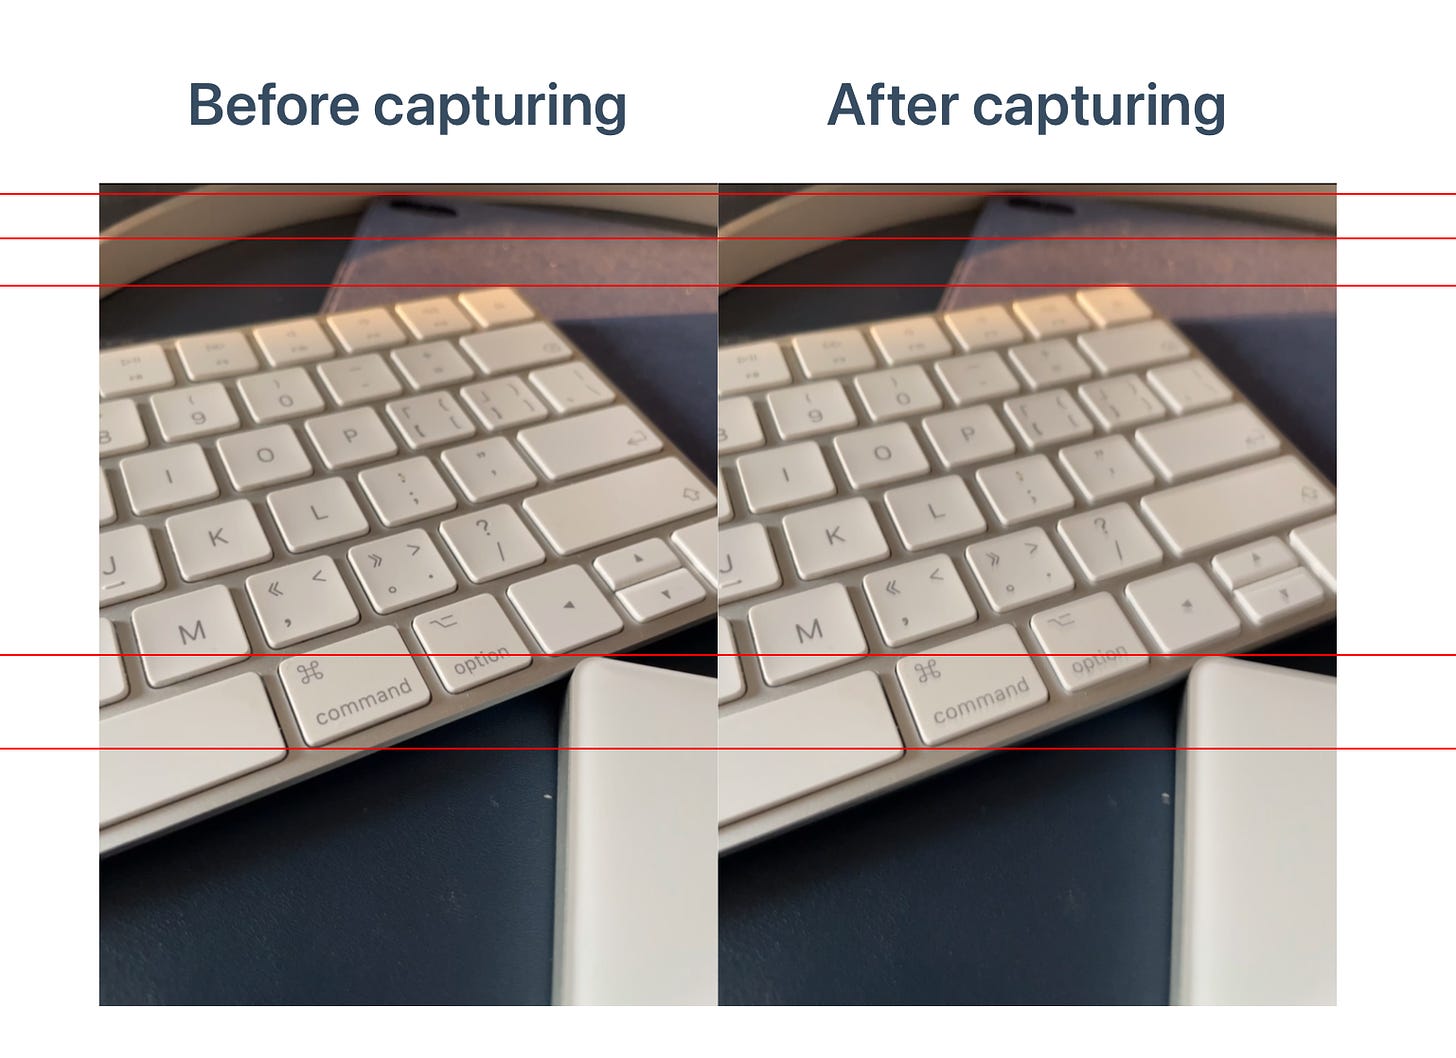
You will notice that after taking the very first photo, the preview image will shift vertically by approximate a few pixels
The preview image will keep the shift state no matter what we do, like capturing more photos
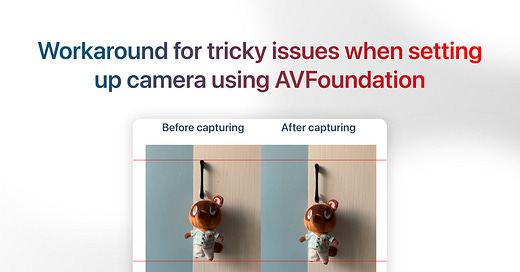
You can see the before-after comparison below.
You may think that the shake of the hand when tapping the capture button is the reason for this issue. However, even if you place the iPhone on a fixed surface, you will still get the same result.
To investigate this issue, please let’s review how the preview is retrieved and displayed.
The
CMSampleBufferis retrieved in thecaptureOutput(_:didOutput:from:)method fromAVCaptureVideoDataOutputSampleBufferDelegate
Then we use
CMSampleBufferGetImageBufferto get theCVPixelBuffer. And then we createCIImagefrom theCVPixelBuffer
In the
draw(in:)method ofMTKViewDelegate, we draw theCIImageto theCAMetalDrawableprovided by theMTKView
There are several potential reasons that could be causing this bug:
The
CMSampleBufferfrom theAVCaptureVideoDataOutputSampleBufferDelegateis incorrect, resulting in a shifted source for the preview image.
Something went wrong when displaying the
CMSampleBuffer.
Based on the information provided, it seems that the first reason is the most likely cause of the bug.
So if the CMSampleBuffer is wrong, what can we do?
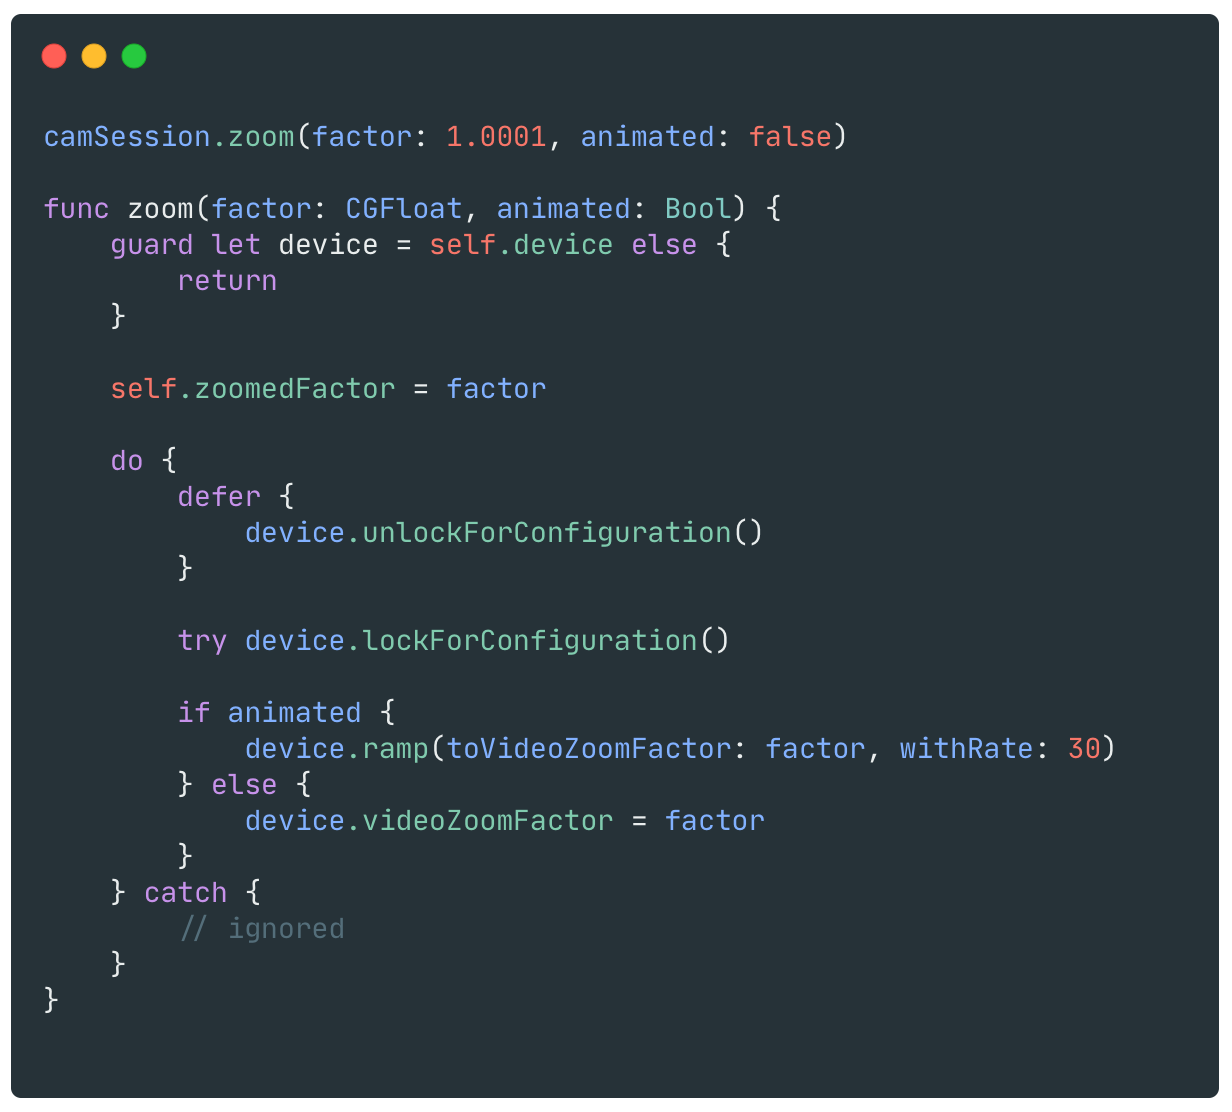
I figured out the solution by noticing that when I apply a zoom factor of 1.5x to the camera, the issue no longer exists. So I wonder if any zoom factor will do the trick. And yes, a tiny little change of zoom factor will solve this issue:
It's strange, isn't it? Please note that applying this zoom factor will change the field of view (FOV) of the preview and the dimensions of the captured image. However, I believe that most users can ignore this change.
Incorrect exposure when zoomed with maximum dimensions
With 48MP sensor on iPhone 14 Pro/Pro Max, iPhone 15 and iPhone 15 Pro/Pro Max, third-party apps like us can utilize this feature to capture the 48MP photos as well.
By enabling the maximum capture dimensions, we can obtain a full 48MP photo with no zoom factor. Additionally, we can capture a photo exceeding 12MP when zoomed in. For example, when a zoom factor of 1.5x is applied, we can obtain a 32 million pixel photo (48 million / 1.5), which allows us to fully utilize the capabilities of the 48MP sensor.
Enable 48MP
To enable the 48MP feature, we need a few steps.
First, make sure we set the sessionPreset to AVCaptureSession.Preset.photo .
After adding the AVCapturePhotoOutput to the AVCaptureSession, set the maximum photo dimensions to the AVCapturePhotoOutput.
Lastly, set the maxPhotoDimensions property of AVCapturePhotoSettings to its maximum value.
The issue
When you enable the 48MP mode and capture photos, everything looks fine so far. However, the issue arises when you apply a zoom factor to the camera and compare the tone of the output with the preview.
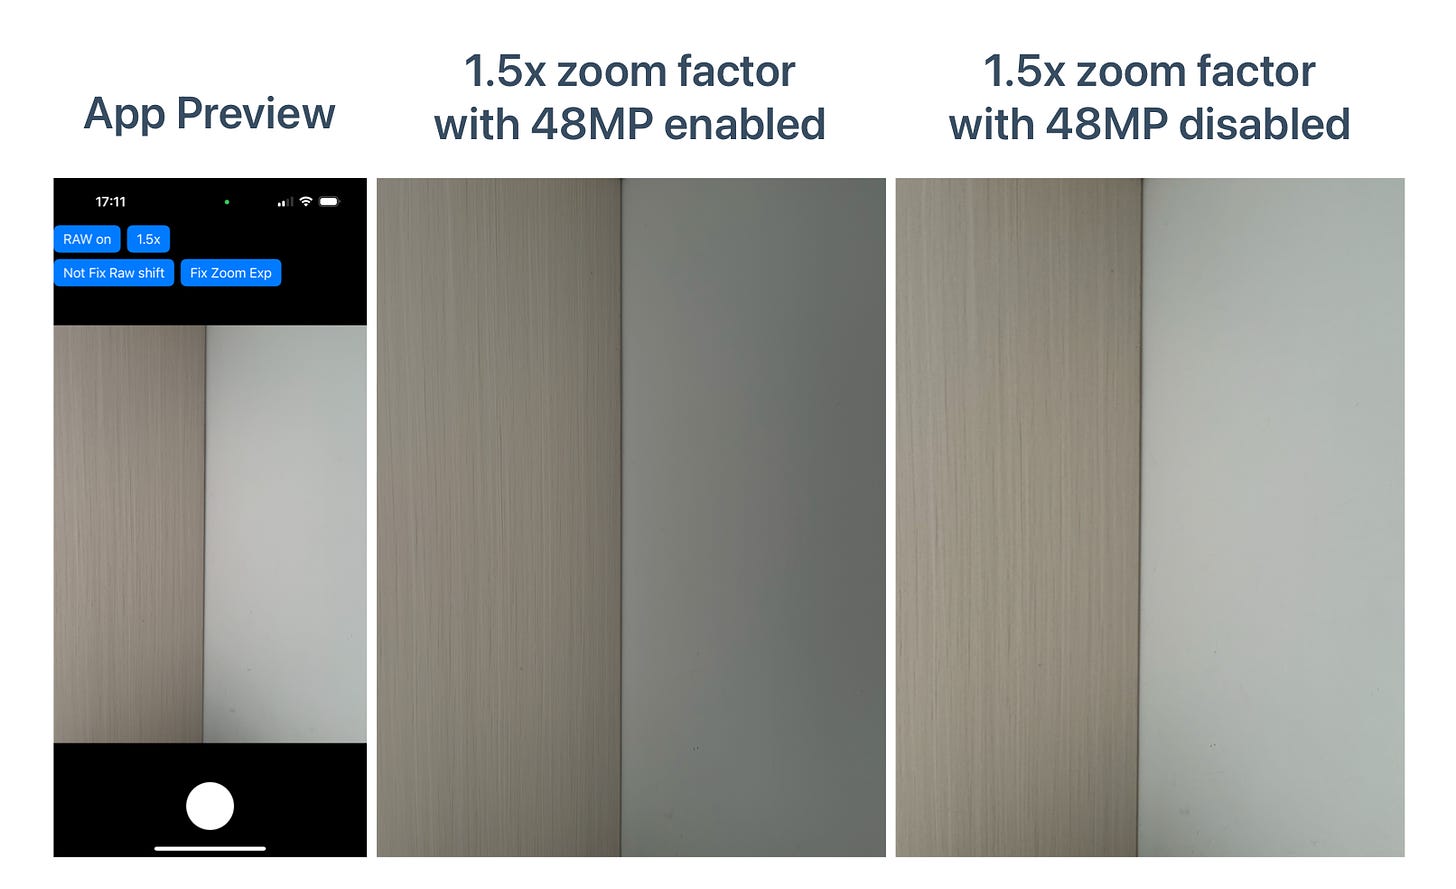
To be more specified, the output looks darker compared to the preview. You can see the image below to see what’s the different.
As you can see, the middle image apparently looks darker than the preview(left) and the captured photo with 48MP disabled(right).
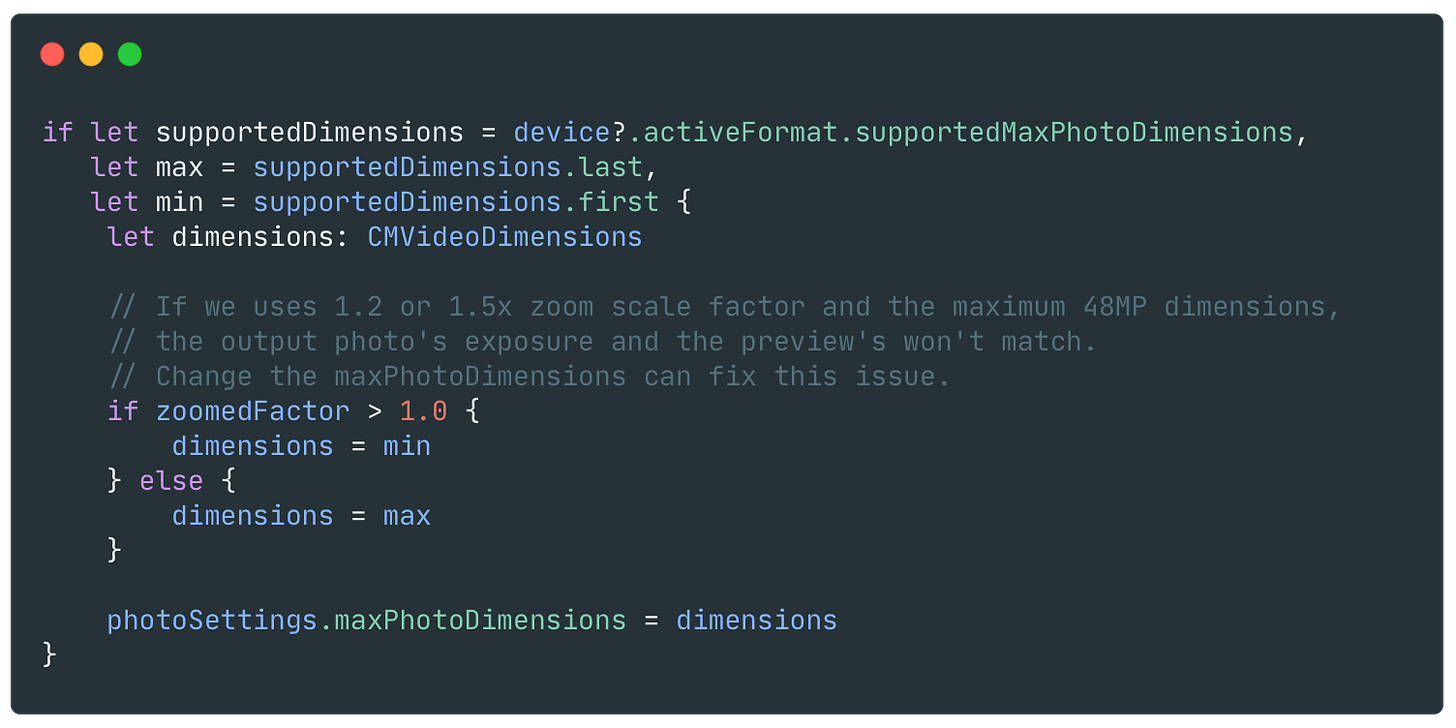
To fix this issue, we should set the maxPhotoDimensions property of AVCapturePhotoSettings to 12MP max.
Note that since we are still using a 48MP sensor in AVCapturePhotoOutput, the quality of the output photo with zoom factor applied won't be affected too much compared to the iPhone without a 48MP sensor.
Distortion issue when not using BayerRAW for basic iPhone model
The third issue pertains to the non-Pro model of iPhone, such as the iPhone 12.
Capturing photos with basic photo settings can lead to a strange preview issue. To be more specified:
When capturing photo, construct a AVCapturePhotoSettings with AVVideoCodecKey configured only.
When capturing a photo, there are a few frames that the preview images got blur, which looks a distortion effect. You can see the image below to tell the difference.
You may think that the shake of the hand when tapping the capture button is the reason for blurry preview. However, even if you place the iPhone on a fixed surface, you will still get the same result.
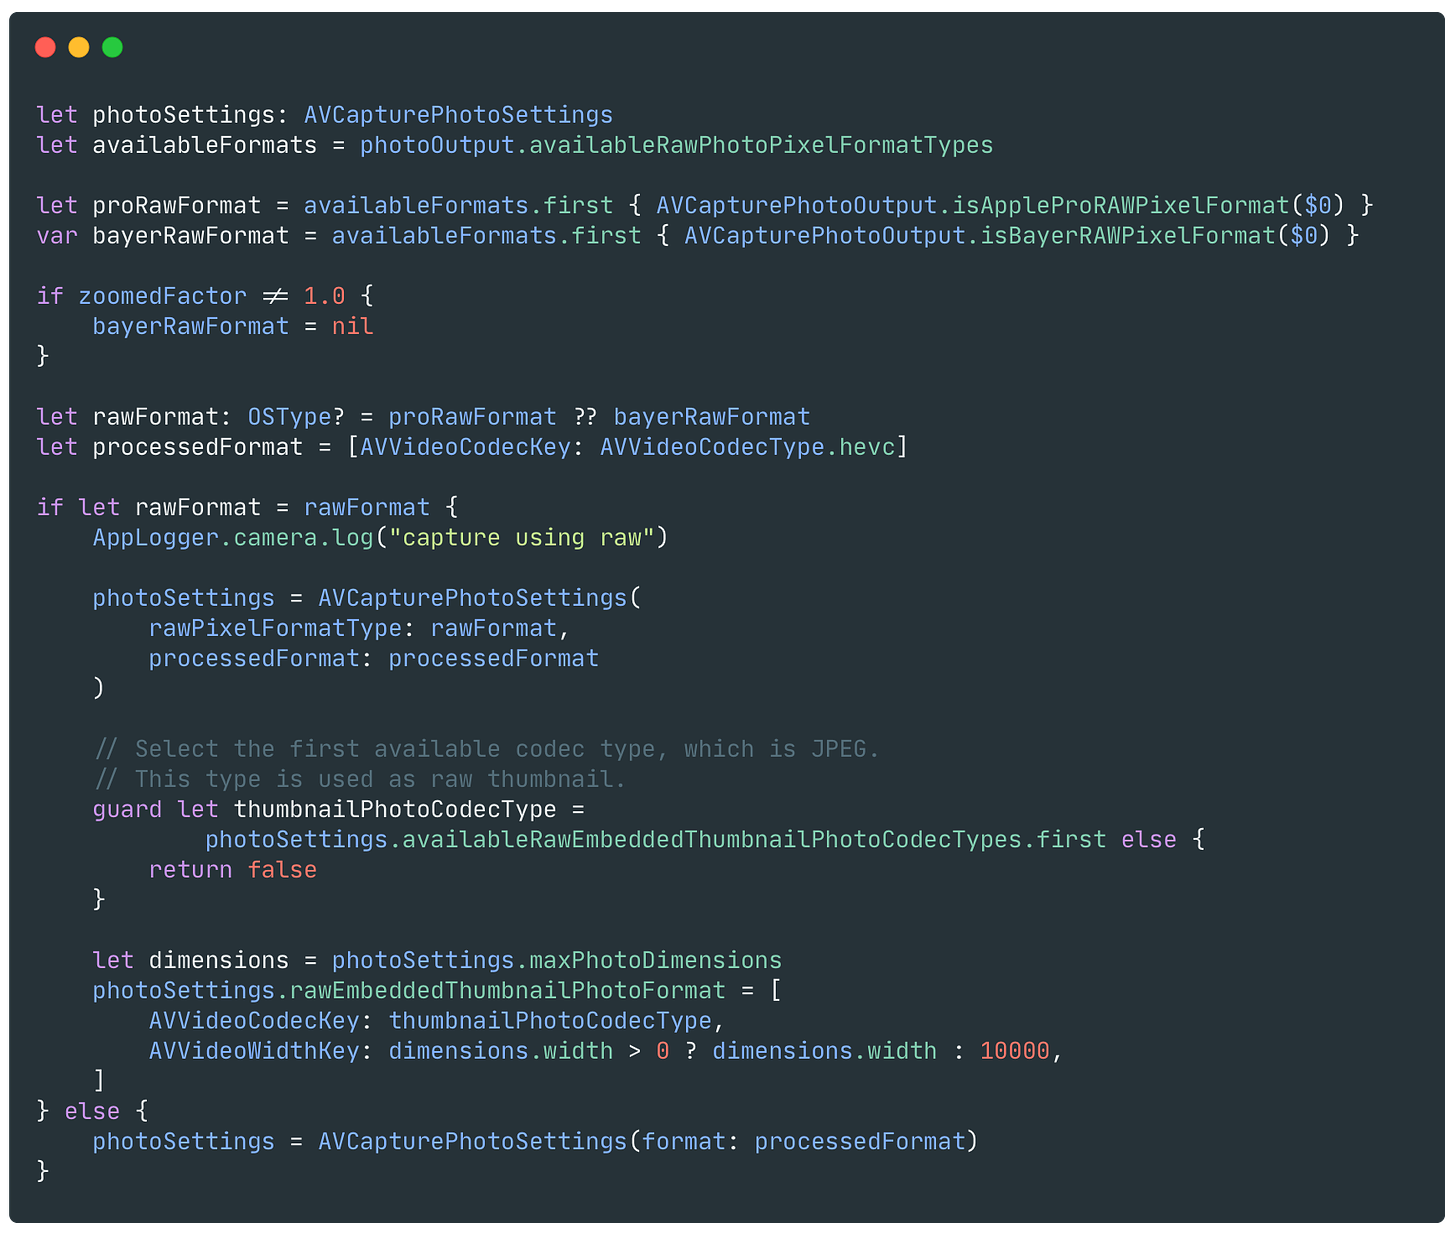
A simple way to fix this issue is by capturing a photo with Bayer RAW enabled. If you don't intend to save both the RAW and HEIF files simultaneously, you can simply ignore the photo output of the RAW file.
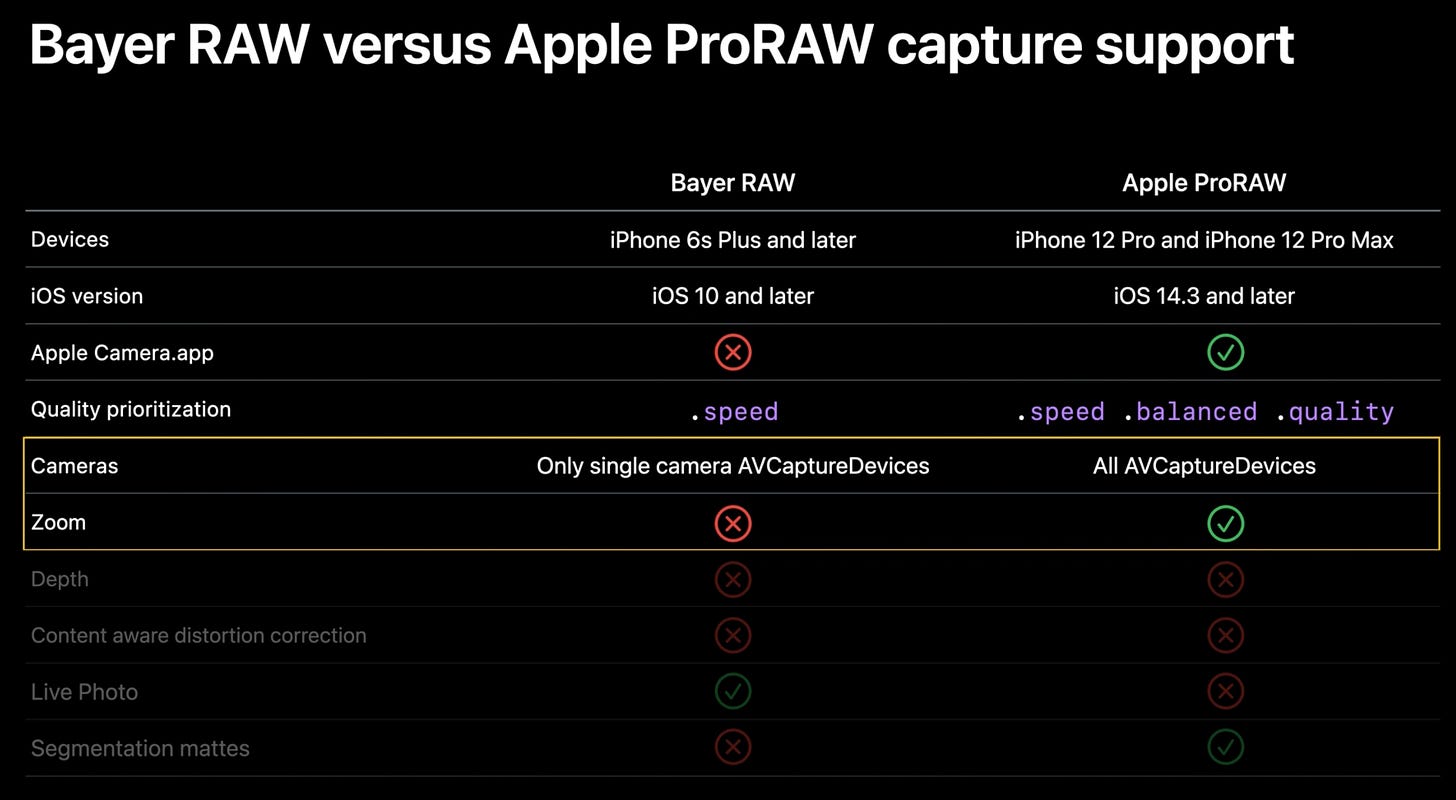
Note that if you apply zoom factor to the camera, you shouldn’t use Bayer RAW to capture photo, as it’s not supported by Apple and will throw an exception if you do so. This WWDC video tells the differences between Bayer RAW and Apple ProRAW.

